
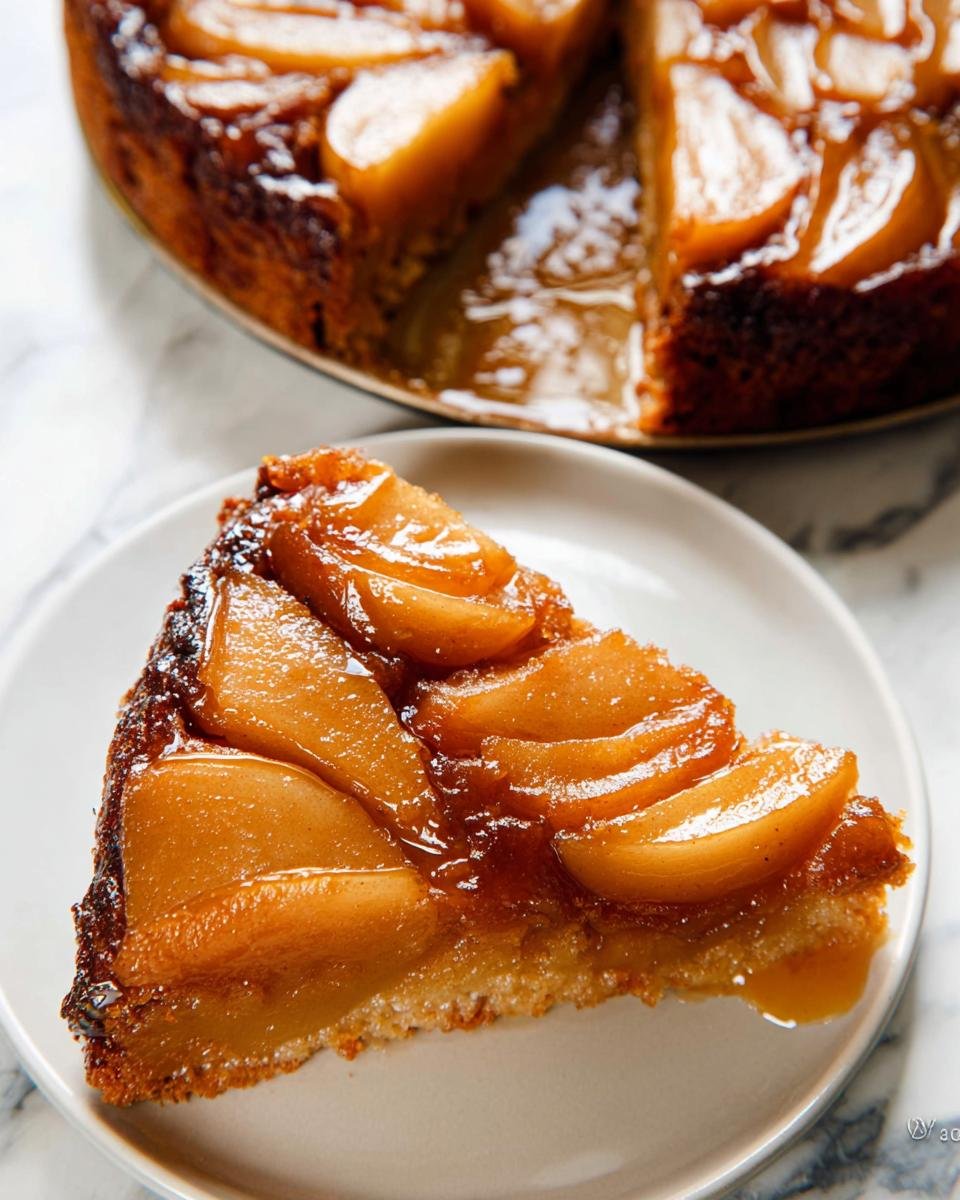
When the air finally turns crisp, you just crave something warm, spiced, and deeply comforting, right? I live for those cozy fall desserts, and nothing stops a room in its tracks quite like a perfectly glazed fruit topping. That’s why I completely adore making this simple, yet seriously impressive Caramel Apple Upside Down Cake. I still remember the first time I made a caramel-apple treat on a chilly autumn afternoon. The smell of bubbling caramel and soft apples instantly made that tiny apartment feel like the coziest retreat imaginable. That moment taught me how powerful homemade recipes are in grounding us during busy seasons, and why I keep this classic treat close to my heart. It’s truly beginner friendly and always a winner!
If you want to see how easy it is to get that stunning look without all the fuss, stick around. For more amazing apple baked goods, don’t forget to check out my recipe for apple cake with cream cheese when you’re finished here.
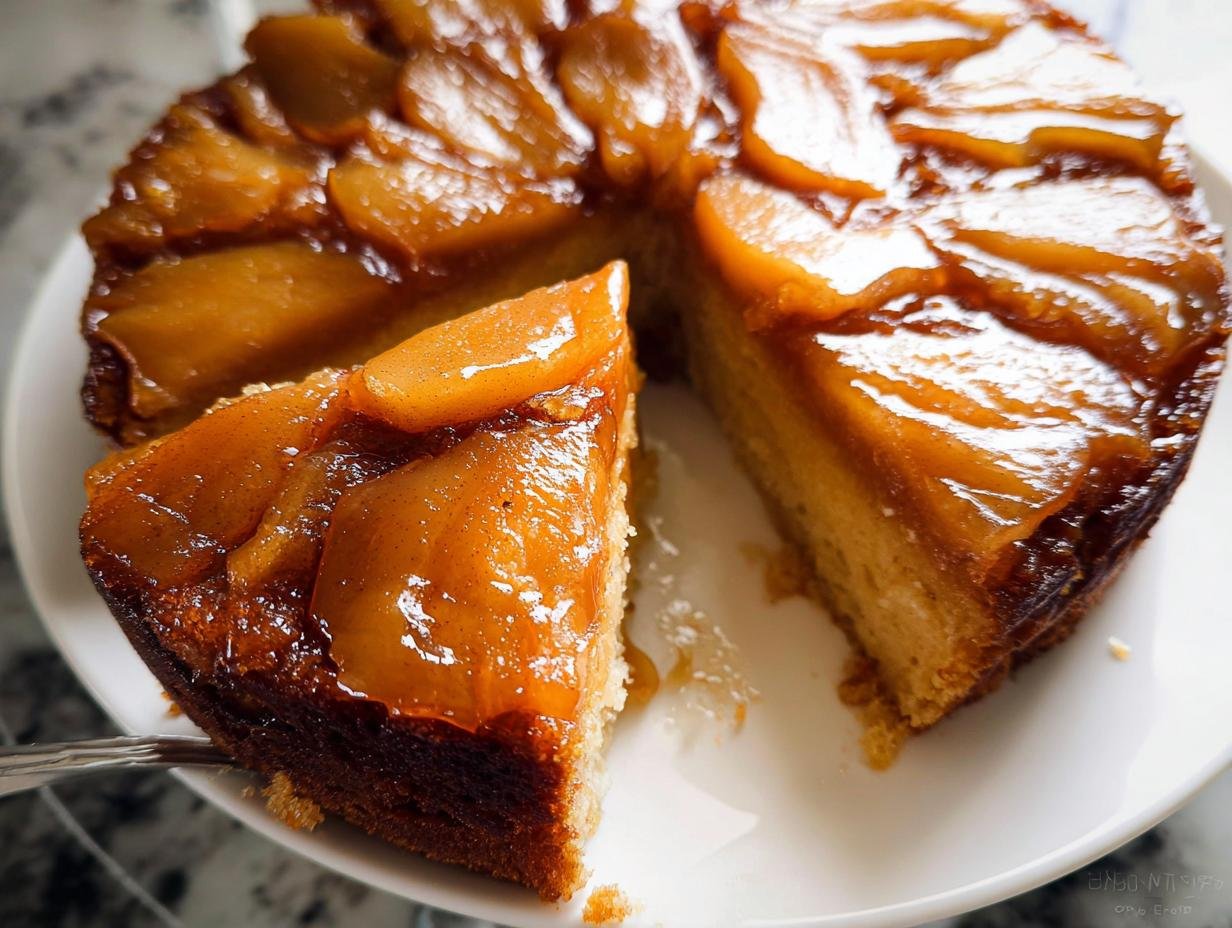
Why This Caramel Apple Upside Down Cake is a Must-Try Dessert
I know you’ve seen those towering layer cake recipes that look amazing but take forever. Not this one! This Caramel Apple Upside Down Cake is designed to give you maximum wow factor with minimum fuss. It’s a perfect dessert party option because it bakes right in the pan and flips out looking gorgeous.
- It’s incredibly beginner friendly—the topping is made right on the stove!
- The flavor profile is pure comfort with warm cinnamon meeting sweet, tender apples.
- You get that spectacular presentation without needing advanced frosting skills.
If you’re looking for even more apple goodness, you absolutely have to check out my apple dapple cake for a different style of fall treat.
Gathering Ingredients for Your Caramel Apple Upside Down Cake
This cake looks fancy, but it truly relies on standard pantry staples. The magic definitely happens when you pay attention to the details and the temperature of your ingredients, which is key for a good rise and texture. Trust me, room temperature eggs and milk make a huge difference in making sure your cake batter comes together beautifully without splitting! You need about 8 servings of this gorgeous dessert.
When sourcing your apples, think firm baking varieties. If you want to see some other fantastic apple desserts after this one, take a peek at my apple pie cheesecake bars or perhaps you’d prefer the apple crisp cheesecake bread recipe?
For the Caramel Topping
- 6 Tablespoons unsalted butter (that’s about 85g)
- 1/2 cup packed light or dark brown sugar (100g)
- 1/4 teaspoon ground cinnamon
- 1/4 teaspoon pure vanilla extract
- 2 medium apples, make sure they are peeled and sliced into 1/4-inch slices (you want about 188–250g total)
For the Cake Batter
- 1 and 1/2 cups all-purpose flour (188g, spooned & leveled—this is important!)
- 1 and 1/2 teaspoons baking powder
- 1 and 1/2 teaspoons ground cinnamon
- 1/4 teaspoon ground nutmeg
- 1/2 teaspoon salt
- 1/2 cup unsalted butter (113g), this must be softened to room temperature
- 1/2 cup granulated sugar (100g)
- 1/2 cup packed light or dark brown sugar (100g)
- 2 large eggs, always at room temperature
- 1 teaspoon pure vanilla extract
- 6 Tablespoons whole milk (90ml), also room temperature!
Step-by-Step Instructions for the Caramel Apple Upside Down Cake
This is where the magic happens! Don’t rush this part, even though the total time looks long. Most of that is hands-off waiting time. Since this is a beginner friendly recipe, I’ve broken down every critical moment so you get that show-stopping flip right on the first try. For a fun savory pairing later, you might want to look at my French apple cider chicken recipe once you devour this cake!
Preparing the Oven and Caramel Base
First things first, get that oven warming up to 350°F (177°C). While that heats, we make the topping in a small saucepan. Melt the butter and brown sugar together over medium heat, stirring until it thickens slightly—about one minute needs constant whisking. You’ll take that right off the heat and whisk in the cinnamon and vanilla Extract. Pour this sticky goodness into your ungreased 9×2 inch pie dish. Now, arrange those apple slices so they sit nicely, overlapping just a bit. Pop the dish in the refrigerator while you make the batter; chilling it just for a few minutes helps the caramel set up and keeps your apple pattern perfect when the batter goes on top.
Mixing the Cake Batter for Your Caramel Apple Upside Down Cake
Take all your dry ingredients—flour, baking powder, cinnamon, nutmeg, and salt—and just give them a quick whisk together in a bowl. Set that aside. Now for the wet work: cream the softened butter with both the granulated and brown sugars until they look light and fluffy. This creaming is what gives you that non-dry layer cake texture, so don’t skimp on the air! Beat in your room-temperature eggs one at a time, making sure each one disappears before you add the next, followed by the vanilla extract.
When you combine them, turn the mixer down to low. Slowly pour in the milk while the mixer runs, then gradually add the dry mixture. Listen to me: turn the mixer off the second everything combines! A few lumps at the bottom are okay; over-mixing this batter makes it tough, and we want tender apples meeting tender cake.
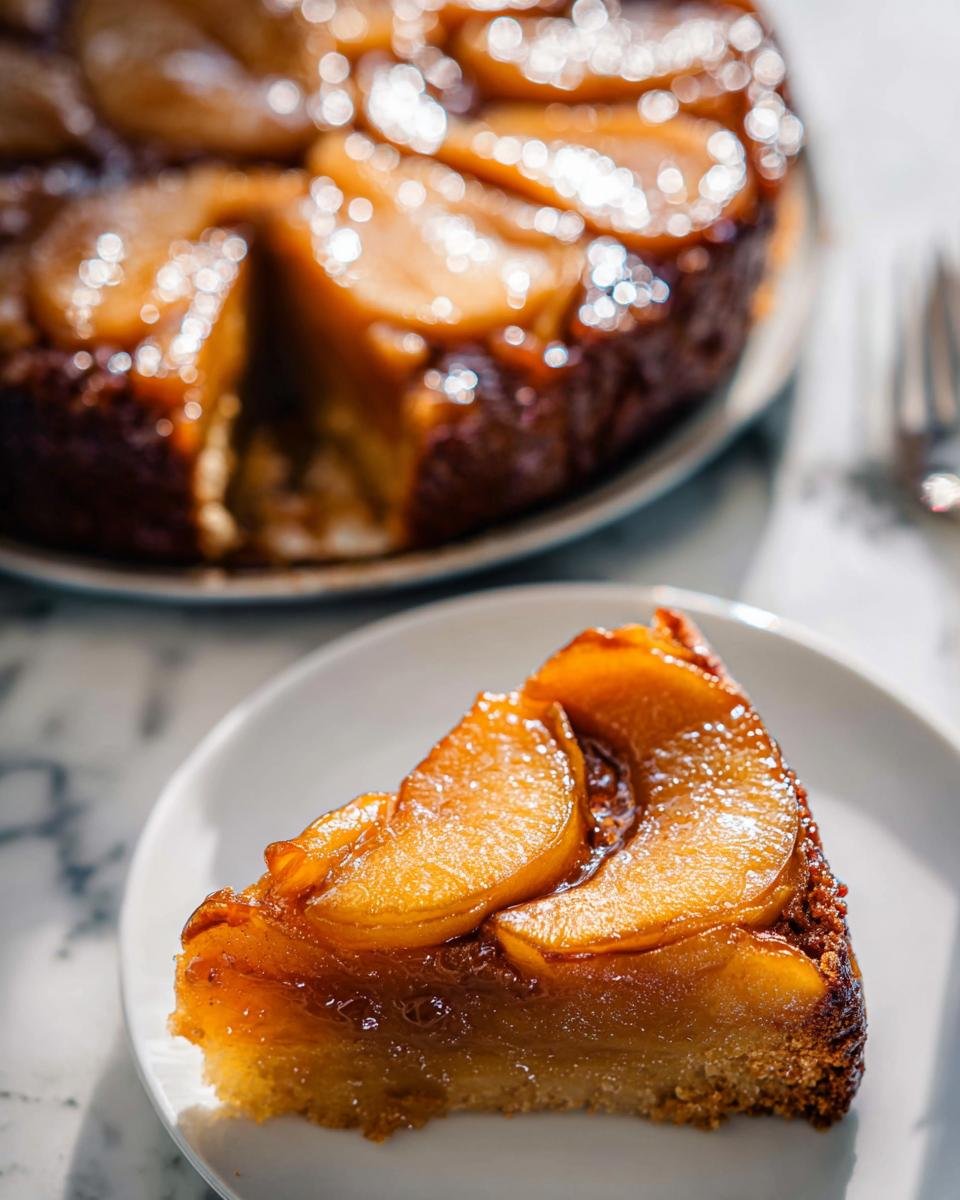
Baking and Inverting the Caramel Apple Upside Down Cake
Gently spread that thick batter evenly over your chilled apple and caramel layer. Bake this beauty for about 40 to 46 minutes. If you notice the edges getting too dark before the center looks done, just tent a little piece of foil over the top halfway through. When a toothpick comes out mostly clean—a few moist crumbs are perfect—you’re ready! Take it out and let it cool on a wire rack for exactly 15 minutes. This waiting period is non-negotiable!
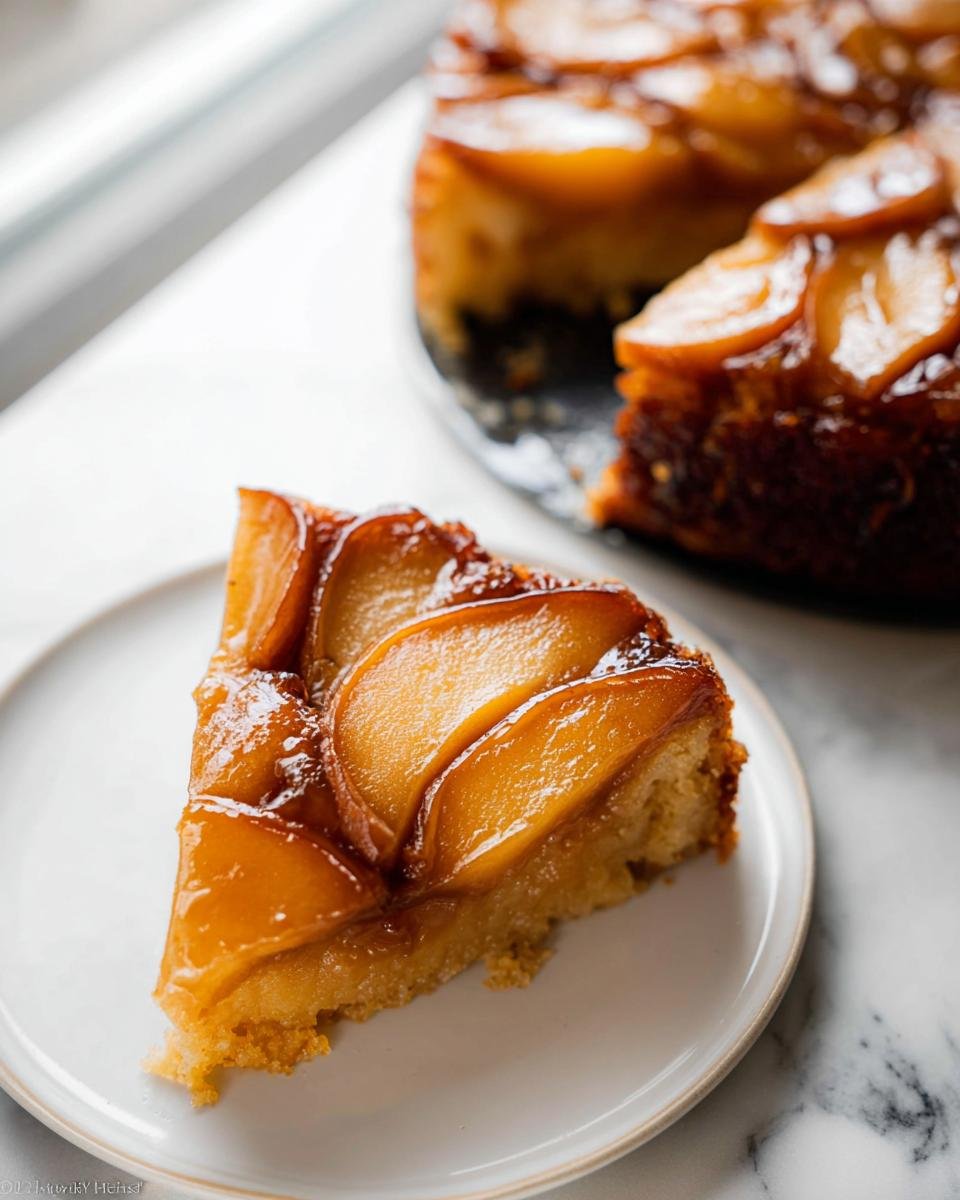
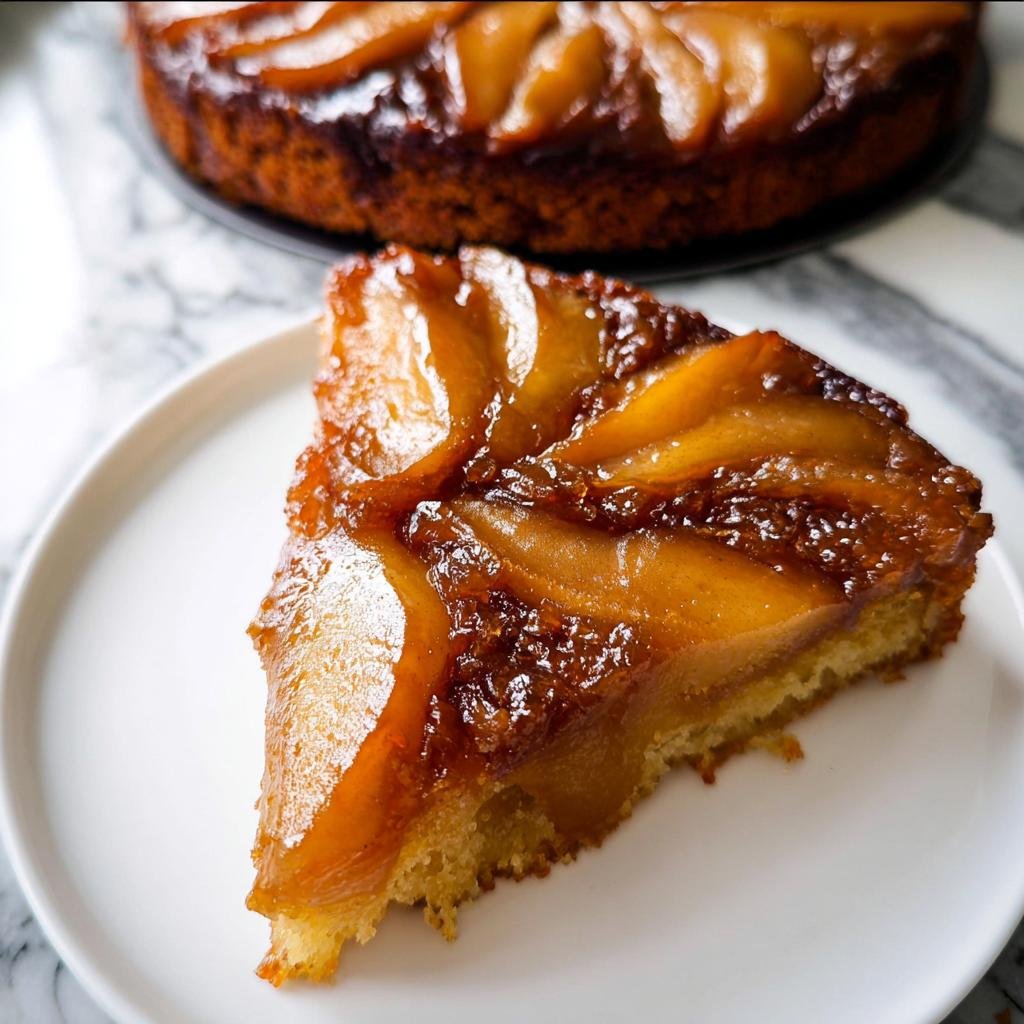
Then, place your serving plate upside down over the pan. Hold them tightly together and flip! Lift the pan off carefully. I like to serve it slightly warm, which means the caramel is gooey, but honestly, let it cool completely if you plan on slicing it cleanly for serving later.
Expert Tips for a Perfect Caramel Apple Upside Down Cake
Getting that show-stopping flip right is the scariest part, but let’s talk real secrets that guarantee success. First, apple choice matters immensely! Skip the soft ones; you absolutely need firm, slightly tart apples like Honeycrisp or Granny Smith for the topping. They hold their shape beautifully during the bake and don’t turn to mush.
To stop that caramel from scorching while the cake bakes through, remember to watch the heat. If your topping starts looking dangerously dark before the middle is done, don’t hesitate to tent the top with a piece of foil halfway through baking. This keeps the beautifully arranged apples from burning while the interior finishes cooking.
Finally, about that clean inversion—the key isn’t cooling time, it’s *just the right* cooling time. Cooling for 15 minutes lets the caramel firm up slightly so it doesn’t run everywhere, but cooling too long lets the cake glue itself to the pan bottom. Also, for that satisfying crumb, make sure you cream your butter and sugars until they are truly pale; that traps the air needed for a lighter layer cake structure!
If you want to try another great fall bake, my oatmeal apple cake is fantastic when you need something a little different.
Ingredient Substitutions for Your Caramel Apple Upside Down Cake
I always try to keep my recipes flexible because you never know what pantry items you’ll have on hand! While I truly believe the recipe works best as written, sometimes you just can’t swap things out, and that’s okay. We can make smart substitutions that keep this cake delicious and still hold up well, even if it’s not technically a true layer cake.
If you’re looking for other ways to use up apples or want a delicious twist, check out my recipe for caramel apple cheesecake bars! They’re dense, fudgy, and divine.
Dairy Swaps
The butter in both the topping and the cake is essential for richness, but if you need to skip dairy, you have options. For the topping, you can often use a firm, high-quality vegan butter stick. Just make sure it melts similarly to dairy butter when cooking that caramel base.
In the cake batter, swapping out the 1/2 cup of softened butter is easier. Coconut oil works well, especially if it’s measured correctly, though the flavor will be slightly different. For the whole milk, any plant-based milk works great—almond, soy, or oat milk are fantastic choices here. Since the milk is added toward the end when the mixer is on low, it’s very forgiving.
Apple Alternatives and Variations
The apple selection is the main flavor driver, so be mindful here. If you don’t have your favorite firm apple, pears are a wonderful, unexpected replacement! They offer a similar texture when baked and pair beautifully with cinnamon and caramel. Just make sure they are firm and slice them to the same 1/4-inch thickness.
If you’re feeling creative and trying to use up jars, a thin layer of canned pineapple rings (drained well!) can stand in for the apples entirely, giving you a classic upside-down cake vibe. Just be aware that pineapple is much juicier than apples, so watch your bake time!
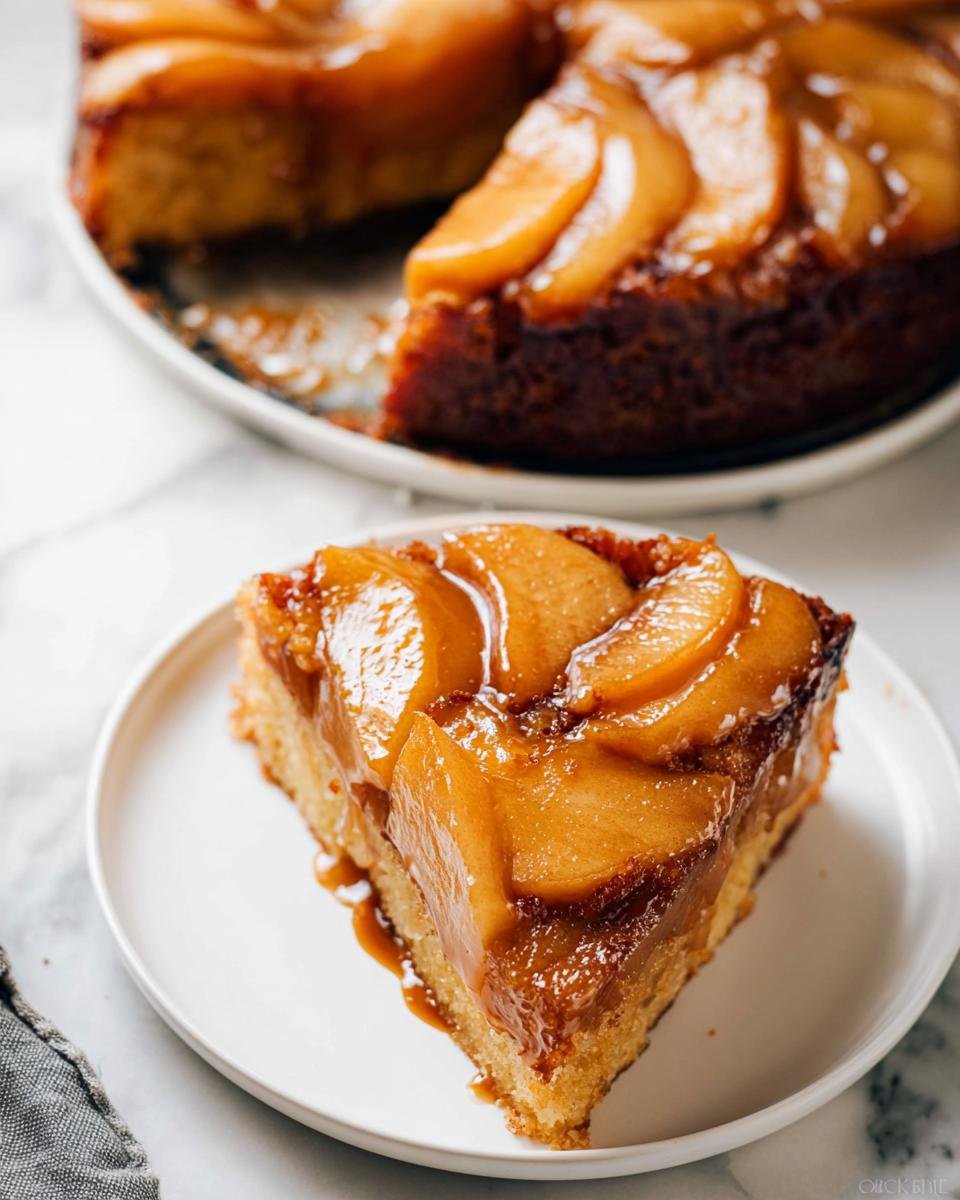
Serving Suggestions for This Dessert Party Favorite
Honestly, this Caramel Apple Upside Down Cake is so stunning and flavorful all on its own, but when you’re hosting a dessert party, a little something extra just makes it feel special. Since we’ve already got the caramel loaded in there, we don’t want to overwhelm it. We just want complementary textures and temperatures.
My favorite way to serve it is warm, right after that tense 15-minute cooling period—it’s pure comfort food. Here are my go-to additions:
- Classic Vanilla Ice Cream: You cannot beat the contrasting temperatures. A scoop of really high-quality vanilla ice cream slowly melting into the warm caramel sauce? It’s heaven. The cold creaminess cuts through the baked sweetness perfectly.
- Lightly Sweetened Whipped Cream: If you’re not a huge ice cream person, thin, slightly sweetened whipped cream is perfect. Add just a tiny splash of extra vanilla or maybe even a whisper of bourbon to the cream before whipping it. It adds lightness without too much competing flavor.
- A Nutty Crunch: If you like texture, you could definitely sprinkle some toasted chopped pecans over the top right before serving. They add that satisfying, nutty element that pairs so well with baked apples. For a related treat, sometimes I make a batch of pecan pralines and crumble those over individual slices!
Keep it simple, let that beautiful apple arrangement shine, and enjoy!
Storage and Reheating Instructions for Leftover Caramel Apple Upside Down Cake
The best part about an already rich dessert is knowing you have leftovers for a treat tomorrow! You can cover slices and keep them in the refrigerator for up to three days. Frankly, they taste amazing just straight from the fridge.
If you have a lot of slices left, they freeze really well for about three months. But heed my warning—do not try to freeze the whole cake at once! The caramel topping doesn’t handle the freezing and thawing process cohesively when it’s assembled like that. Just freeze individual slices wrapped tightly, and let them thaw slowly on the counter.
Frequently Asked Questions About the Caramel Apple Upside Down Cake
Whenever I share this recipe, I always get so many great questions about the flipping part or the best apples to use. It’s funny how we all get nervous about that final flip! Don’t worry, this recipe is designed to be very straightforward, even if you don’t normally tackle cake recipes. If you’re nervous about baking a classic layer cake but still want an impressive dessert, this is secretly the best starting point for you!
If you need another fantastic, approachable apple treat, you absolutely have to check out my recipe for apple cake with cream cheese!
Can I make this Caramel Apple Upside Down Cake ahead of time?
You absolutely can prepare the topping and arrange the apples hours ahead of time! Just keep the pan covered in the fridge. However, I always wait until I’m ready to bake to mix the cake batter. Cake batter doesn’t love sitting around; its chemical rising agents start working right away, so mixing it fresh ensures you get the absolute best lift and structure for your cake.
What apples work best for this recipe?
This is crucial for a clean flip! You need apples that are firm and hold their shape when heated. I stick to Granny Smith, Honeycrisp, or Braeburn apples. They balance sweetness perfectly against that rich caramel, and most importantly, they won’t turn into total mush after 45 minutes in the oven. You want slices, not applesauce!
Is this recipe suitable for a beginner friendly baker?
Yes, absolutely! I consider this one of the most beginner friendly recipes I have. Why? Because it’s a one-pan wonder! You skip the messy labor of layering batter and frosting that you find in a traditional layer cake. You just make a quick topping, pour the batter over, and bake. The presentation success is basically guaranteed when you do the flip!
Estimated Nutritional Snapshot for Caramel Apple Upside Down Cake
Okay, so this is a treat, not an everyday staple, and because we’re using real butter, brown sugar, and apples, we get that deep, satisfying flavor! When you’re planning your menu, you should know roughly what you are working with per serving (this recipe makes 8 slices). Remember, this is just an estimate—baking is an art, and your specific brand of flour or the exact size of your apples can shift these numbers a little bit.
If you are tracking things like sugar or carbs and want some other lighter dessert options to balance things out, check out my link for calorie smart recipes on the site for ideas!
Here is the breakdown based on the ingredients list we used:
- Calories: About 450 (Wow, that’s rich!)
- Fat: Around 20g (Hello, butter!)
- Carbohydrates: Roughly 65g
- Sugar: Approximately 35g (Don’t forget the natural sugars from the apples!)
- Protein: About 5g
I always warn folks not to fret too much over the exact numbers when you’re baking something this special for a celebration. It’s worth every single bite! Just enjoy the process and the wonderful aroma!
Caramel Apple Upside Down Cake
Ingredients
Equipment
Method
- Preheat your oven to 350°F (177°C).
- Prepare the topping first: Combine butter and brown sugar together in a small saucepan over medium heat. Whisk occasionally until the butter has melted. Cook, whisking constantly, for 1 minute as the mixture thickens. Remove from heat and whisk in the cinnamon and vanilla extract. Pour into an ungreased 9×2 inch pie dish or round cake pan. Arrange the apple slices neatly on top, overlapping where necessary. Place the pan in the refrigerator for a few minutes while you prepare the cake batter. This helps set the topping’s arrangement.
- Make the cake batter: Whisk the flour, baking powder, cinnamon, nutmeg, and salt together. Set this mixture aside.
- Using a mixer fitted with a paddle or whisk attachment, beat the butter on high speed until smooth and creamy, about 1 minute. Add both sugars and beat on high speed until creamed together, about 1 minute. Scrape down the sides and bottom of the bowl with a rubber spatula as needed. On high speed, beat in the eggs and vanilla extract until combined. Scrape down the sides and bottom of the bowl as needed.
- Pour the dry ingredients into the wet ingredients. Turn the mixer to low speed and as the mixer runs, slowly pour in the milk. Beat on low speed just until all of the ingredients are combined. Do not over-mix. You may need to whisk it all by hand to make sure there are no lumps at the bottom of the bowl. The batter will be slightly thick.
- Remove the topping from the refrigerator. Pour and spread the cake batter evenly over the topping.
- Bake for 40–46 minutes, tenting foil on top of the cake halfway through the bake time to prevent the top from over-browning before the center cooks fully. The cake is done when a toothpick inserted into the center comes out mostly clean; a couple moist crumbs are acceptable. Do not worry if your cake takes longer or if the cake rises up and sticks to the foil.
- Remove the cake from the oven and cool on a wire rack for 15 minutes. Invert the slightly cooled cake onto a cake stand or serving plate. Some of the juices from the topping will seep over the sides; this is fine. You can slice and serve the cake warm, but the slices will be messy. Cool the cake completely at room temperature before slicing and serving. Do not refrigerate the cake to speed up the cooling process because it could taste overly dense.