
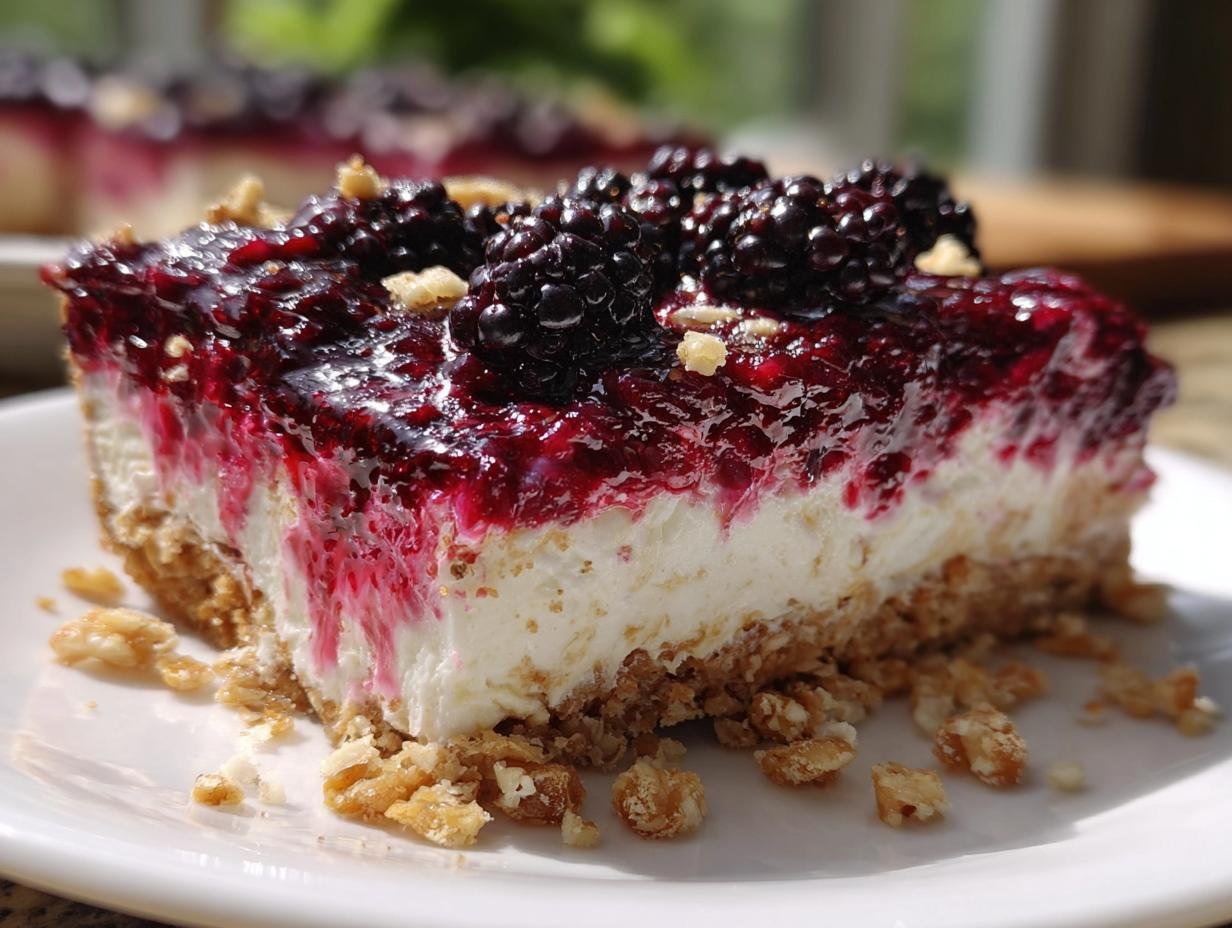
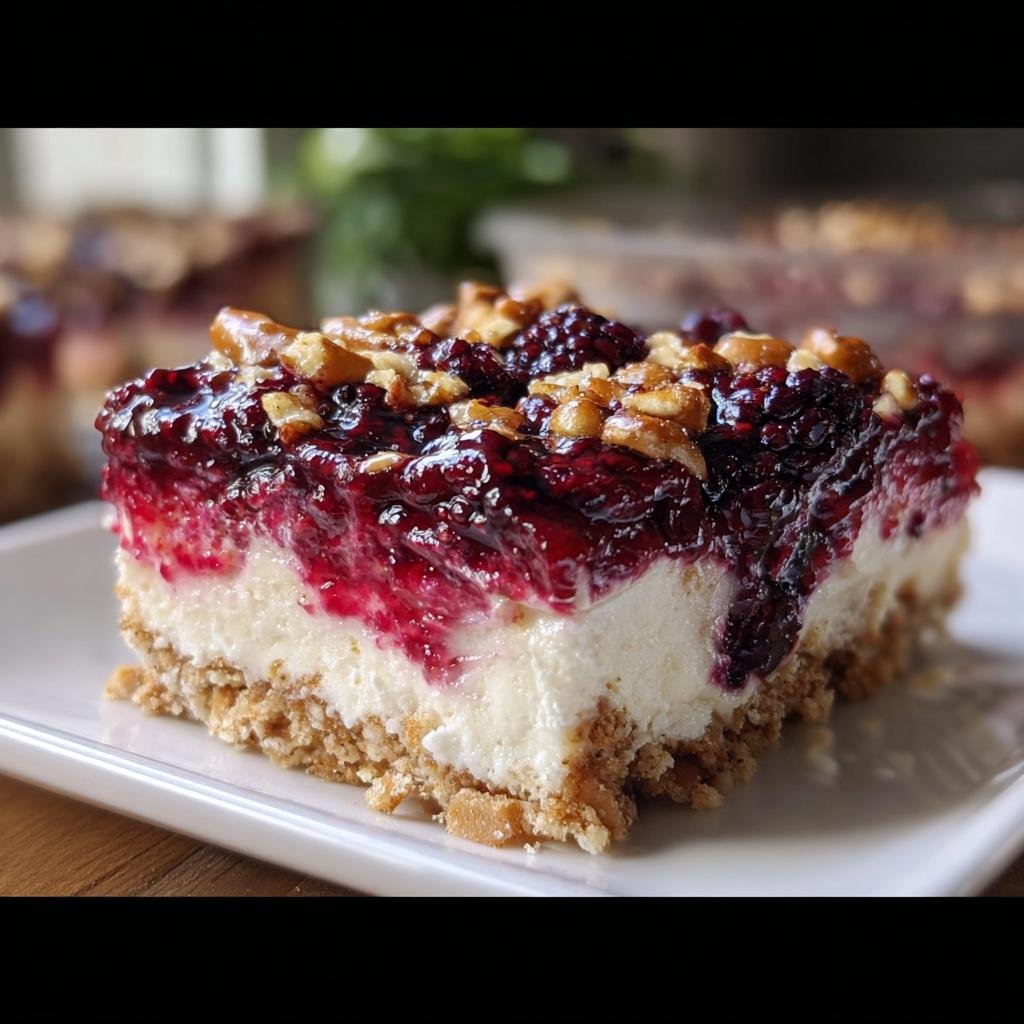
Oh, you know those desserts that just scream childhood gatherings, potlucks, and big family lunches? The ones that bring instant nostalgia the second they hit the table? Well, I’ve spent years perfecting layered, chilled desserts, and I finally nailed the absolute best version of the classic sweet and salty layered treat: the Blackberry Pretzel Salad. Forget those sad, floppy versions you might have tried years ago. We’re making one that holds its shape but still delivers that incredible creamy texture against that salty, buttery crunch.
This isn’t just a good recipe; it’s *the* recipe. My secret is making sure every layer is balanced perfectly so you get that fantastic hit of saltiness, sweet cream, and tart blackberry in every single bite. Trust me, this layered dessert comes together faster than you think, and it tastes like summer heaven.
Why This Blackberry Pretzel Recipe Works So Well
Honestly, the payoff for the little effort you put into this Blackberry Pretzel Salad is massive. It’s the kind of dish everyone asks you to bring! I think it’s superior to other versions because of three things:
- The crust stays perfectly crisp—no sad, soggy bottoms here!
- It’s unbelievably easy to assemble; we’re talking quick mixing and layering.
- That sweet and salty balance is just addictive, especially with the tart berries.
If you love layered desserts that feed a crowd without requiring any oven time past that quick crust bake, you’re going to adore this. Speaking of other amazing pretzel-based treats, you have to check out this apple cinnamon pretzel salad when you get a chance!
Gathering Your Ingredients for the Perfect Blackberry Pretzel
Okay, this is where we get serious about structure! Since the Blackberry Pretzel Salad has three distinct layers, I always organize my ingredients just like that. It keeps everything clear, and it means less scrambling while you’re layering everything up. Don’t skimp on the quality here, because these simple ingredients are what make the magic happen!
Make sure your cream cheese is perfectly softened—that’s crucial, trust me. Also, when I say crushed pretzels, I mean those standard, salty ones. If you use sourdough pretzels or anything too flavored, it throws off that essential sweet-and-salty dynamic we are going for!
For the Pretzel Crust: Ingredients for the Blackberry Pretzel Base
This layer needs to be sturdy enough to hold those wet layers above it, so we don’t mess around with ratios here. Get these measured out before you even turn the oven on!
- Crushed Pretzels: You need 2 full cups. I usually crush mine in a Ziploc bag with a rolling pin until they look like coarse sand—just slightly bigger than flour.
- Butter: 3/4 cup of butter, melted down gently. This is the glue that holds our salty base together.
- Sugar: 1/2 cup of granulated sugar mixed in here does two things: it helps caramelize the crust slightly and balances the saltiness of the pretzels.
For the Cream Cheese Filling: The Creamy Layer of Your Blackberry Pretzel
This layer is pure velvet, but only if you treat the cream cheese right! If it’s cold, you end up with little lumps, and nobody wants a lumpy cream cheese layer, right?
- Cream Cheese: 8 ounces of cream cheese absolute must be softened to room temperature. Get it out early!
- Sugar: 1 full cup of regular sugar goes in with the cream cheese. This gives the filling its primary sweetness.
- Whipped Topping: One standard 8-ounce container. This is what lightens up the heavy cream cheese into something airy and fluffy. Remember to fold it in gently later!
For the Blackberry Topping: Completing the Blackberry Pretzel
This isn’t your standard jello. We use blue gelatin here, which sounds weird, but it’s important! It sets up perfectly firm and provides that gorgeous color contrast against all the white and tan layers.
- Berry Blue Gelatin Mix: You only need 3 ounces, which is usually one small box. The blue color looks fantastic with the dark blackberries!
- Boiling Water: 2 cups are needed to fully dissolve that gelatin mix. Make sure it’s boiling hot when you add it.
- Frozen Blackberries: 10 ounces of frozen berries are perfect! They actually help cool the hot gelatin down so we can layer it faster. The slight tartness cuts right through the sweet cheese layer.
Step-by-Step Instructions for Making Blackberry Pretzel Salad
Alright, now for the fun part—putting this masterpiece together! Since we’ve got those lovely ingredients prepped, assembly is super fast. You’ll be glancing at the clock and realizing you only spent about 20 minutes actively stirring bowls before it goes into the fridge to work its magic.
My biggest tip right here? Don’t rush the cooling time for that crust. If the crust is even slightly warm when you put the cream cheese layer on, things get melty and messy fast. I always put mine right next to an open window or even pop it in the freezer for five minutes if I’m impatient!
Once you see the finished product, you’ll understand why this recipe is worth every layer. If you love layered desserts, this is a winner, though if you are looking for something baked and rich, check out my recipe for apple crisp cheesecake bread!
Preparing and Baking the Pretzel Crust for the Blackberry Pretzel
First things first, get that oven warmed up to 350°F (175°C). We want it nice and hot for that crust!
In a big mixing bowl—use one of your larger ones—toss together your 2 cups of crushed pretzels, the 1/2 cup of sugar, and the 3/4 cup of melted butter. Mix it until all those salty crumbs are coated and it looks like wet sand. That butter does the heavy lifting, binding everything together.
Press this mixture firmly and evenly into the bottom of your 9×13 inch baking dish. Use the bottom of a flat glass or measuring cup to really pack it down tight. A dense crust prevents sogginess later! Bake this crust for just 10 minutes. As soon as it comes out, you *must* let it cool completely. I mean it—let it reach room temperature before moving on. Patience here pays off big time!
Creating the Smooth Cream Cheese Layer of the Blackberry Pretzel
While that crust is cooling down, we make the middle layer. Go grab your electric mixer for this because we want air in this filling!
Beat your 8 ounces of softened cream cheese along with the 1 cup of sugar. You need to mix this until it is absolutely smooth—no lumps allowed! If you see any hard bits of cream cheese, keep mixing until it’s fluffy and pale.
Once it’s smooth cream cheese bliss, you gently fold in the entire container of whipped topping. Remember, folding is key here! We don’t want to deflate all the air we just whipped into it. Spread this creamy fluff evenly over the now-cooled pretzel crust. Smooth it out nice and flat!
Assembling the Blackberry Topping and Final Chill for Blackberry Pretzel
Now for the gorgeous, fruity top! Get a saucepan going and bring 2 cups of water to a full boil. Take your 3 ounces of Berry Blue gelatin mix and whisk it into that boiling water until every last crystal is dissolved. This is important—dissolve it completely!
Once it’s dissolved, stir in those 10 ounces of frozen blackberries. They will cool the liquid down quickly, but you don’t want it hot when it hits the cream cheese. Let that mixture cool down just a bit after you add the berries.
Carefully, and I mean carefully, pour this slightly cooled blackberry topping right over the cream cheese layer. Try to pour it slowly onto a spoon resting on the filling to prevent it from digging holes into your fluffy center layer. Pop the whole dish into the refrigerator. You need at least 1 hour of chilling time, but honestly, 2 hours is better, so the gelatin sets up nice and firm.
Expert Tips for the Best Blackberry Pretzel Texture
I’ve made this Blackberry Pretzel Salad so many times for so many events that I know exactly where things can go sideways if you rush. It’s all about managing moisture and temperature, since we’re not baking this thing into submission.
You absolutely must prevent that crust from getting soggy. It’s the number one crime against this dessert! The trick here is twofold: make sure you pack that buttered pretzel mix down really tightly before baking, and—this is key—letting it cool completely. I remember one time I was rushing it for a church picnic, and I layered the cream cheese on while the crust was still faintly warm. By the time we got to the picnic, the bottom layer was basically pretzel mush mixed with cream cheese. Never again!
For that amazing, smooth cream cheese layer, you have to use room temperature cream cheese. If it’s straight out of the fridge, you’ll spend five minutes with the mixer trying to chase down little hard cheese chunks. Beat it with the sugar first until it looks like thick icing, then gently fold in the Cool Whip. That pre-beating creates the fluffiness that holds the gelatin layer up later on.
Finally, about the gelatin set—this is where the frozen berries help! I often use frozen blackberries even if fresh ones are available. Why? Because those frozen berries act like little ice packs, rapidly cooling down your hot gelatin mixture just enough so it doesn’t melt that beautiful whipped cream layer underneath it when you pour it on top.
If you want another stunning, layered dessert that manages temperature and texture perfectly, you should really check out my apple cake with cream cheese recipe. It uses similar principles of balanced layers!
Ingredient Notes and Substitutions for Blackberry Pretzel Salad
While I absolutely adore this recipe the way it’s written—with those standard salted pretzels and the beautiful blackberries—I know life happens and cabinets don’t always stock exactly what the recipe calls for! So let’s talk about tweaking things just a little bit without ruining that essential sweet-and-salty magic.
The main area people like to substitute is the fruit, and that’s usually totally fine. If you don’t have blackberries on hand, or maybe they are out of season and super expensive, feel free to try raspberries or even frozen mixed berries. Just remember, raspberries tend to be a little tarter, so you might want to add just a tiny pinch more sugar to the cream cheese layer to keep things balanced overall. The principle remains the same: hot gelatin + frozen fruit cools down fast.
Now, let’s discuss the crust. The saltiness of the standard pretzel is what makes the contrast with the sweet filling so good. If you decide to go rogue and use sourdough pretzels or those little mini-twisted ones, you’ll definitely need to taste your dry mix before pressing it into the pan. Sourdough is much saltier, so you may want to pull back on that 1/2 cup of granulated sugar in the crust just slightly—taste it first! You want that salty undertone, not an overpowering puckering.
And what about that blue gelatin? I use Berry Blue because it sets nice and firm and contrasts beautifully with the dark purple berries. If you only have strawberry or raspberry gelatin, go for it, but your top layer will look much pinker than the classic version. It still tastes amazing, though! If you’re looking for something baked but equally satisfying, don’t forget to check out my apple dapple cake recipe next time you need a warm dessert!
Serving Suggestions for Your Blackberry Pretzel Dessert
Once that Blackberry Pretzel Salad has set up perfectly—and I mean *perfectly* firm—the real fun is in how you present it! This dessert is so rich and satisfying that it doesn’t need much fuss, but a little garnish goes a long way when you’re serving it at a party.
Since the chilling process makes this dessert taste fantastic cold, I always serve it straight from the fridge. That cold temperature just makes the cream cheese layer feel richer and the pretzel crust snap nicely. If you’re laying it out early, keep it covered tightly in the back of the fridge so it stays super chilly.
Here are my favorite ways to dress up a slice of this sweet and salty dream:
- A Cloud of Whipped Cream: You can never go wrong with extra whipped topping! A spoonful dolloped right on top of the slice just before serving adds a lovely lightness to contrast the density of the lower layers.
- Powdered Sugar Dusting: If you want a super elegant look without adding more sweetness, grab a fine-mesh sieve and dust just a whisper of powdered sugar over the top layer. It makes the dark blackberries pop visually!
- Contrast with a Crumb: For a little texture play, I sometimes reserve about a quarter cup of the unused pretzel crust mixture before baking, then I toast it lightly on a sheet pan with a tiny drizzle of butter. Once cooled, I crumble that extra-crunchy topping over the plated slices. It’s a little extra work, but that fresh crunch is divine!

Because this dessert is rich and complex—salty, creamy, tart—it pairs wonderfully with something simple and warm on the side. If you serve this after a big meal, try offering coffee or maybe even a plain shortbread cookie. Honestly, though, this Blackberry Pretzel Salad is strong enough to stand on its own! If you’re looking for another rich, satisfying treat that offers that same kind of complexity, you absolutely must try these apple pie cheesecake bars next time you’re entertaining!
Storage and Make-Ahead Options for Blackberry Pretzel
One of the biggest reasons I love making this Blackberry Pretzel Salad, besides how incredible it tastes, is that it’s built to be made ahead! You can’t serve this right after assembly; it needs that chill time anyway, so timing it around a big event is actually a huge advantage.
This dessert is designed to last a few days in the fridge, but the key, as always with any dessert built on a pretzel crust, is keeping that bottom layer from going soft. If you can manage it, assembling it the day before you plan to serve it is my absolute sweet spot.
If you’re preparing it the day before, just make sure you cover that 9×13 dish TIGHTLY. I use plastic wrap and press it gently right down onto the gelatin surface. This keeps any weird fridge smells out and prevents condensation from forming right on top of the berry layer, which can sometimes thin out the set. It stays fantastic for about three days this way.
Now, let’s talk about freezing—and this is a tricky one for layered, creamy desserts.
Can You Freeze Blackberry Pretzel Salad?
Honestly, I don’t recommend freezing the whole thing assembled. The three main components react very differently to freezing, and you end up with a texture mess. The cream cheese layer gets a bit grainy once thawed, and the gelatin topping can weep moisture, making everything soggy.
However, you *can* freeze the crust separately! If you want to make a double batch of the crust and freeze half for next time, go for it. Bake it off, let it cool completely, wrap that layer tightly in plastic wrap, and then wrap it again in aluminum foil. It will keep well in the freezer for about a month. When you’re ready to use it, just let it thaw overnight in the fridge, and then proceed with the cream cheese and berry layers as usual.
If you’re planning ahead for a holiday treat, maybe try making a batch of pecan pralines instead. Those actually freeze like a dream and don’t have any fussy chilling requirements!
Keeping the Crust Crisp When Assembling Early
If you are making this the morning of a big party, the crust is usually pretty safe, but if you plan to assemble the whole Blackberry Pretzel Salad the night before, here is what I do to protect the base. I bake the crust and let it cool completely, just like the recipe says. Then, before adding the cream cheese layer, lightly brush the fully cooled crust with a very thin layer of melted white chocolate (use the good quality kind!).
Wait about five minutes for that white chocolate seal to harden up—it’s practically instant at room temperature. That thin layer acts like a waterproof barrier between the salty butter and the moisture from the cheesy layer above it. It’s a little extra step that keeps the sweet and salty layers perfectly distinct, even after 18 hours in the fridge. You won’t even taste the white chocolate, you just get clean, crisp pretzel!
Frequently Asked Questions About Blackberry Pretzel Salad
I knew you’d have questions! This layered dessert involves a few specific steps, especially with the gelatin and the crust, so it’s smart to ask ahead of time. I’ve tried to answer the things that pop up most often when people are making this sweet and salty delight for the first time.
Remember, the keys here are usually temperature control and moisture management. Don’t sweat it if you need to adjust; that’s part of learning any great recipe! If you love learning quick baking tips, you should definitely bookmark my recipe for those keto butter pecan cookies!
Can I make this Blackberry Pretzel recipe ahead of time?
Yes, you absolutely can, and I highly recommend it! This Blackberry Pretzel Salad actually tastes *better* after it sits for a while and lets the flavors meld together. The best timing is assembling the entire thing the night before you plan to serve it. Cover it tightly with plastic wrap—make sure the wrap isn’t touching the gelatin layer if you can help it—and let it chill overnight. It’ll be perfectly firm and ready to cut the next day. We discussed freezing possibilities in the last section, but for refrigeration, overnight is the golden rule!
What is the best way to crush pretzels for the Blackberry Pretzel crust?
Oh, scooping them up by hand is the messy way! My favorite, no-mess way to crush those pretzels into that perfect, coarse-sand consistency needed for the Blackberry Pretzel crust is seriously simple. Toss your 2 cups of pretzels right into a sturdy, gallon-sized Ziploc bag. Seal it closed, making sure to push out as much air as you can.
Next, grab a heavy rolling pin—or even a sturdy canned good if you don’t have a rolling pin handy—and just pound away until they are crushed to your liking. I like mine to have a bit of texture, not quite flour, so I usually stop when I can still see some slightly larger pieces mixed in. It’s fast, it’s therapeutic, and it keeps the crumbs contained!
Share Your Blackberry Pretzel Creations
Well, that’s it! You’ve successfully mastered the layers of the ultimate sweet and salty, creamy dessert. I truly hope that rich, tangy blackberry topping and that salty pretzel crunch brings as much joy to your table as it does to mine. It’s the perfect dish to bring to a BBQ or to finish off a big holiday meal because it tastes amazing cold!
Now that you’ve got this amazing Blackberry Pretzel Salad in your baking repertoire, I really want to know what you think! Head down to the comments section below and tell me all about it. Did you keep the blue gelatin? Did you stick to classic salted pretzels? Seriously, I want to hear every detail about how your layers turned out!
If you made this recipe, please do me a huge favor and leave a rating—it helps other folks find this recipe for their next gathering. And if you snapped a picture of that beautiful three-layered slice, please tag me on social media! I absolutely love seeing your kitchen creations come to life. Happy layering, and if you’re already planning your next bake, check out my recipe for keto pecan softies for something totally different but just as delicious!
Blackberry Pretzel Salad
Ingredients
Equipment
Method
- Preheat oven to 350°F (175°C). In a mixing bowl, combine crushed pretzels, melted butter, and 1/2 cup sugar. Press mixture evenly into the bottom of a 9×13 inch baking dish.
- Bake the crust for 10 minutes. Let cool completely.
- In a separate bowl, beat together the softened cream cheese and 1 cup sugar until smooth. Fold in the whipped topping.
- Spread the cream cheese mixture evenly over the cooled pretzel crust.
- In a saucepan, dissolve the berry blue gelatin mix in the boiling water. Stir in the frozen blackberries. Let it cool slightly.
- Carefully pour the blackberry mixture over the cream cheese layer.
- Chill for at least 1 hour before serving.