
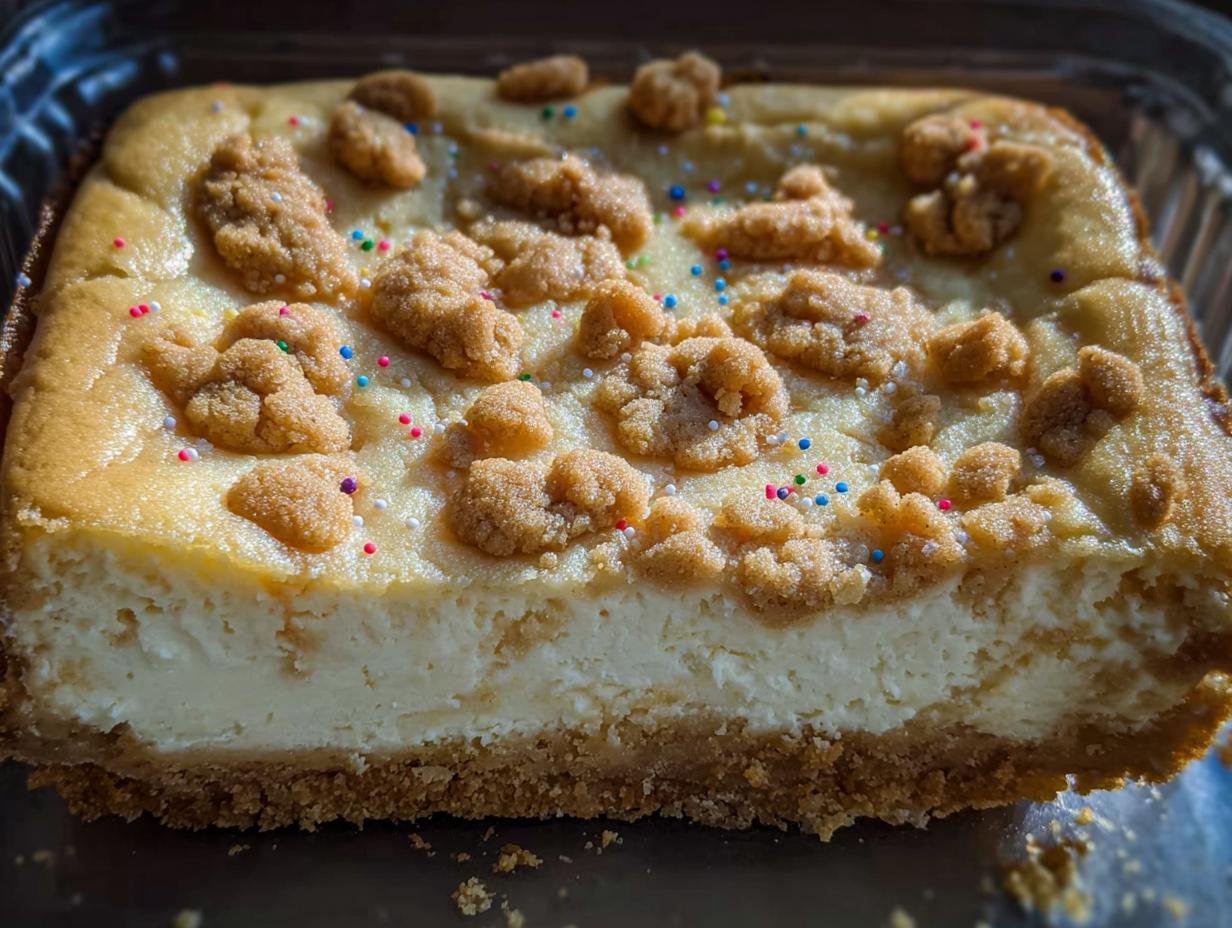
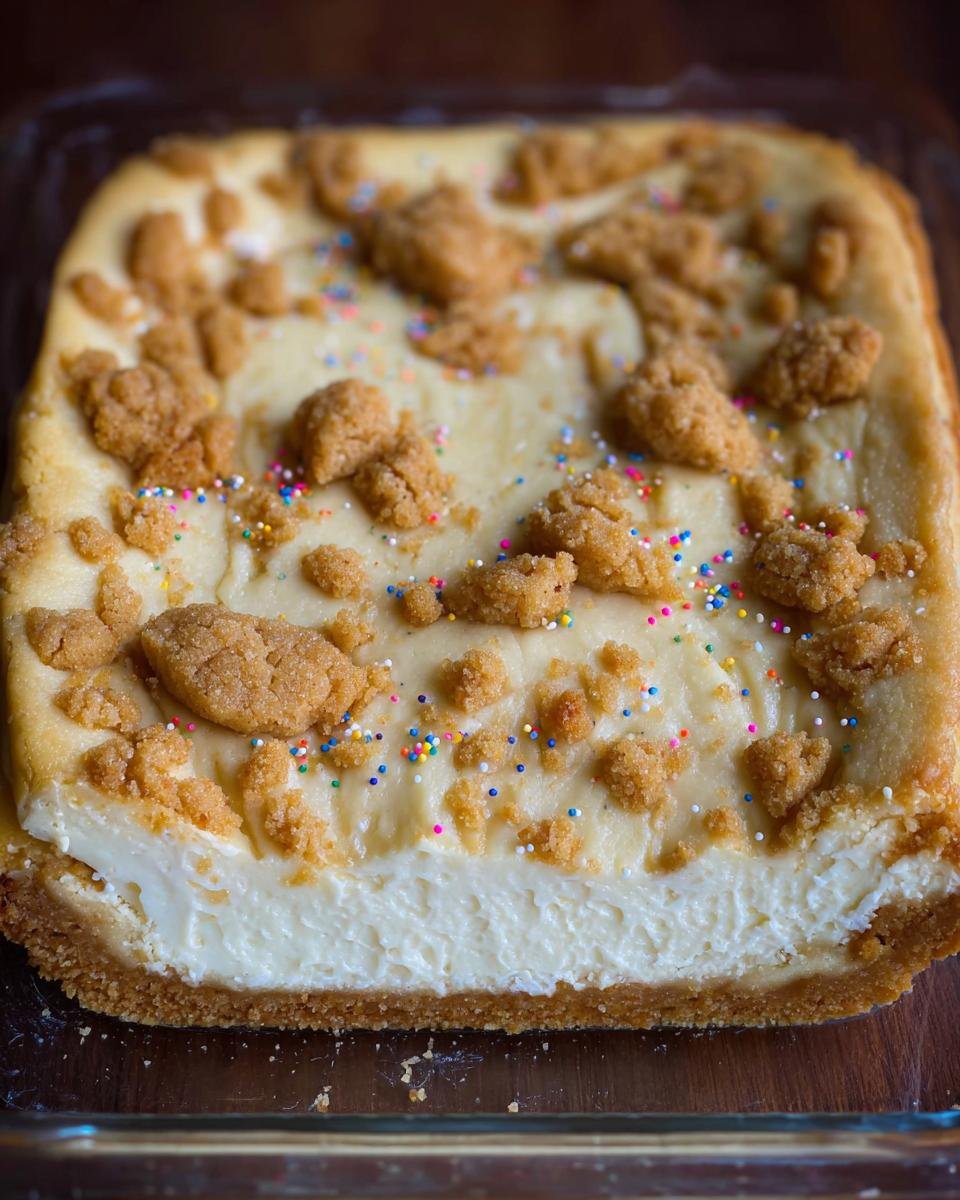
Oh my gosh, you know how you sometimes just crave two totally different desserts at the exact same time? That used to be me—dreaming of chewy sugar cookies one minute and velvety cheesecake the next. Well, I finally stopped dreaming and just put them together! Trust me when I say this Sugar Cookie Cheesecake is the ultimate mashup; it’s a baked delight that gives you a perfectly soft, buttery cookie base hugging the richest, creamiest filling you’ve ever had.
I think it works so well because the slight saltiness in the cookie crust cuts through the richness of the cheesecake filling perfectly. It just makes everything feel balanced, you know? It’s total dessert harmony, marrying those classic flavors into something brand new and utterly irresistible!
Why This Sugar Cookie Cheesecake Recipe Works So Well
Honestly, the magic here is all about the textural experience. We’re not messing around with flimsy graham crackers; this dessert demands a proper, sturdy sugar cookie foundation. That contrast between the soft, slightly chewy crust and that impossibly smooth, cool cheesecake filling? That’s what makes me come back to this recipe again and again. It’s so incredibly satisfying!
- The crust has just enough chewiness from the flour and butter to hold up to the dense filling.
- The baked cheesecake filling is superior because it sets up firmer and richer than any no-bake version I’ve tried.
- The flavors just sing together—vanilla sugar cookie playing off the tangy cream cheese. Perfection!
Perfect Texture Balance in Every Sugar Cookie Cheesecake Slice
You absolutely need to bake this one; no-bake crusts just don’t have the right buttery depth for this recipe. When you bake that cookie dough first, it caramelizes just a tiny bit and creates a wonderful, almost shortbread-like layer underneath. Then you pour that gorgeous, creamy filling right on top! When you slice into it, you get that soft, yielding crumble from the cookie meeting the thick, luxurious cheesecake. It’s heaven, trust me.
Time Breakdown for Your Sugar Cookie Cheesecake
I know cheesecake sounds intimidating, but look at these times! We need about 30 minutes of active prep time just to mix everything up. Then it bakes for 60 minutes. That’s less than two hours for the hands-on work, which is fantastic for a dessert this impressive.
The real secret is the patience required for the chilling time. You absolutely must reserve 4 hours, and honestly, 240 minutes goes by faster than you think when you’re anticipating this treat! Chilling is non-negotiable for that perfect slice.
Gathering Ingredients for Your Sugar Cookie Cheesecake
Before we even think about turning on the oven, we need to gather everything up. You know how frustrating it is when you’re halfway through a recipe and realize you’re missing something small? I always lay everything out on the counter first—I call it my mise en place—and it just makes the whole process smoother.
For this amazing baked dessert, we’re splitting the ingredients into two essential teams: the delicious cookie base and the creamy topping. Make sure your butter and cream cheese are truly softened; that’s key for getting that luxurious texture later on!
Ingredients for the Sugar Cookie Crust
The crust is what gives this cheesecake its signature flavor, so don’t skimp here! We need that rich vanilla background.
- One cup of unsalted butter—that’s two whole sticks—and make sure it’s genuinely softened, not melted!
- Three-quarters of a cup of granulated sugar.
- One large egg.
- One teaspoon of vanilla extract.
- Two full cups of all-purpose flour.
- Half a teaspoon of baking powder.
- And just a tiny pinch, a quarter of a teaspoon, of salt to balance the sweetness!
Ingredients for the Cheesecake Filling
This filling is thick, tangy, and so velvety smooth. Remember to use full-fat cream cheese for the best results, always!
- Three packages of cream cheese—that’s 8 ounces each—and they must be softened down completely.
- One full cup of granulated sugar.
- A quarter cup of sour cream for that essential tang.
- One teaspoon of vanilla extract, matching what’s in the crust.
- And finally, three large eggs, which we add very carefully, one at a time, later on.
Essential Equipment for Making the Sugar Cookie Cheesecake
You don’t need a whole professional bakery setup for this, thankfully! But because we are dealing with a decadent, dense cookie base and a delicate cheesecake filling, having the right tools makes a world of difference. Using the wrong equipment can definitely lead to lumps or a cracked top, and we definitely don’t want that!
First thing, you absolutely must have a good quality 9-inch springform pan. Because we chill this dessert for so long, you need that removable side to get beautiful slices without destroying the edges. Another lifesaver for the crust part is a food processor. It makes blending the cookie dough base so fast and uniform!
For the filling—and this is important—you need an electric mixer. Trying to cream three blocks of cream cheese by hand is a recipe for sore arms! You need that mixer power to get the filling light enough before we add the eggs. If you’re looking for some tips on achieving creamy textures in other baked goods, I always check out this recipe for brown butter chocolate chip cookies because their mixing technique is spot-on.
Gather these three things, and you’re already halfway to cheesecake success, I promise!
Step-by-Step Instructions for Perfect Sugar Cookie Cheesecake
Alright, let’s get baking! I know the number of steps looks long, but honestly, once you get into the rhythm, this comes together so quickly. Remember, we are building layers here, so make sure your crust has a good foundation before we move onto the creamy part. Don’t worry if your hands get a little messy; that just means you’re cooking with love!
Preparing the Oven and Sugar Cookie Crust
First things first, fire up that oven to 350 degrees F (175 degrees C). You want it nice and hot when the cheesecake is ready. Take your 9-inch springform pan and make sure you grease and flour it well—I can’t stress that enough for cheesecakes, they stick stubbornly!
Now for the crust magic. Use your electric mixer for this part. Cream that softened butter and granulated sugar together until they look light and fluffy—we need some air in there! Then mix in your vanilla and that single egg until it’s just combined. Don’t whip it too long here, we’re not making meringue!
In a separate bowl, whisk your flour, baking powder, and salt together briefly. Now, add the dry stuff to the wet stuff slowly, mixing only until you see the last streaks of flour disappear. Overmixing the flour is how you get tough cookies, so stop as soon as it’s combined. This is the most important part for the topping: take about two-thirds of this dough and press it firmly into the bottom of your prepared pan. Keep that remaining one-third dough handy—it’s going to make the best topping!
Mixing and Layering the Cheesecake Filling
Time for the rich part! In a clean bowl, take your softened cream cheese (remember, 3 blocks!) and that cup of sugar. Beat them until they are completely smooth. You want zero lumps here, so take your time whipping them together until it looks gorgeous.
Next, gently mix in the sour cream and that teaspoon of vanilla. The really critical step for a crack-free cheesecake filling is how you add the eggs. Incorporate them strictly one at a time. Beat barely until the yellow yolk disappears into the mix before adding the next one. If you beat them too hard, you introduce too much air, and that’s when cracks happen later!
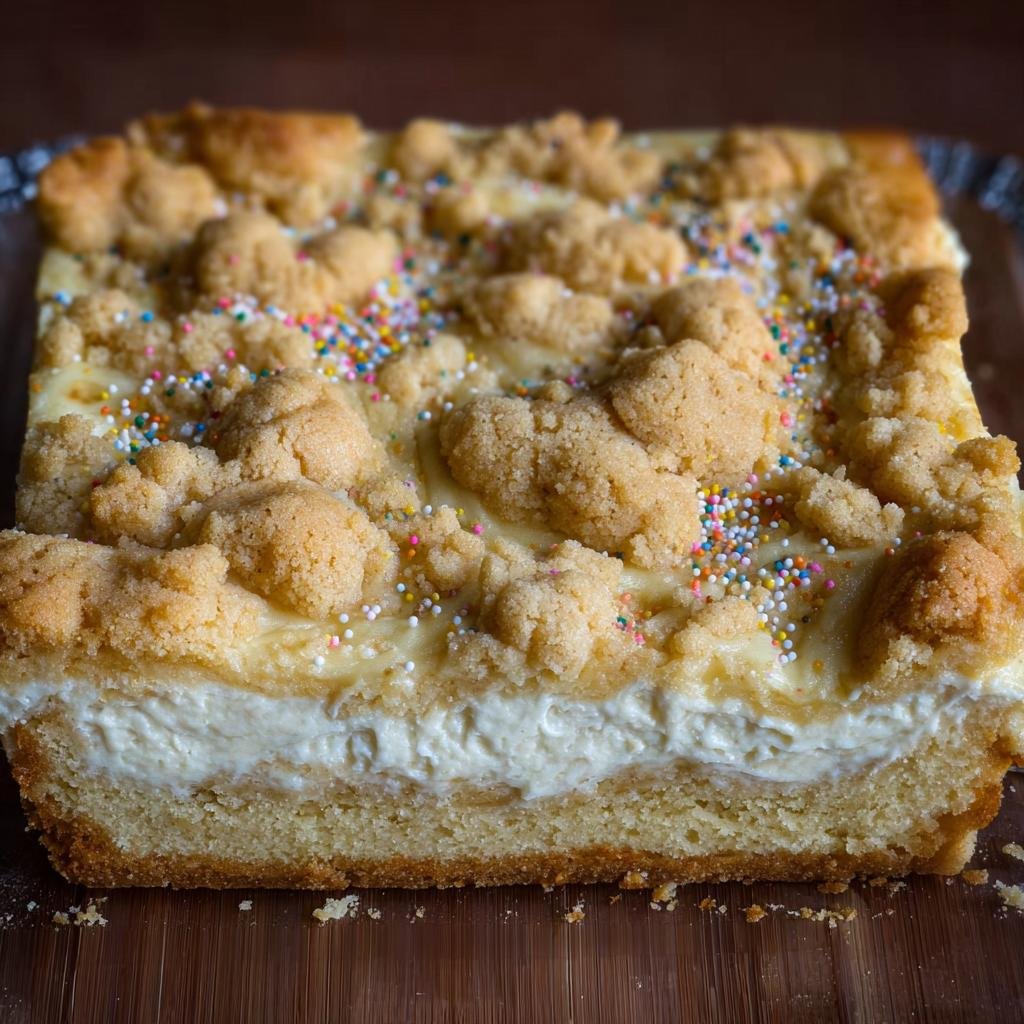
Pour all that creamy filling right over your pressed sugar cookie crust. Now for the fun bit of contrast: grab that reserved dough and crumble it evenly right on top of the cheesecake filling. It looks messy, but trust me, it bakes up beautifully. If you need a quick reminder on how to handle cookie doughs without overworking them, these quick chocolate chip cookies have a great little mixing overview that applies here!
Baking and Cooling Your Sugar Cookie Cheesecake
This part right here is where most people panic, but I promise you, if you follow my slow cooling method, our Sugar Cookie Cheesecake will stay gorgeous and smooth. We bake it at 350 degrees F, and it generally needs about 60 minutes in the oven.
When that hour is up, you need to check it gently. Don’t jostle the pan! You’re looking for the edges to look completely set—firm and opaque. The very center, though, should still have just a tiny little wobble, like soft Jell-O. If it looks liquidy, give it another five minutes. That slight jiggle is the secret to not overbaking it!
Achieving the Perfect Set in the Sugar Cookie Cheesecake
Once you see those set edges and that slight jiggle, it’s time to trick your cheesecake! We are going to turn off the oven completely, but here’s the magic trick: Leave the cheesecake right inside on the rack, but prop the oven door open a crack. I usually use a wooden spoon or a rolled-up dish towel to keep it open maybe four or five inches.
This slow, gentle descent in temperature is what prevents that sudden drop that causes cracking. Let it sit in that slightly warm, airy environment for a good 30 minutes. It’s a slow transition, and your cheesecake will thank you for it!
After that half-hour in the oven, carefully take it out and let it sit on the counter until it’s completely at room temperature. Only then do you even think about plastic wrap and the fridge. Remember that 4-hour minimum chilling time? The flavor and texture are astronomically better if you can hold out overnight, honestly. Don’t rush the chill!
Tips for Success with Your Sugar Cookie Cheesecake
Even though we followed the slow cooling method, sometimes cheesecakes still try to stick or pull away funny when you first release them from the pan. Don’t sweat it if it looks a little dramatic when you first remove the outer ring! That’s why we used that springform pan, right?
As soon as your cheesecake is fully chilled—I mean, rock solid cold after those 4+ hours—you’ll want to run a thin, sharp knife all the way around the edge where the filling meets the pan. Don’t push hard, just a gentle glide to detach the sides. Once you release the springform side, the crust often holds everything perfectly in place. If you’re having trouble getting the crust just right, mastering the creaming technique from this cookie recipe can really help build a better base!
Here are a few quick-fire things I learned the hard way:
- Room Temperature Filling: I keep stressing this, but if your cream cheese isn’t fully soft, you *will* get lumps in the filling. And nobody wants a lumpy cheesecake!
- The Crumble Placement: When you crumble that reserved dough on top, make sure it’s not piled too high. Too much dough on top bakes faster than the filling underneath, and that can sometimes lead to a drier top layer. A light, even scattering is what we aim for.
- Don’t Over-Mix the Eggs: Seriously, this is the number one cause of cracks. Beat them in one by one until they just disappear. A heavy hand with the electric mixer equals a cracked top!
If you take your time with the chilling and use that hot knife trick just before serving, you will get those gorgeous, clean slices of Sugar Cookie Cheesecake every single time. It’s worth the wait!
Storing and Reheating Your Sugar Cookie Cheesecake
Once you’ve finally waited all that time and you’ve sliced into this amazing Sugar Cookie Cheesecake, the next question is always, “How do I keep the leftovers perfect?” Because this is a baked cheesecake and not a mousse-style dessert, it actually holds up beautifully!
The absolute best way to store it is right in the springform pan, but only after you’ve taken the outer ring off and used that thin knife trick we talked about. You want to cover the whole thing—the exposed filling and the crust—tightly with plastic wrap. Some folks use a single large piece that drapes over the whole cake. Make sure it’s sealed well to keep any fridge odors out!
Refrigeration is Non-Negotiable
This dessert loves the cold! It needs that refrigeration time to fully firm up, and frankly, it tastes best when it’s chilled right before serving. You can absolutely keep it stored like this in the refrigerator for about four to five days. Honestly, if it lasts that long in your house, you’re stronger than I am!
I find that the flavor actually deepens slightly on day two, making it even better than when it was fresh. Just remember, always take it out about 15 minutes before you plan to serve slices, just to take the hard chill off the cream cheese so it comes back to that perfect, creamy texture. You don’t want it room temperature, just slightly less icy!
Serving Freshness Tips
Because this dessert relies on that cold set, reheating is really not applicable—it would just turn the whole thing into a gooey mess, and nobody wants baked sugar cookie soup, right? We want that nice, dense structure!
When you go to serve, make sure you’re using that hot, sharp knife and wiping it clean between every single slice. That’s how you get those impossibly clean edges. If you store the slices individually after cutting, wrap each one tight in plastic wrap, then maybe put them in an airtight container for the best seal.
Frequently Asked Questions About Sugar Cookie Cheesecake
I get so many questions whenever people try this recipe, which tells me you all are making it, and I just love that! I’ve pulled together some of the most common things I hear about this baked dessert to make sure yours turns out absolutely perfect from start to finish. Don’t worry if you have a little snafu; we can usually fix it!
Can I make this Sugar Cookie Cheesecake without chilling?
Oh, honey, no! I really wish you could, but chilling is honestly one of the most important steps for any proper cheesecake, especially one built on a cookie crust. If you try to slice it warm or even slightly cool, the filling is going to just slump right out when you cut it. It needs that good 4-hour chill—or ideally, overnight—to fully set up and achieve that dense, creamy texture we are striving for. The chilling time is what firms up the eggs and cream cheese so you get those picture-perfect slices!
What is the best way to get clean slices?
This is my biggest trick, and it works on every cheesecake I’ve ever made! You need a long, thin knife—not one of those chunky butter knives. First, make sure the cheesecake is cold, cold, cold from the fridge. Dip your knife into a tall glass of very hot water for about 10 seconds, wipe it completely dry, and then make your first, smooth slice. Repeat that hot water dip and dry wipe between *every single cut*. This keeps the blade clean and melts just enough of the filling edge so it doesn’t drag, giving you a beautiful, clean presentation!
Can I add frosting to this baked dessert?
You totally can! Since the top layer of the crust is already a crumbly cookie, you can treat it just like a regular cake once it’s chilled. I usually keep things simple because the flavor combo is already pretty strong, but if you want that extra bit of fabulousness, go for it!
Best Toppings for Your Baked Dessert
A simple vanilla buttercream piped on top, maybe slightly swirled to resemble soft peaks, looks amazing. Alternatively, a thin cream cheese glaze drizzled over the top before serving also adds great moisture. And hey, since it’s a sugar cookie base, you know I always recommend a handful of colorful sprinkles scattered over the frosting just before you bring it out to the party! It makes the whole dish look fun and celebratory.
Storing and Reheating Your Sugar Cookie Cheesecake
Since this gorgeous Sugar Cookie Cheesecake is a baked item, it stores wonderfully, but you have to handle it correctly to maintain that creamy texture. I highly recommend leaving it in that 9-inch springform pan with the ring removed once it has fully chilled—just cover the whole thing tightly with plastic wrap. You want to lock in that moisture!
It keeps beautifully in the refrigerator for about five days. In fact, I think the flavors meld together even better on day two! The one thing you absolutely *cannot* do is try to reheat this dessert. Reheating a cheesecake turns the texture grainy and soft way too fast. We worked so hard for that density, so we preserve it in the cold!
If you accidentally cut into it and only have a few slices left, transfer those individual slices to an airtight container. Make sure they are wrapped tightly in plastic wrap first, though! That helps prevent them from drying out or absorbing any weird fridge smells. Don’t freeze it if you can help it; the texture doesn’t recover as well after thawing.
Nutritional Estimate for Sugar Cookie Cheesecake
Okay, so because this is decadent, rich, and loaded with butter and cream cheese—as all the best things are—it does come with a respectable calorie count. Remember, these numbers are just estimates based on the standard ingredients and serving sizes listed!
For one slice of this glorious dessert:
- Calories: Around 450
- Fat: About 27 grams
- Carbohydrates: Roughly 45 grams
- Protein: About 8 grams
It’s definitely a treat meant for special occasions, so enjoy it without guilt! You earned every bite of that buttery crust and creamy filling.
Nutritional Estimate for Sugar Cookie Cheesecake
Okay, so because this is decadent, rich, and loaded with butter and cream cheese—as all the best things are—it does come with a respectable calorie count. Remember, these numbers are just estimates based on the ingredients and serving sizes listed in the recipe! I always tell my friends to think of this as a holiday indulgence, not an every-day snack.
For one slice of this glorious dessert, you’re looking at these averages:
- Calories: Around 450
- Fat: About 27 grams
- Carbohydrates: Roughly 45 grams
- Protein: About 8 grams
It’s definitely a treat meant for special occasions, so enjoy it without guilt! You earned every bite of that buttery crust and creamy filling. If you’re tracking sodium or sugars, take a look at the full chart above, but honestly, when something tastes this good, I try not to pay too close attention to the decimals!
Sugar Cookie Cheesecake
Ingredients
Equipment
Method
- Preheat your oven to 350 degrees F (175 degrees C). Grease and flour a 9-inch springform pan.
- Make the crust: In a large bowl, cream together the butter and sugar until light and fluffy. Beat in the egg and vanilla extract.
- In a separate bowl, whisk together the flour, baking powder, and salt. Gradually add the dry ingredients to the wet ingredients, mixing until just combined. Do not overmix.
- Press about two-thirds of the dough evenly into the bottom of the prepared springform pan to form the crust. Reserve the remaining one-third of the dough for the topping.
- Make the filling: In a separate large bowl, beat the softened cream cheese and sugar until smooth. Beat in the sour cream and vanilla extract.
- Beat in the eggs one at a time, mixing just until each egg is incorporated. Pour the cheesecake filling over the crust in the pan.
- Crumble the reserved dough evenly over the top of the cheesecake filling.
- Bake for 60 minutes, or until the edges are set and the center has only a slight jiggle. Turn off the oven and let the cheesecake cool in the oven with the door ajar for 30 minutes.
- Remove the cheesecake from the oven and let it cool completely on a wire rack. Once cool, cover and refrigerate for at least 4 hours, or preferably overnight, before slicing and serving.