

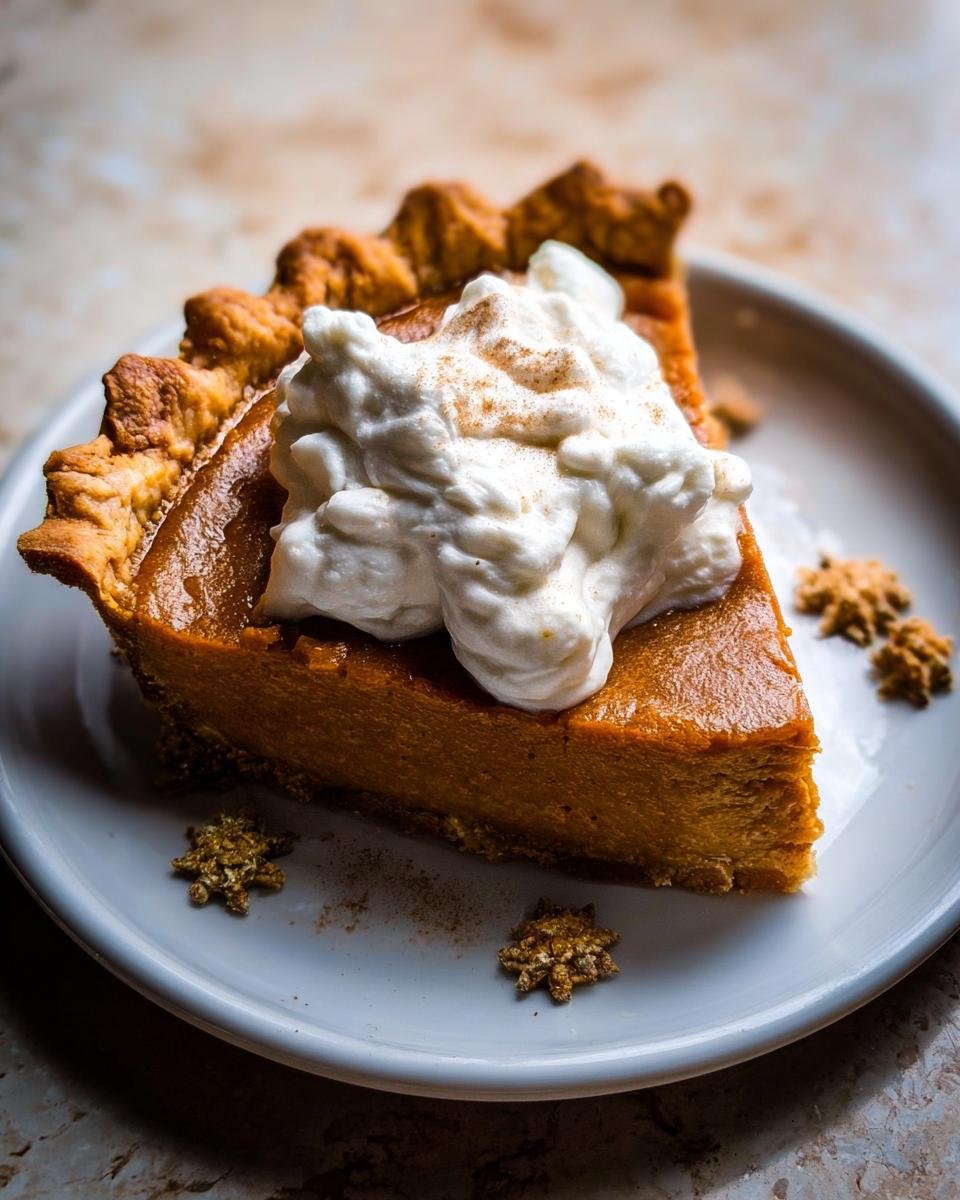
There’s just nothing that smells more like cozy autumn comfort than a perfectly spiced pumpkin pie baking in the oven. I love everything about this holiday classic, but years ago, I found traditional recipes just hit my sweet tooth a little too hard. Growing up, my mom made a pie that filled the whole kitchen with cinnamon and nutmeg spice, but when I started focusing on nutrition, I knew I could find a balance.
That’s why this recipe for Silky Pumpkin Pie with Maple Cream is absolutely crucial for my family now. I spent ages experimenting, and this version nails that deeply satisfying, smooth texture we all crave, while using real maple syrup and fewer refined sugars. It feels indulgent enough for any holiday table, but it supports my wellness goals perfectly. As I learned more about nutrition, I kept tweaking those spices and sweeteners. You can learn more about my journey over on my About Me page. Trust me, after you try this adaptation, you’ll never go back to the overly sweet stuff!
Why This Silky Pumpkin Pie with Maple Cream is Your New Holiday Favorite
When it comes to holiday baking, we need desserts that taste amazing but don’t derail our whole month! This pie hits that sweet spot perfectly. It gives you that deeply satisfying pumpkin flavor without being sugary, guaranteeing everyone at the table, from the little ones to the pickiest relatives, will love it.
The absolute best part, besides the flavor balance, is how easy it is to make from scratch. You won’t be fighting fussy steps when you have a house full of holiday prep going on. I love that I can whip this up and leave it chilling, knowing I have a beautiful, family friendly dessert ready to go.
Key Benefits of Our Silky Pumpkin Pie with Maple Cream
- It achieves an unbelievably silky texture—no grittiness allowed!
- The real maple cream topping adds just the right amount of light sweetness, which you can learn more about in the Lightened-Up Comfort Food section.
- It’s an incredibly easy pie recipe to manage, even for beginner bakers.
- It’s a family friendly favorite that tastes homemade without the immense sugar crash.
Gathering Ingredients for Silky Pumpkin Pie with Maple Cream
Okay, ingredient sourcing is where we build that foundational trust, right? You can’t get that signature silky texture if you skip out on the good stuff, especially when making this pie from scratch. I always make sure I have every spice measured out before even thinking about turning on the oven. If you’re looking for inspiration on where to source the best autumnal flavors, check out some tips in my Farm Fresh Recipes category!
We break this down into two parts: the foundation pie and the beautiful, airy topping. Pay special attention to the heavy whipping cream—we need that fat content for the filling to set beautifully smooth!
For the Pie Filling and Crust
For the main event, you’ll need:
- One pie crust, use your favorite homemade recipe or a good store-bought one.
- One 15-ounce can of pumpkin puree (make sure it’s puree, not pie mix!).
- For richness, we use 1/2 cup of heavy whipping cream (I always reach for Land O Lakes®).
- Three eggs—these are key for structure!
- 1/3 cup of pure, *real* maple syrup.
- Two tablespoons of dark brown sugar for a deeper molasses note.
- Two teaspoons of vanilla extract.
- And a symphony of spices: 1 teaspoon cinnamon, 3/4 teaspoon ginger, 1/2 teaspoon nutmeg, 1/4 teaspoon cardamom, and 1/4 teaspoon cloves.
- Don’t forget 1/2 teaspoon kosher salt and just a *tiny* pinch of pepper—it wakes up the pumpkin flavor!
For the Maple Whipped Cream Topping
This topping is what makes the pie special, so don’t skimp here!
- You need 1 cup of heavy whipping cream again (Land O Lakes® works great).
- Two tablespoons of real maple syrup for drizzly sweetness.
- The seeds scraped from one vanilla bean—the flavor is incredible!
- If you want a little crunch, you can sprinkle on some chai sugar, but this is totally optional.
Essential Equipment for Perfect Silky Pumpkin Pie with Maple Cream
To get that gorgeous, clean slice of pie texture we’re aiming for, you need the right tools ready to go before the holiday chaos kicks in. I keep everything out on the counter; it just makes the process so much smoother when you’re rushing around that day. Having the right gear totally supports the whole ‘easy’ aspect of this pie!
Here is what you absolutely must have pulled out of your cabinets for assembling this beauty:
- You’ll need an 8-inch pie plate. This size works perfectly with the filling quantity.
- A good sized mixing bowl for combining all those spices and the creamy filling.
- An electric mixer—this is honestly non-negotiable for getting that maple cream whipped up into soft, beautiful peaks!
- To blind bake the crust properly, grab some parchment paper. We need this for lining the crust before we add the weights!
Step-by-Step Instructions to Make Silky Pumpkin Pie with Maple Cream
This is where the magic happens! Don’t let the steps scare you; this whole process takes about 20 minutes of hands-on prep time, followed by about 105 minutes of gentle baking time. I always start this pie in the early afternoon so it has plenty of time to chill before dessert time. If you need quick tips for getting through the active steps, check out my guide on quick and easy keto recipes—the mindset is similar!
Preparing and Blind Baking the Crust
First things first, get that oven ready! We need to preheat it to 375 degrees F. Go ahead and grease your 8-inch pie plate really well—butter is my go-to here. Next, gently fit your crust into the plate. Now, we blind bake, which is crucial for avoiding that dreaded soggy bottom. Line the crust with parchment paper and fill it up! Use pie weights, dried beans, or even rice for weight. Bake that shell until the edges look set, which should take about 30 to 35 minutes. Then, carefully remove the weights and paper and bake it for about 10 more minutes until it gets a lovely golden tint. Once you pull that partially baked crust out, immediately reduce your oven temperature down to 325 degrees F.
Mixing and Baking the Silky Pumpkin Filling
Time to mix the filling! Grab your biggest mixing bowl. You just need to combine absolutely everything for the filling: that 15-ounce can of pumpkin puree, the half cup of heavy cream, all three eggs, the maple syrup, brown sugar, vanilla, and that whole beautiful blend of spices, salt, and pepper. Mix it until it looks totally smooth—you shouldn’t see any streaks of egg or spice clumps. Seriously, whisk until it’s uniform. Pour this luscious mixture right into your warm, ready-to-go crust. Pop it into the 325-degree oven. It needs about 50 to 55 minutes. Remember, we are aiming for silky, so the very center should have just a slight jiggle when you give the pan a gentle nudge—it will set up completely as it cools!
Creating the Maple Whipped Cream and Serving
Once it’s baked, take the pie out; it must cool completely before chilling. The recipe calls for at least 120 minutes of chilling time in the fridge to lock in that silky texture! While it’s chilling, or just before serving, whip up the topping. Using your electric mixer, whip the 1 cup of heavy cream until you start seeing nice soft peaks form. Then, gently beat in the 2 tablespoons of maple syrup and those gorgeous vanilla bean seeds. Whip just a little bit more until it’s fluffy. At serving time, top each slice with a cloud of that maple cream and a sprinkle of chai sugar if you grabbed some. Enjoy!
Tips for Achieving the Best Silky Pumpkin Pie with Maple Cream Texture
When people ask me how I get my pumpkin pie so incredibly smooth and silky—not grainy or overly dense—it all comes down to a few small but mighty details. As someone who was trying to pull back on sugar while keeping the classic holiday feel, I learned that technique matters just as much as sweetening! You can find some great meal pairing ideas in my Lightened-Up Dinner Ideas section for when you serve this pie!
The biggest texture enemy in any custard pie is over-mixing the eggs, which can incorporate too much air and cause cracking or a spongy center instead of that luscious silkiness. I learned this the hard way!
Ingredient Notes and Substitutions
Let’s talk ingredients, because even though this pie keeps the sugar lower, the quality has to be high. You absolutely must use real maple syrup here. Don’t even think about grabbing the pancake syrup substitute—that watery stuff has corn syrup and won’t give you the deep, earthy caramel flavor that plays so nicely with the cinnamon and nutmeg in the filling. It’s worth every penny!
For the pumpkin, make sure you are using 100% pumpkin puree from a can, not pre-made pumpkin pie filling. That filling already has sugars and spices mixed in, and we want total control over those elements since we are managing the sweetness here.
If you are watching carbs closely, you might wonder about swapping the maple syrup. While you *can* swap it for a liquid low-carb sweetener, I just won’t promise the same depth of flavor you get with the real deal. If you do substitute, reduce the heavy cream slightly in the filling, as some sweeteners are more watery than maple syrup.
Make-Ahead and Storage for Your Silky Pumpkin Pie with Maple Cream
One of the best things about this recipe being family friendly is that it truly shines when made ahead of time! Planning ahead is essential during the holidays, and honestly, this pie tastes even better the next day once all those warm spices have had a chance to really meld into that silky filling base. If you are prepping for a big event, you can definitely bake this while you are working on your weekly meal prep routine; check out my thoughts on Fresh Weekly Meal Prep for more scheduling ideas!
Here’s the essential rule for making sure your pie presentation is flawless: DO NOT touch the topping until you are ready to serve.
You can successfully bake the entire pie—crust and filling—up to two days in advance. Once it’s completely cool (after that 120-minute chill time!), cover the pie tightly with plastic wrap. Don’t wrap it so tight that the plastic touches the filling, though; I usually float a piece of foil over the top first, then wrap loosely with plastic wrap around the edges of the pie plate.
If your pie is stored in the refrigerator, it should be good for nearly two full days. When you are about 30 minutes away from serving, that’s when you pull out your heavy whipping cream and whip up the maple cream topping. Apply that cloud of sweetness right before slicing. If you have any leftovers, just cover the remaining pie tightly without the whipped topping, or gently scrape the topping off before storing the pie slices.
For storage of leftover slices, they’ll keep well in the fridge for about four days. If you want to freeze the pie (without cream!), wrap it exceptionally well, like you’re freezing a precious gift. Thaw overnight in the fridge before serving warm or cold.
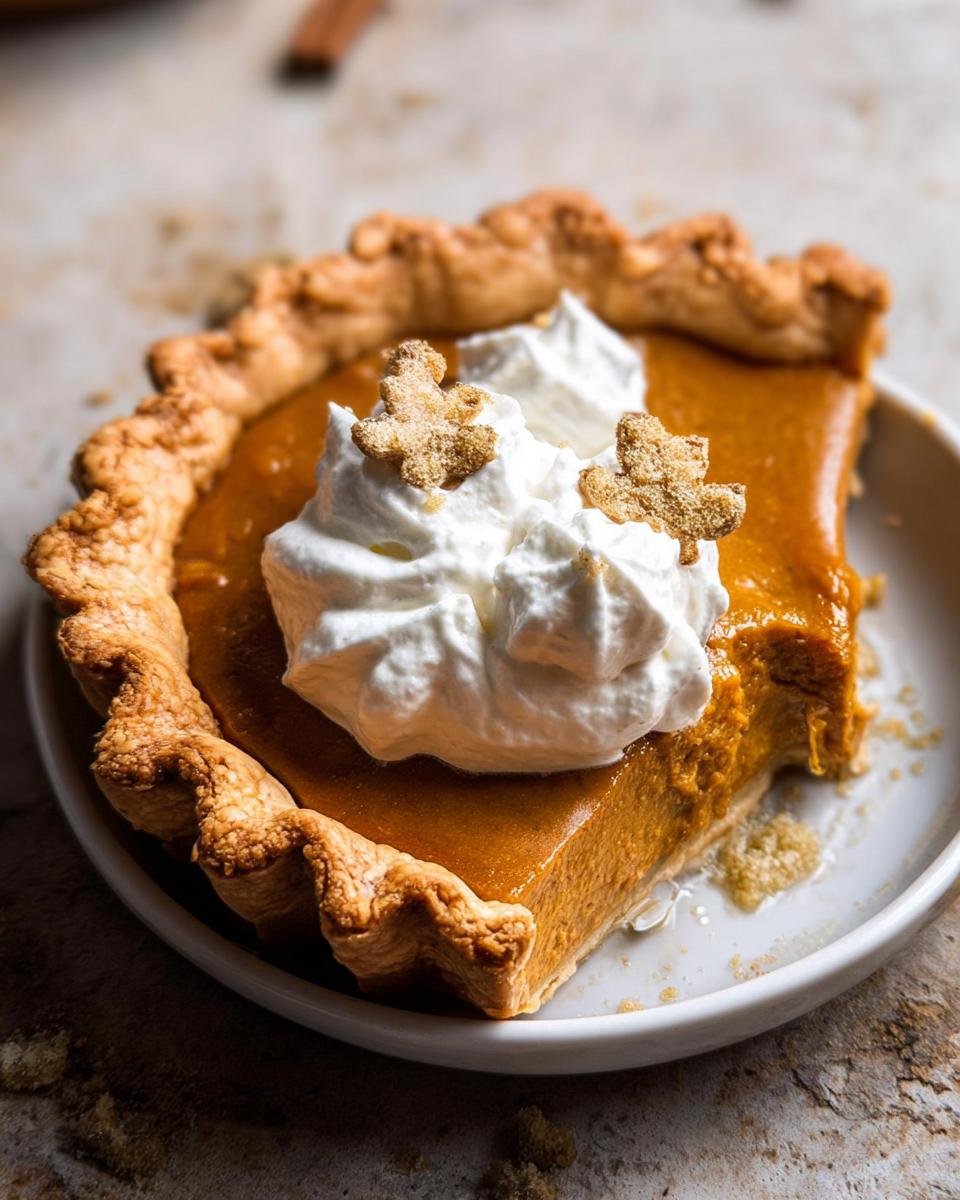
Presentation Ideas for Your Holiday Silky Pumpkin Pie with Maple Cream
Even though this pie is designed to be easy, we want it to look like it took three days to complete, right? The beauty of the Silky Pumpkin Pie with Maple Cream is that the filling is so smooth and the topping is so airy, it practically presents itself!
The best presentation is often the simplest, especially when you’re balancing a huge holiday meal. Since we are cutting back on sugar, the natural fall colors really pop, so let’s lean into that!
Here are a few ways I dress up my pie for the family table:
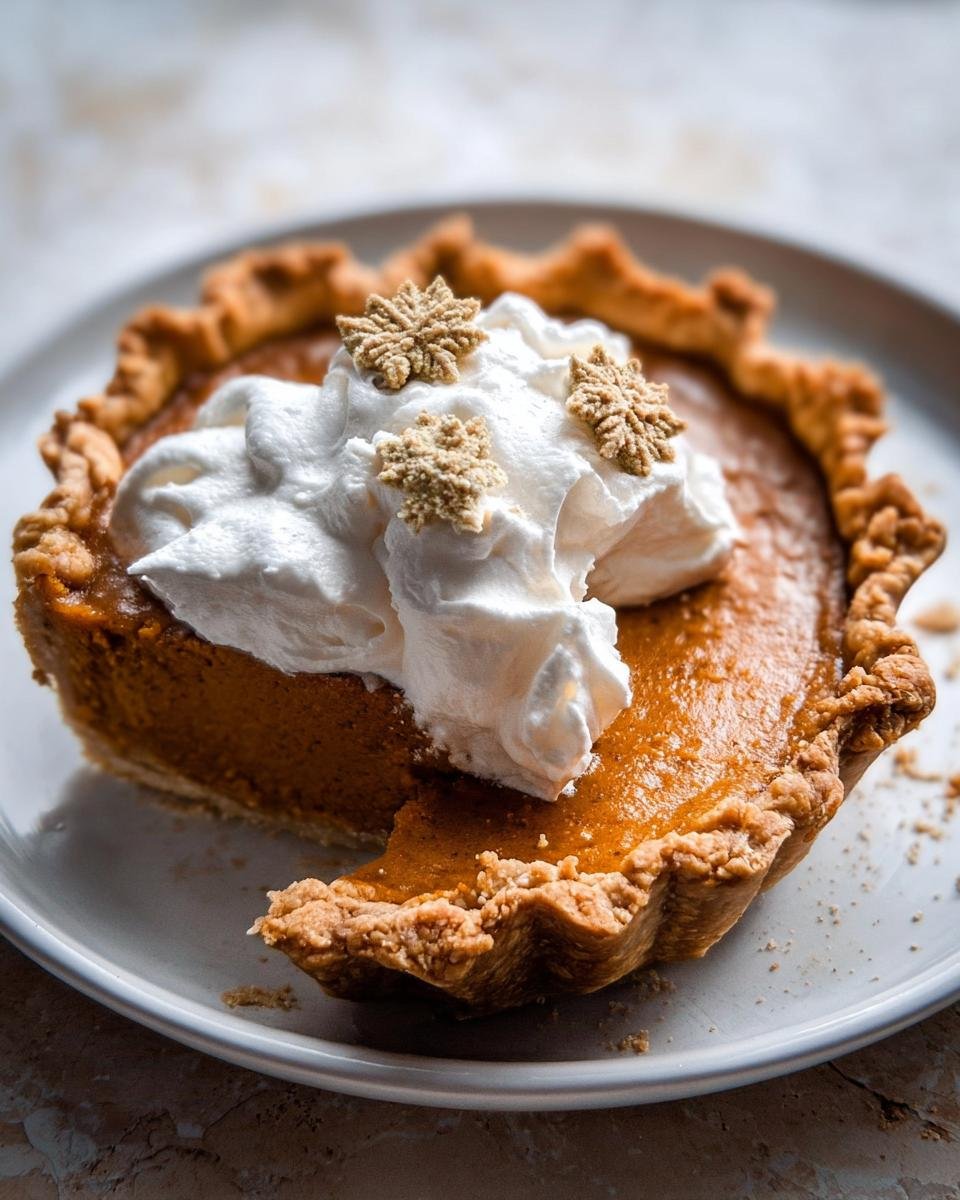
- Leaning on the Chai Sugar: If you opted to use the chai sugar sprinkle, this is your moment! Don’t just sprinkle it randomly; use a small sieve or sifter and dust it right over the center of the whipped cream cloud. It looks elegant and gives people a little preview of the spices inside.
- Edge Detail with Maple Drizzle: Once the maple cream topping is dolloped on, take a tiny bit of reserve maple syrup—maybe just a teaspoon—and gently warm it for about five seconds so it’s really runny. Use a fork or a small spoon to drizzle just a few thin lines across the cream. It catches the light beautifully.
- Natural Garnishes: Because this pie isn’t covered in heavy frosting, you can use whole, natural elements. I love placing four small, whole pecans or walnuts, perfectly aligned, on top of the cream at the 12, 3, 6, and 9 o’clock positions. It adds texture contrast and screams happy fall harvest!
- Serving Temperature Matters: Remember, because this is a silky custard, it needs to be thoroughly chilled. Serve it directly from the fridge. A cold pie holds its shape better when sliced, and that contrast between the cool, smooth filling and the fresh, airy cream on top is just delightful.

Honestly, though, the biggest tip is to serve it on my favorite vintage cake stand. It just elevates everything, instantly making this easy pie feel like a showstopper!
Frequently Asked Questions About This Pie Recipe
We all get those little panics when baking, right? Like, did I bake the crust long enough? Will it crack when I slice it? Don’t stress! This is a super friendly pie, and these common questions pop up all the time, especially when you’re focused on making an easy, beautiful calorie smart recipe for your gathering.
Can I use a graham cracker crust instead of traditional pie crust?
You totally can! Graham cracker crusts bake up really fast. If you swap it in, you’ll only need to pre-bake it for about 10 to 12 minutes total, just until it’s set, before you pour in the filling. Since this recipe is focused on getting that silky texture in the filling, using a store-bought crust variation is a super easy shortcut for your holiday prep!
How do I know when the pie is truly done baking?
This is the key to keeping that silky texture! Forget setting a timer and walking away. When you gently nudge the edge of the pie plate, the edges of the filling should look totally set, but the very center—about the size of a quarter—should still have a slight, gentle wiggle. It shouldn’t look like liquid, that’s for sure! It will firm up completely once it hits that cold refrigerator after the oven. If you bake it until it’s completely solid in the oven, you’ll end up with a denser, less luxurious filling.
Is this recipe suitable for a family friendly holiday dessert?
Absolutely! This is exactly why I tweaked it. It hits all those warming, comforting notes you expect during the holidays, thanks to the cinnamon, ginger, and nutmeg, but we deliberately pulled back on the refined sugar. The result is a pie that is balanced—sweet enough to feel decadent and special, but not so sweet that it overwhelms the pumpkin flavor. It’s a genuine crowd-pleaser that everyone can enjoy!
Nutritional Estimates for Silky Pumpkin Pie with Maple Cream
I know so many of you who are reading this are focused on mindful eating, just like I am! When I developed this recipe, I wanted to ensure it still fit beautifully into a healthy diet while celebrating the healthy diet meals philosophy. It’s still a treat, of course, but one we can enjoy without guilt on Thanksgiving or Christmas.
I’ve run the numbers based on the ingredients list—remembering we’re using maple syrup instead of tons of white sugar—and here are the estimates per slice (serving 8 slices total). But, and this is important for us home cooks focused on trust: these are just estimates! Your crust choice and exact brand of heavy cream can shift these numbers slightly, so take them as a helpful guideline rather than a total guarantee!
For one slice of this amazing pie, here’s what you’re looking at:
- Calories: About 350
- Carbohydrates: Around 35 grams
- Protein: Approximately 8 grams
- Fat: Roughly 20 grams
- Sugar: Around 20 grams (mostly from the natural maple syrup and the pumpkin itself—much better than refined white sugar!)
See? That’s a manageable slice for any holiday feast. It tastes like indulgence, but the numbers keep you feeling responsible. Happy eating!
Share Your Silky Pumpkin Pie with Maple Cream Success
Wow, I am so excited for you to try our Silky Pumpkin Pie with Maple Cream! It really is my favorite holiday dessert because it tastes rich and special without forgetting where we are on our wellness journey. Baking is always better when it’s shared, so I truly hope you’ll stop by and let me know what you think!
When you make this for your holiday table, please come back and leave a star rating right here on the blog. Ratings help other bakers who are looking for an easy, healthier slice of tradition find this recipe. I read every single comment, and seeing that one of my tweaks brought a little bit of cozy fall comfort into your own home means the world to me. It’s part of why I love sharing these adapted family recipes!
And if you snap a picture of your perfectly smooth pie topped with that gorgeous maple whipped cream, please tag me on social media! I adore seeing everyone’s finished beauties—whether you went classic with the chai sugar sprinkle or tried my drizzle idea. If you want to read a bit more about why I share all these recipes, you can visit my About Us page. Happy baking, friends, and thank you for being part of this kitchen family!

Silky Pumpkin Pie with Maple Cream
Ingredients
Equipment
Method
- Preheat the oven to 375 degrees F. Grease an 8-inch pie plate with butter.
- Fit the pie crust into the prepared pie plate. Line the crust with parchment paper and fill with pie weights, beans or rice. Transfer to the oven and bake until the crust is set, 30 to 35 minutes. Remove pie weights and continue to bake until the crust is golden, about 10 minutes. Remove from oven. Reduce the oven temperature to 325 degrees F.
- To make the pumpkin filling, mix together the pumpkin, heavy cream, eggs, maple syrup, brown sugar, vanilla, cinnamon, ginger, nutmeg, cardamom, cloves, salt, and pepper in a mixing bowl until combined. Pour the mixture into the baked crust.
- Transfer the pie to the oven and bake for 50-55 minutes or until the center no longer jiggles. Remove from the oven and let cool, then place in the refrigerator to cool completely.
- Using an electric mixer, whip the cream until soft peaks form. Add the maple syrup and vanilla bean seeds. Whip once more until combined and fluffy.
- When ready to serve, top the pie with the maple cream and sprinkle with chai sugar, if desired. Slice and serve.