
Oh, the holiday dinner panic! We’ve all been there, staring down a gorgeous, expensive prime rib roast, convinced that this is the one time we are absolutely going to mess up the centerpiece of the entire feast. Seriously, I used to sweat prime rib more than any other recipe. It felt like such an intimidating cut of beef, and I kept picturing that sad, grey, overcooked roast hanging out on the platter.
But listen, I’m here to tell you that stress is officially over! After years of trial and error—and yes, one memorable near-disaster involving a rushed oven temperature change—I figured out the secret dance this cut of meat requires. This method is so reliable, I’m calling it my recipe for **Perfect Prime Rib Every Time**.
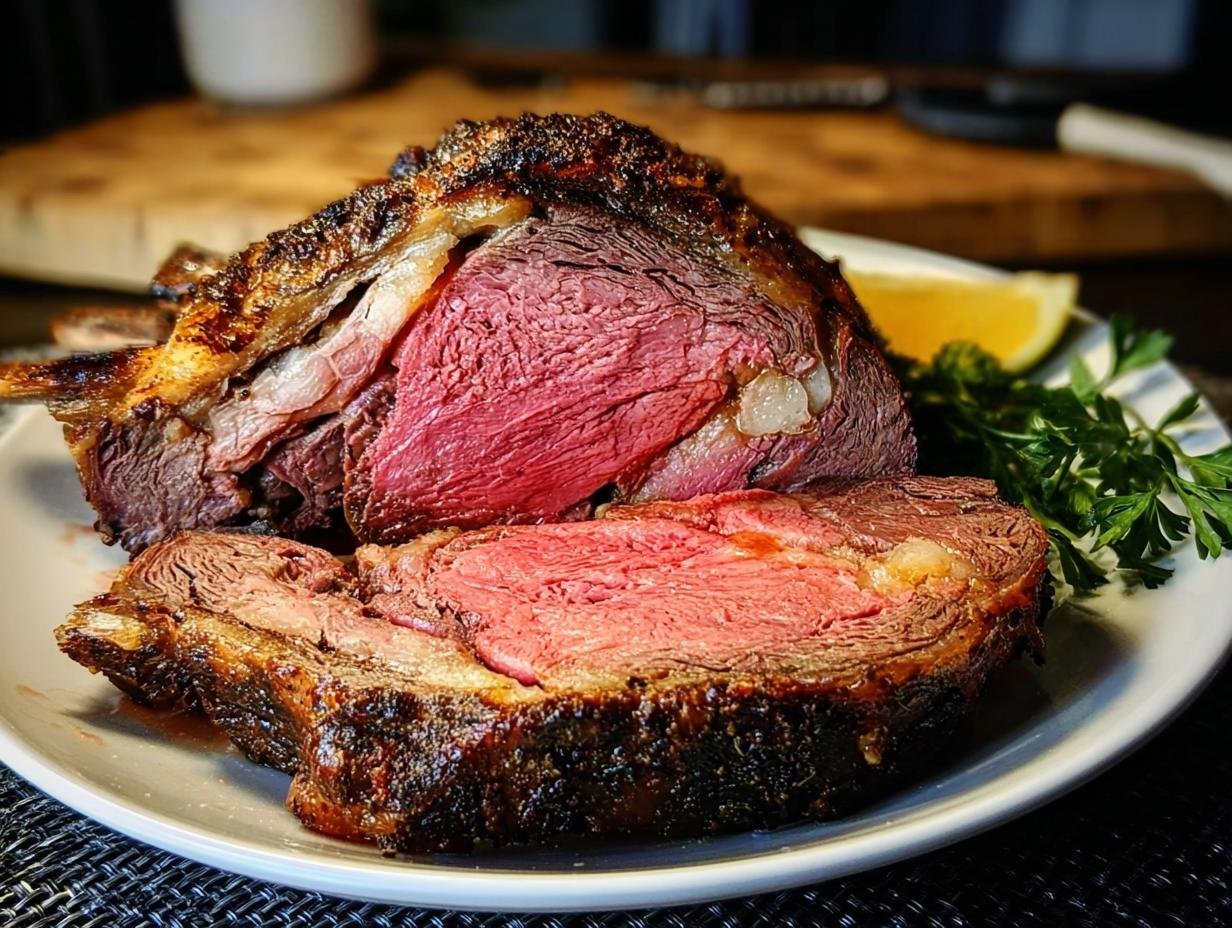
I still remember the first time I made prime rib for a winter dinner gathering. I was nervous, convinced it would be complicated or that I’d overcook such a beautiful cut of meat. But as it roasted slowly in the oven, filling the kitchen with rich, savory aromas, I realized how simple and meditative the process could be. The moment I sliced into that perfectly tender roast, I felt an unexpected sense of pride—and that experience has stayed with me ever since, shaping how I approach comforting, celebratory meals today.
We’re going to use a simple, two-stage temperature trick that locks in all the goodness. Trust me, you’ve got this!
Why This Method Guarantees a Perfect Prime Rib Every Time (Authoritative Tips)
Look, the reason so many people stress about prime rib is they stick to one temperature the whole time. That’s a recipe for a sad grey band around a pink middle, and we don’t want that! This technique I use is all about control and respecting the meat. It’s how you get a beautiful crust while keeping that beautiful tenderness inside, which is the real secret to achieving **Perfect Prime Rib Every Time**.
We nail the exterior crust first, then we let the inside cook gently. It sounds fancy, but it’s incredibly easy once you trust the thermometer. Don’t even look at the clock too much; your meat thermometer is your best friend here!
Understanding the Two-Stage Cooking Technique for Perfect Prime Rib Every Time
This is the magic moment where we earn that title of **Perfect Prime Rib Every Time**. We start high—really high, 450 degrees!—for just 15 minutes. That blast of heat sears the outside, kind of caramelizing those beautiful fats and seasoning, giving you that gorgeous brown color you crave.
Right after that initial blast, we drop it way down to 325 degrees Fahrenheit. We don’t even open the oven door when we do this! Keeping that door shut is vital because we want to gently roast the inside without messing up the sear we just created. This slow, steady heat allows the center to cook evenly, bringing it right up to the perfect finishing temperature without any fuss or panic.
Essential Ingredients for Perfect Prime Rib Every Time
Okay, so here’s the amazing part: you don’t need a huge list of fancy things to make this roast taste incredible. The quality of the meat does most of the heavy lifting, which is why choosing a nice cut is key. We are keeping the sides simple here so you have more time to focus on the main event, or maybe whip up some easy cheesy rolls for dipping in the drippings later!
You need your roast, a little garlic powder, salt, and pepper. That’s it. Seriously, those three spices are everything we require for that **Perfect Prime Rib Every Time** result. Don’t overthink it!
Seasoning Blend Notes and Preparation
My biggest advice on seasoning is to be generous—and I mean *generous*. Don’t be shy with the salt and pepper, and make sure that garlic powder coats every single nook and cranny. I usually mix my salt, pepper, and garlic powder right in my hand before rubbing it all over the chilled roast. Give it a good massage!
You want a solid crust before it ever sees the oven, and that simple rub is exactly what gives you the flavor foundation for a **Perfect Prime Rib Every Time**. Just ensure you do this after it has tempered on the counter for those two hours!
Equipment Needed for Perfect Prime Rib Every Time Success
You don’t need a whole suite of fancy gadgets for this, but there are two things you absolutely cannot skip if you want that **Perfect Prime Rib Every Time** result. Yes, I’m talking about a sturdy roasting pan that has a rack—that rack is important because we need air circulating all around that glorious hunk of beef.
But the real star? The digital meat thermometer. Seriously, toss out the old pop-up timers; they are useless! You need to know the internal temperature, and that’s non-negotiable for success. If you haven’t checked out my background yet to see how seriously I take kitchen tools, you can read a little bit about me here.
So, grab your roasting pan with the rack and make sure that reliable meat thermometer is right there on the counter. That’s it for equipment!
Step-by-Step Instructions: Achieving Perfect Prime Rib Every Time
This is where the magic happens! Don’t worry, I’m going to walk you through this so slowly you’ll feel like you’re next to me in the kitchen, checking the oven door. Follow these exact steps, and you are practically guaranteed a showstopper roast. Think of this entire process as setting up the perfect stage for a truly celebratory meal. If you want to see how I handle the drippings for amazing gravy, check out my favorite way to make juicy roast chicken with pan drippings—the principle is similar!
Preparation and Initial High-Heat Blast
First things first: this roast needs to relax! Take it out of the fridge about two hours before you even think about turning on the oven. It needs to come almost to room temperature; this is called tempering, and it helps prevent that weird cool center when the outside is cooked. Once it’s tempered, crank your oven up to a blazing 450 degrees Fahrenheit.
Rub that roast down aggressively with your seasoning blend—really work it in! Place it fat-side up on the rack in the pan, and slide it into that screaming hot oven for exactly 15 minutes. Then, here’s the vital bit for **Perfect Prime Rib Every Time**: reduce the heat to 325 degrees Fahrenheit. Whatever you do, **do not** open the oven door while you’re changing the temperature. Just turn the dial and let it bake!
Low and Slow Roasting: The Key to Perfect Prime Rib Every Time
Now that we’ve set our crust, we settle in for the long haul at 325 degrees. This is where you really need that meat thermometer. Forget timing per pound recipes if you want that **Perfect Prime Rib Every Time**—the actual thermometer reading is the only way to know for sure. A good rule of thumb is about 12 to 15 minutes per pound if you want rare, but always go by feel!
When you check it, slide that thermometer right into the thickest part of the roast, making absolutely certain you aren’t touching any bone. Hitting bone will give you a false, higher reading, and that’s how you accidentally overcook this beauty. Keep checking every 20 minutes or so until you hit your initial target temp.
Temperature Targets and Resting for the Final Result
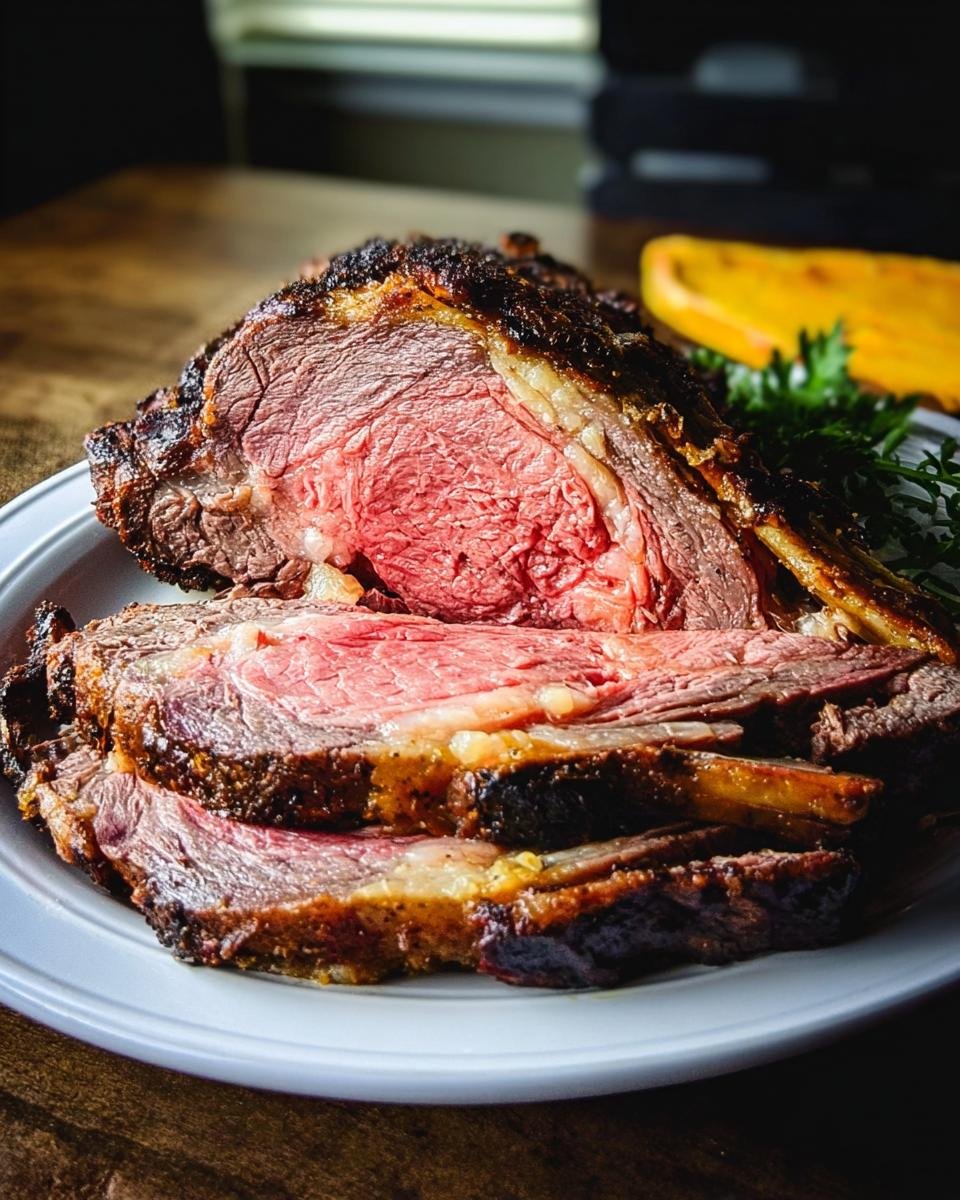
Here are the numbers I swear by. Pull the roast out when the thermometer reads 120°F for rare, 130°F for medium-rare (my personal favorite!), or 140°F if you prefer medium. Remember, the roast keeps cooking after it leaves the heat—this is called carryover cooking!
Transfer that gorgeous roast to a cutting board and lightly tent it with foil. Now, walk away! It *must* rest for a solid 15 to 20 minutes. This resting time allows all those hard-earned juices to redistribute back into the meat. When you pull it out at 120°F, it will easily climb 5-7 degrees while resting, landing you in that perfect, juicy rare zone. Patience here is what solidifies your **Perfect Prime Rib Every Time** success!
Tips for Success When Making Perfect Prime Rib Every Time
Now that you know the high-low method, let’s talk about those little things that trip people up. Even with the right technique, a couple of small blunders can derail your **Perfect Prime Rib Every Time** goal. First off, if you’re using a bone-in roast, I always suggest tying it tightly with kitchen twine before seasoning. This helps those non-uniform parts cook a little more evenly, which is a lifesaver!
Another great tip is to let those drippings collect! Don’t let them just sit sadly in the pan; save them immediately. They are liquid gold for making the best gravy, or you can toss them into your next batch of creamed spinach for a major flavor boost. Finally, if you find your roast looks a little pale after resting, don’t panic! You can always blast it back under the broiler for one minute per side for color, but only *after* it has rested completely.
Serving Suggestions to Complement Your Perfect Prime Rib Every Time
You’ve nailed the roast for your **Perfect Prime Rib Every Time**—fantastic! Now we need to make sure the table looks just as good as that centerpiece tastes. A roast this rich needs sides that can stand up to it but also offer a nice, bright contrast. Don’t forget, this impressive main dish always makes the whole spread feel fancier, which means you can go slightly easier on the appetizers! Think about those gorgeous holiday spreads; this easily anchors a selection of **NYE Appetizers**.
When I serve prime rib, I always make a mix of hearty, comforting sides and then throw out a beautiful spread of lighter bites so people can graze before dinner is ready. Sides like my incredibly sweet and tender honey butter cornbread or a creamy, cheesy cauliflower gratin are non-negotiable in my house. They just soak up those glorious pan drippings so well!
Pairing with Crowd-Pleaser Snacks for the Gathering
Since you’ve spent time creating the absolute best roast beef, you shouldn’t have to slave away making eight different complicated starters. This magnificent prime rib pairs perfectly with the pre-meal nibbles. I love having a massive Grazing Board out with some fancy cheeses and olives so people can snack easily.
When your guests are chatting and mingling, having some simple **Crowd-Pleaser Snacks** ready means they stay happy waiting for the main event. You want things that are easy to grab while standing up, maybe some **Bacon-Wrapped Bites** or simple **Sliders & Skewers**, so everyone feels like they are being treated but you aren’t stressed out in the kitchen.
Storage and Reheating Instructions for Leftover Perfect Prime Rib Every Time
Oh dear, the dreaded leftovers question! But honestly, leftover protein is the best, provided you treat it right. For storing your **Perfect Prime Rib Every Time**, the key is to keep those slices away from the air so they don’t get dry and tough. Wrap individual slices tightly in plastic wrap first, then pop them into an airtight container in the fridge. They’re usually great for about four days!
When you want to reheat slices—maybe for a quick lunch or some late-night snacking—you have to be gentle. Never microwave a whole stack! Lay the slices in a baking dish and add just a tablespoon or two of beef broth or the collected pan juices over the top. Cover the dish tightly with foil and warm it in a 300-degree oven until heated through. This keeps the meat lovely and moist. You can check out how great leftover roast beef is with some simple oven roasted vegetables on the side!
Common Questions About Perfect Prime Rib Every Time
When you’re aiming for that legendary **Perfect Prime Rib Every Time**, I totally get that questions pop up, especially when you’re planning a big holiday spread. It’s one thing to read the steps, but it’s another to know exactly how to handle a bone-in vs. a boneless roast, or what to do if you need to start prepping early.
Honestly, most of my questions revolve around the final temperature and resting, which makes total sense! If you’re planning a huge dinner with lots of different dishes, remember this roast is one of the best things you can handle as part of your **Make-Ahead Party Recipes**, since the prep is so simple!
Is it better to cook bone-in or boneless roast for the best results?
Oh, this is a big one! I’m going to tell you the real deal: bone-in is generally better for flavor and insulation. The bone acts like a natural shield, keeping that meat right next to it from overcooking as fast. That means you often get a more consistently cooked roast from edge to center with a bone-in piece.
However, boneless is easier to carve, and if you use the two-stage roasting method exactly like we talked about, you can still achieve delicious results! Just watch that thermometer like a hawk, because boneless roasts tend to cook just a little faster overall.
What if I want it medium-rare—should I remove it from the oven at 130°F?
This is the most important temperature question for a **Perfect Prime Rib Every Time**! No, you shouldn’t remove it at 130°F if you want medium-rare when it’s time to eat. Remember that carryover cooking we talked about? The internal temperature will jump another 5 to 7 degrees while it’s resting under that foil tent.
So, for a perfect medium-rare finish (which is usually around 135°F when you serve it), you need to pull it from the oven when the thermometer hits 130°F. If you want rare, pull at 120°F. If you want medium, pull it at 140°F. Always go low when removing it!
How long should I let the prime rib rest before slicing?
Please, please, please do not skip this step! This resting period is just as crucial as the roasting itself for achieving that **Perfect Prime Rib Every Time**. If you cut into it immediately after it comes out of the oven, all those juicy, flavorful liquids that have been pushed to the outside of the roast during the cooking process will just run out all over your cutting board.
You need 15 to 20 minutes minimum. Tent it loosely with foil—not tight, we don’t want it steaming, just staying warm—and then go set the table! This resting time allows those juices to calm down and redistribute evenly throughout the meat, ensuring every slice is tender and flavorful. If you’re planning ahead, you can even chill it after resting and then slowly reheat slices later with some tasty maple glazed carrots on the side!
Share Your Perfect Prime Rib Every Time Experience
Honestly, seeing your success is my favorite part of sharing these tried-and-true family methods! If you followed these steps and achieved that **Perfect Prime Rib Every Time**, please come back and let me know. Rate this recipe, share your photos, and tell us what side dishes you paired with it!
I’m Emily Santiago, and I love knowing that I helped take the stress out of that big holiday showstopper for you. Head over to my About Us page to connect even more, and happy cooking!
Perfect Prime Rib Every Time
Ingredients
Equipment
Method
- Remove the prime rib from the refrigerator at least 2 hours before cooking to allow it to come closer to room temperature.
- Preheat your oven to 450 degrees Fahrenheit (232 degrees Celsius).
- Rub the entire surface of the roast generously with garlic powder, salt, and pepper.
- Place the roast, fat side up, on the rack in the roasting pan.
- Place the roast in the preheated oven and cook at 450 degrees Fahrenheit for 15 minutes.
- Reduce the oven temperature to 325 degrees Fahrenheit (163 degrees Celsius). Do not open the oven door.
- Continue roasting at 325 degrees Fahrenheit. Calculate the remaining cooking time based on your desired internal temperature. A general guideline is 12 to 15 minutes per pound for rare.
- Insert a meat thermometer into the thickest part of the roast, avoiding bone.
- Remove the roast from the oven when it reaches 120 degrees Fahrenheit for rare, 130 degrees Fahrenheit for medium-rare, or 140 degrees Fahrenheit for medium.
- Transfer the roast to a cutting board and tent loosely with foil. Let it rest for 15 to 20 minutes before slicing. The internal temperature will rise during resting.
- Slice against the grain and serve.