

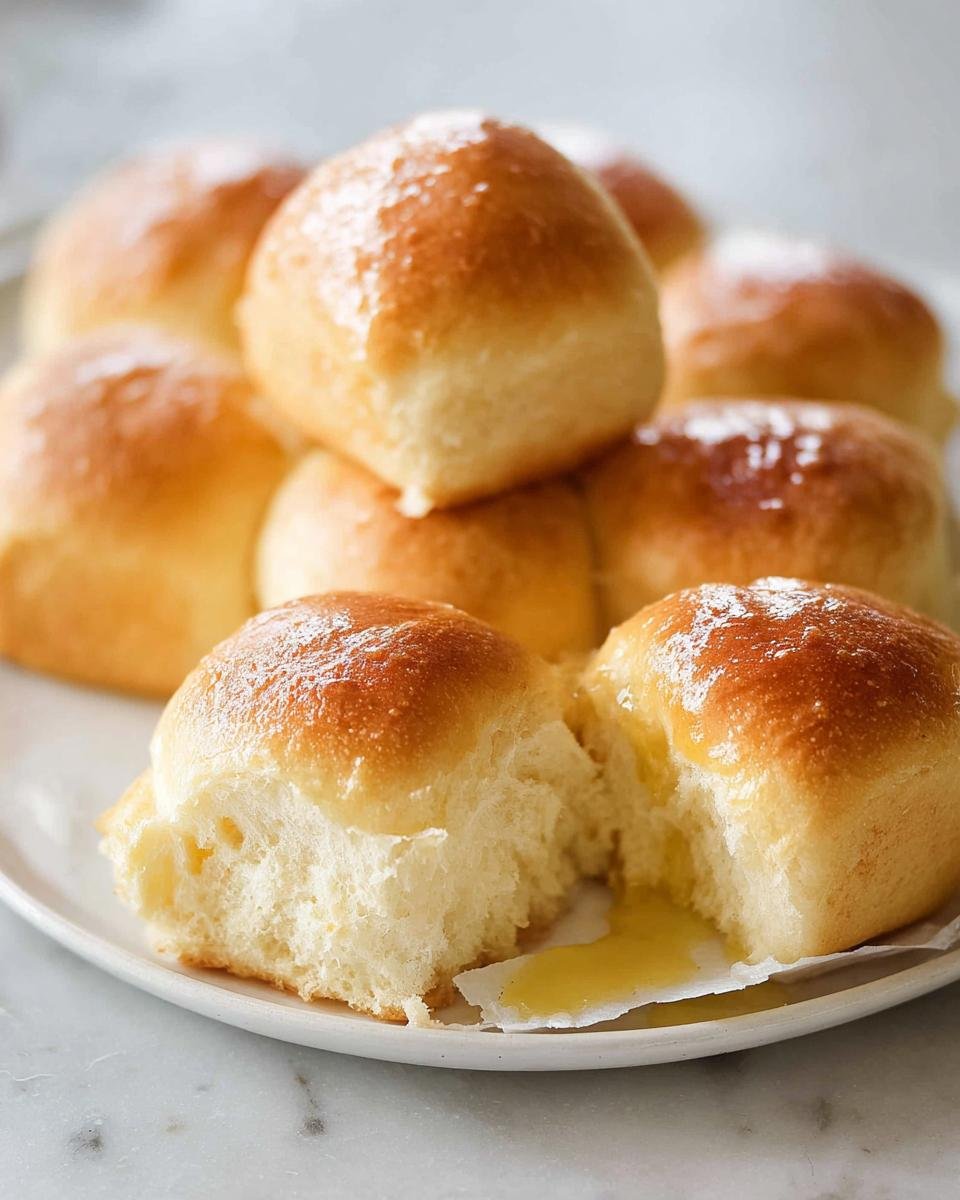
There is something truly magical about pulling a batch of warm, soft bread right out of the oven, especially when you realize it took almost no effort on your part. If you’ve ever looked at yeast recipes and thought, “Nope, not today, my hands hurt,” I have the perfect solution for you. We’re making the fluffiest, melt-in-your-mouth No Knead Skillet Dinner Rolls, and I promise, your wooden spoon does all the heavy lifting!
The first time I made these skillet dinner rolls, it was on a day when I felt too tired to fuss with dough—but still craved something warm and homemade. I mixed the ingredients in minutes, left the bowl on the counter, and later shaped the soft dough with almost no effort. Pulling the golden rolls from the oven, hearing their gentle crackle, reminded me that cooking doesn’t always need to be complicated to be deeply satisfying.

We’re talking about tender bites that are incredibly buttery and perfect for soaking up gravy or just pulling apart with your fingers. Forget the bench scraper and the dusting of flour for kneading—this recipe is about patience, not power. It’s the easiest dinner roll recipe for beginners, trust me on this one!
Why You Will Love These No Knead Skillet Dinner Rolls
I know you’ve got a million things going on, so spending an hour punching and folding dough just isn’t realistic sometimes. That’s why I am obsessed with this method! These rolls truly deliver incredible results with minimal input from you. They are soft, pillowy, and perfectly golden brown.
You are going to feel like a baking wizard, but you didn’t even have to break a sweat. If you’re interested in making more lightened-up comfort food that feels indulgent but doesn’t require huge effort, I’ve got some great ideas over in my Lightened-Up Comfort Food section.
Here is why these just became your permanent go-to side dish:
- Zero Kneading Required: Seriously, just mix it until it’s sticky and let time do the work. It’s shockingly easy!
- Quick Prep Time: You only spend about 20 minutes actively working hands-on time before the dough takes over.
- Unbeatable Softness: Thanks to the whole milk and eggs mixed in, these stay incredibly tender, even the next day.
- Perfect Side Dish: They are sturdy enough for heavy soups but soft enough for simple butter. A total meal enhancer.
Ingredients for Perfect No Knead Skillet Dinner Rolls
When you aren’t kneading, you need to make sure the ingredients you use are spot-on because they have to do all the structural work for you! The beauty of this recipe is that most of it is pantry staples—flour, sugar, milk—but a few details really make the difference between a good roll and one that sings. Pay close attention to the temperature of your warm water and milk; yeast is fussy, and warm doesn’t mean hot!
Also, since we are relying on that long, slow rest for structure, using bread flour really helps give us that beautiful stretch and chew we want in a dinner roll. Don’t skip the eggs or the melted butter in the mix, either. They create a rich, almost brioche-like dough that doesn’t need any aggressive handling. Get everything measured out, and you’ll be amazed at how fast you get this sticky mixture into the bowl!
For the Buns
- 1 tbsp dry yeast (or 9 grams)
- 1/4 cup caster/superfine sugar (or sub with normal white sugar)
- 1/2 cup warm water
- 4 cups bread flour (+ extra for dusting)
- 1 1/2 tsp salt (cooking/kosher salt)
- 1 cup milk (lukewarm, whole or low fat)
- 50 g unsalted butter (melted and cooled, 3 1/2 tbsp)
- 2 whole eggs (at room temperature, beaten with fork)
For Brushing
- 1 tbsp butter (melted)
Step-by-Step Instructions for No Knead Skillet Dinner Rolls
This is where the magic happens, and yet, it’s the easiest part! Since we aren’t building gluten structure with our muscles, we let time and the yeast do the heavy lifting. You are going to mix this dough until you question if you did it right—it’s supposed to look sloppy! Trust the process, cover it up, and let it rest in a warm spot. If you are thinking about skipping the first long rise, don’t! That 150 minutes is when all the flavor develops. If you fancy learning more about patience in bread making, check out my thoughts on making a fresh Italian loaf.
Activating Yeast and Mixing the Dough
First things first, wake up that yeast! Mix the yeast and a smidge of your sugar into your medium bowl with the warm water. Wait five minutes until you see foam—that means your yeast is alive and ready to party. In a separate, large bowl, whisk your flour, the rest of the sugar, and the salt together. Now, pour all those wet ingredients—the lukewarm milk, the melted (and slightly cooled!) butter, the beaten eggs, and the frothy yeast mixture—right into the dry ingredients. Grab your wooden spoon and mix! Stop when everything is incorporated. I mean it, stop mixing! The dough will look really thick and sticky, almost like a heavy muffin batter that refuses to look like real dough. This is absolutely perfect; we are not kneading one bit!
First Rise and Preparing the Skillet
Once mixed, cover that messy dough with a damp tea towel. Find the warmest, coziest spot in your kitchen—something around 25C or 77F is perfect. Let it hang out there for at least 1.5 to 2 hours. You know it’s ready when the surface is bubbly and it looks like it has nearly tripled in size. While waiting, go ahead and line that 9×13 tray with baking paper, making sure you leave big overhangs. Those overhangs become your handles later! After the rise, gently punch the dough down to knock out the biggest air pockets, but don’t overwork it.
Shaping and Second Rest
Now we shape! Dust your counter lightly—don’t go crazy on the flour, or your rolls will be dry. Scrape the dough out, dust the top, and gently pat it into a rough log shape. Slice that log into 12 equal pieces. Don’t stress about perfection here; just aim for roughly the same size. Take each piece, press it flat with your palm, and then use your fingers to tuck the edges up and around underneath itself, gathering it into a tight ball. Flip it over so the smooth side is up, and give it one quick roll on the counter to seal it. Place them smooth-side-up on your prepared tray in a 3×4 pattern. Cover them again, maybe with some lightly oiled plastic wrap this time, and let them rest for 30 to 45 minutes. They should only get about 75% bigger; they won’t double this time. About halfway through this second rest, go ahead and preheat your oven to 200C/390F standard, or 180C/350F if you use a fan. If you look at my method for those cheddar herb rolls, you’ll see I like to infuse flavor into my dough early on!
Baking and Finishing Your No Knead Skillet Dinner Rolls
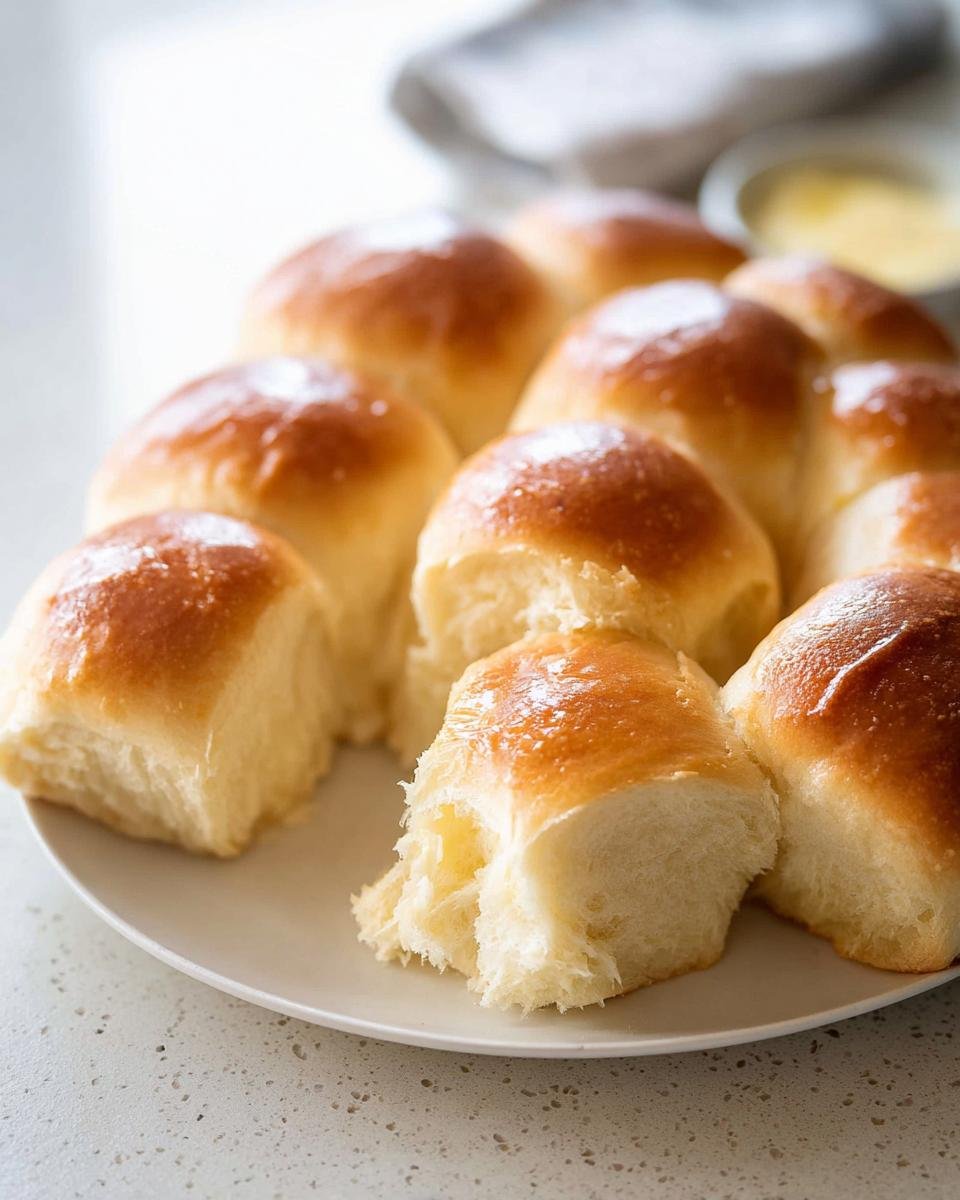
Time to bake! Pop the tray into your preheated oven and bake for 15 to 18 minutes. You’re looking for a beautiful, deep golden brown top. A huge indicator that they are done is to gently tap the roll right in the center—if it sounds hollow, pull them out right away! Immediately after they come out, brush the tops generously with that reserved melted butter. Oh, the smell! Use those lovely paper overhangs to lift the entire batch onto a cooling rack. Let them cool down until they are just warm to the touch. They are dangerously good when warm!
Tips for Success with Rolls Recipes Easy No Knead From Scratch
Even though these are super simple, I still get questions about why rolls sometimes turn out a little dense! Remember, since we aren’t kneading, the long rise time is doing all the heavy lifting for the gluten structure. If your dough didn’t rise much during that first rest, it usually means your water was too cold, or your yeast was old. Don’t panic if that happens; just let it sit longer in a warmer spot, maybe near a sunny window, and give it another 30 minutes.
For anyone trying these rolls recipes easy no knead from scratch for the first time, my biggest tip is to embrace the stickiness! If you fuss and add too much flour when shaping them into balls, they will bake up tougher than you want. A light dusting on your hands is plenty. For rich flavor variations, you might want to check out how I developed different textures in my pistachio pudding bread—the same principle of letting ingredients interact applies!
Make Ahead and Storage for Buttery No Knead Skillet Dinner Rolls
This is honestly why these rolls are my secret weapon for busy holidays or entertaining! The best part about this easy no-knead dough is that you can pause the process right before the final proof that makes these buttery rolls look perfect. This means you can prep the dough the night before, and they’ll be ready to bake fresh when you need them.
If you want to get a jump start, follow all the instructions right up until you place the shaped balls into the lined tray for their second 30-to-45-minute rest. Once they are sitting in that 3×4 pattern on the paper, cover the tray tightly—a layer of plastic wrap works great—and slide the whole thing into the refrigerator. They can chill happily in the cold for up to 24 hours. While they’re resting in the fridge, the yeast slows way down, developing flavor but stopping the rising process.
When it’s time to eat, pull that tray out of the fridge. You want them to warm up just a little bit before going into the oven, so let them sit on the counter for about 30 minutes. They won’t get quite as puffy as if you let them rise fully at room temperature, but they will bake up beautifully golden and soft anyway. This is great for keeping a big batch of homemade bread ready without having to wake up at 4 AM!
If you happen to have leftovers (which is rare in my house!), they are fantastic the next day. They won’t be quite as pillowy soft, but a quick microwave zap is all you need to bring them back to life. Try microwaving a roll for just 15 seconds, and it instantly softens that crumb again. If you have any leftover butter brushed on top, that’s just bonus amazingness!
If you are experimenting with make-ahead recipes and need more ideas that save time without sacrificing flavor, check out my notes on my oatmeal apple cake—it shares a similar strategy of letting time do the flavor building!
Serving Suggestions for Your No Knead Skillet Dinner Rolls
You’ve baked these gorgeous, soft rolls, and now your kitchen smells amazing! What do you serve them with? Since these are the perfect side dish, they go with almost anything hearty. They’re sturdy enough to stand up to thick, comforting meals, but light enough that they won’t ruin your main course.
Honestly, my favorite way to use them is to wipe up the last bits of broth or sauce from a bowl of soup—that’s when that buttery flavor really shines. Think about pairing them with something very flavorful, like my healthy winter vegetable soup, or even something richer like a creamy stew. They also make a stunning accompaniment to that creamy carrot lentil soup I shared last month! They are universally loved, so just pick your favorite saucy meal!
Equipment Needed for Making No Knead Skillet Dinner Rolls
You don’t need fancy mixers or stand mixers for this recipe, which is another reason I love it! Since we are only mixing by hand, you just need basic mixing vessels and something to bake in. Getting all your tools ready beforehand—this is called mise en place, though I just call it ‘not scrambling later’—will make those 20 minutes of prep time fly by.
Here is what you need to have on hand before you even think about waking up that yeast. You probably have all of this hanging around your kitchen right now!
- Medium bowl: This is just for getting the yeast going, so it can be any small mixing bowl you have.
- Large bowl: This is where all the action happens for mixing the big batch of dough.
- A 31.5 x 23.5 cm / 9 x 13″ tray: This gives the rolls enough space for that 3 x 4 arrangement while they bake up soft and pull-apart.
- Wooden spoon: You are going to use this for mixing the dough—no whisks allowed!
- Cooling rack: Trust me, you need this! Putting the hot rolls directly on the counter traps steam underneath, and we want golden bottoms, not soggy bottoms!
Estimated Nutritional Information for No Knead Skillet Dinner Rolls
I always like to give you a heads-up on what you’re digging into when you make my favorite recipes, even if the main goal here is comfort, not counting calories! Because these rolls are so rich with butter and use standard bread flour, they pack a nice little punch of satisfying energy. Remember, this is just an estimate, and your final numbers will change based on the exact brand of milk or size of your eggs, so take it with a grain of salt—or maybe a pat of butter!
For those of you tracking things closely, especially if you’re comparing this to other calorie-smart recipes, here is the breakdown per one generous dinner roll:
- Calories: Approximately 250
- Carbohydrates: Around 45g
- Protein: About 8g
- Fat: Roughly 6g (Yes, that’s where the amazing flavor comes from!)
- Sodium: Around 250mg
Don’t let the carbs scare you off! These are meant to be enjoyed alongside a huge bowl of soup or a healthy veggie side dish, making them part of a well-rounded, cozy meal. They are worth every single calorie, trust me!
Questions About These Easy No Knead Rolls Recipes
I get so many questions sent my way about tweaking bread recipes, and honestly, that’s half the fun! Since these are such a foundational recipe—one of my favorite easy no knead rolls recipes from scratch—people always want to know if they can swap out the flour or the sugar. The short answer is usually yes, but let’s talk about what happens when you do!
Can I use regular All-Purpose Flour instead of Bread Flour?
You absolutely can, but you need to manage your expectations a tiny bit. Bread flour has more protein, which creates stronger gluten networks, meaning it handles that long, lazy rise better and gives you that satisfying chew. If you use all-purpose flour, your rolls might be slightly shorter, a little less chewy, and maybe even need a slightly shorter first rise. Don’t let it stop you, though! If AP flour is all you have, go for it, just make sure you don’t let the mixing go past the point when it just comes together.
How long can I store these buttery rolls?
These are genuinely best on the day they are baked—pull-apart bread just hits differently when it’s fresh! However, because the recipe is loaded with butter and milk, they stay quite soft for a good 24 hours at room temperature under a covering. If you refrigerate them, they can seize up a bit. Remember what I mentioned in the ‘Make Ahead’ section? If you save the baked rolls, microwave them for just 15 seconds right before eating, and they come right back to life! If you’re storing the raw dough, check out my tips on making pumpkin overnight oats; the principle of slow fermentation overnight is similar for keeping things fresh!
Do I have to use sugar, or can I skip it entirely?
This is a great question, especially if you are trying to lower sugar intake! While sugar isn’t just for sweetness in yeast baking—it’s the main food source for the yeast—you can reduce it a little if you must. I wouldn’t recommend cutting it out completely, or your yeast might struggle to get going during that long first rise. If you reduce the 1/4 cup amount, just keep a close eye on your yeast activation step. If it doesn’t froth up nicely after five minutes, try warming your water up just a hair more gently.
What is the best way to get that golden, buttery finish?
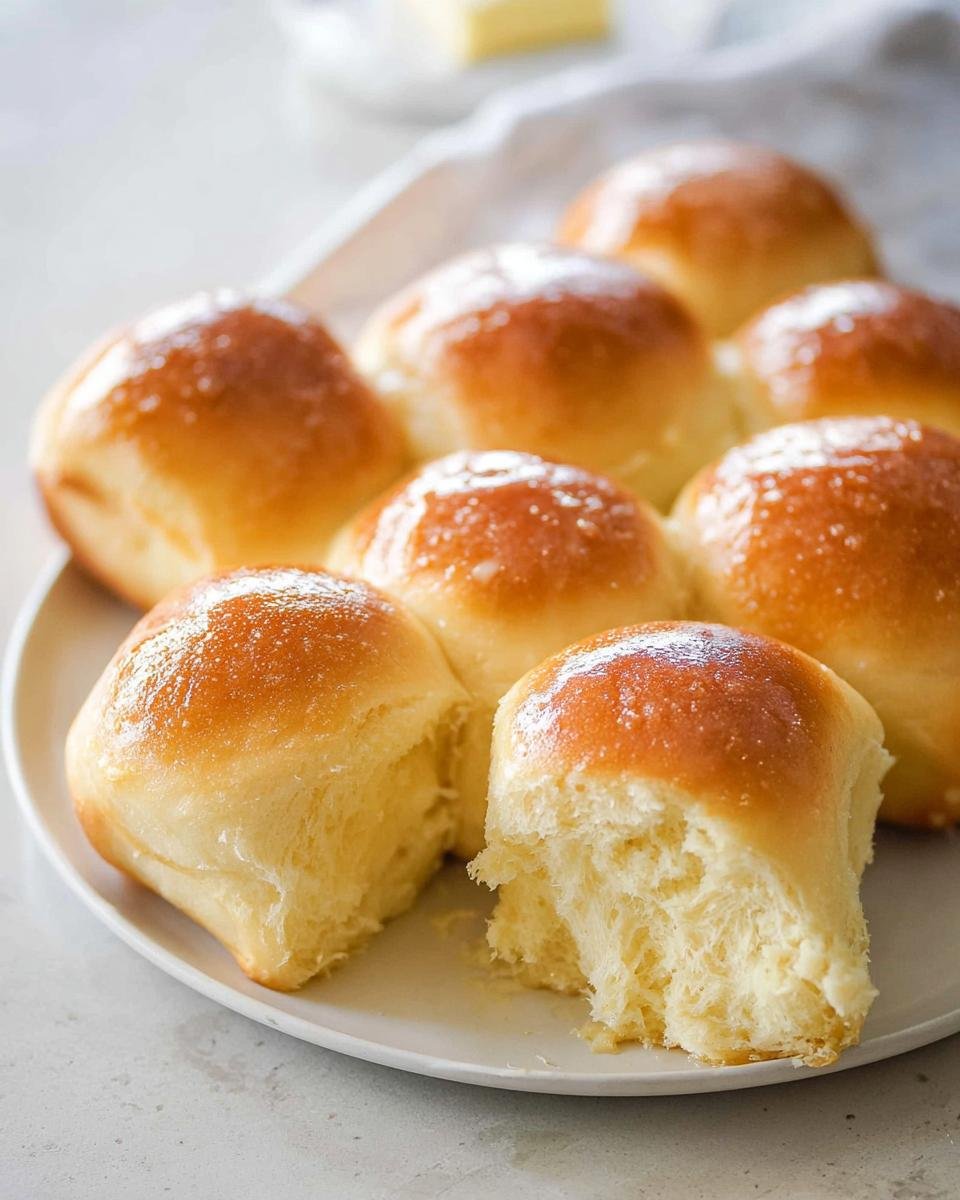
The beautiful, shiny top comes exclusively from that melted butter brushed on right when they exit the oven! Don’t wait even a minute. As soon as those hot rolls hit the cooling rack, grab a pastry brush and just slather that melted butter right over the tops. It melts into all those little cracks and crevices, enhancing that rich, buttery flavor profile we worked so hard to build during the long, no-knead fermentation!
Share Your Homemade No Knead Skillet Dinner Rolls Experience
Now that you’ve pulled a golden, steaming batch of these No Knead Skillet Dinner Rolls out of the oven, I would absolutely LOVE to hear about it! Seriously, nothing makes my day more than knowing someone else got delicious, scratch-made bread on their table without having to spend an hour kneading dough.
Did they turn out as soft as you hoped? Did you manage to wait until they were cool enough to handle, or did you burn your fingers grabbing one straight from the tray? Tell me everything! Leave a rating right here on the recipe card below—five stars if they made your weeknight dinner instantly better!
If you snapped a picture of your beautiful rolls pulled apart, please tag me on social media! I love seeing how different kitchens bring these recipes to life. You can find me sharing more easy, low-fuss comfort food ideas over on my About Me page or by searching for the recipe online. Happy baking, and thank you for trying out this wonderfully simple recipe!

No Knead Skillet Dinner Rolls
Ingredients
Equipment
Method
- Place the yeast and 2 teaspoons of the sugar in a medium bowl. Pour in the water. Leave for 5 minutes until it froths.
- Place flour, remaining sugar, and salt in a large bowl. Mix to combine.
- Make a well in the centre of the dry ingredients. Add milk, melted butter, eggs, and pour in the yeast liquid, including all froth.
- Mix until combined with a wooden spoon. The mixture will be thick and sticky, like a thick muffin batter.
- Cover the bowl with a wet tea towel. Place in a warm place (25C/77F+) to rise for 1 1/2 to 2 hours, or until the dough has almost tripled in volume. The surface should be bubbly.
- Line a 31.5 x 23.5 cm / 9 x 13″ tray with baking paper, allowing for overhang.
- Punch the dough to deflate it. Mix briefly in the bowl to remove large bubbles.
- Dust your work surface with flour. Scrape the dough onto the surface. Dust the top of the dough, then shape it into a log.
- Cut the log into 4 pieces, then cut each piece into 3 pieces, resulting in 12 pieces total.
- Take one piece and press it down with your palm. Use your fingers to gather the dough into a ball. Flip the ball so the smooth side is up, then roll it briefly to form a smooth ball shape.
- Place the ball with the smooth side up on the prepared tray. Repeat with the remaining dough, lining them up in a 3 x 4 arrangement.
- Spray the surface of the rolls (or use cling wrap) with oil. Place cling wrap over the tray.
- Return the tray to a warm place and let it rest for 30 to 45 minutes, until the dough has risen by about 75% (less than double in size).
- Partway through the second rise, preheat your oven to 200C/390F (standard) or 180C/350F (fan/convection).
- Bake for 15 to 18 minutes, or until the surface is golden brown and the roll in the centre sounds hollow when tapped.
- Remove the rolls from the oven. Brush the tops with the melted butter.
- Use the baking paper overhang to lift the rolls onto a cooling rack. Allow them to cool to warm before serving.