

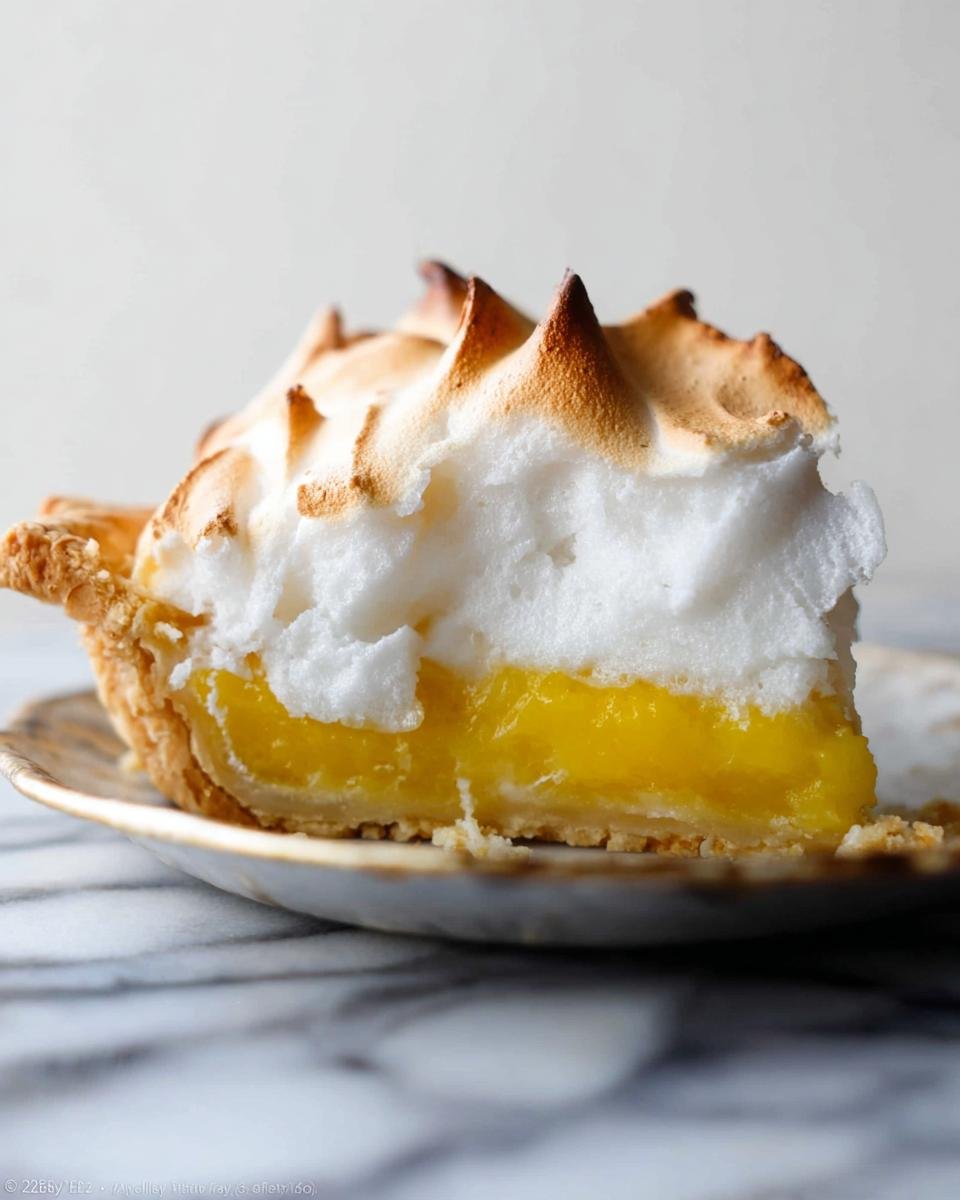
If you’ve ever stared longingly at bakery windows wishing you could create those dramatic, cloud-like swirls of meringue, you are exactly where you need to be! I promise you, achieving that picture-perfect look isn’t reserved just for professionals. This recipe for Lemon Meringue Pie with Tall Peaks is your secret weapon for a bakery-quality showstopper that tastes incredibly bright and citrusy. I still remember testing my very first meringue on a quiet Sunday morning, sunlight hitting the kitchen counter as I watched the egg whites transform into glossy, towering peaks. That feeling of accomplishment stayed with me, and it’s why this dessert continues to be one of my favorites to share. Every time I make it, it brings back that moment when a simple technique turned into something beautiful. It’s surprisingly easy to make this stunning pie from scratch!
Why You Will Make This Lemon Meringue Pie with Tall Peaks
Seriously, you need this pie in your life! It’s not just a dessert; it’s a moment. Here’s why this recipe is a winner:
- The meringue actually stands tall and glossy—no sad, flat tops here!
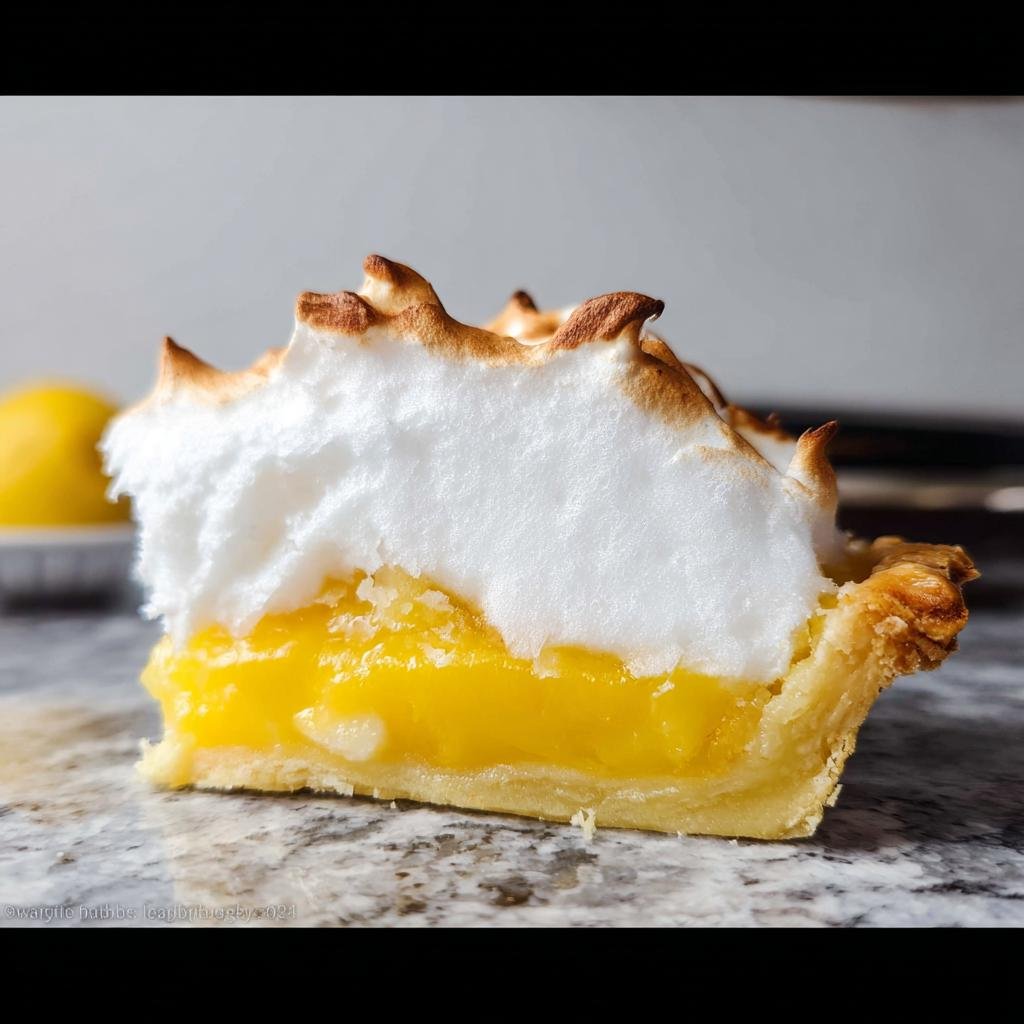
- The lemon filling is intensely bright and tangy, balancing all that sweetness.
- It’s surprisingly straightforward, even if you’ve had trouble with meringue before.
- It always looks incredible on the holiday table! You might even want to check out my tips for other amazing holiday baking while you’re here.
Essential Equipment for Your Lemon Meringue Pie with Tall Peaks
You don’t need a commercial kitchen for this pie! But having the right tools definitely makes the difference between a good pie and a spectacular one—especially when you are whipping up those high peaks. Trust me on this one; make sure you have these basics ready before you start mixing.
- A solid 9-inch pie dish. Glass or ceramic works best for even baking!
- A medium bowl or a liquid measuring cup for whisking those yolks.
- A medium saucepan for cooking down that gorgeous lemon filling. Safety first: make sure the handle isn’t wobbly!
- Your best friend: a handheld mixer or a stand mixer fitted with that marvelous whisk attachment. This is crucial for getting the meringue super fluffy.
- A wire rack for cooling everything down properly after the oven does its magic.
Ingredients for Making Lemon Meringue Pie with Tall Peaks from Scratch
When we decide to make a pie completely from scratch, we have to be careful with our measurements, because even a tiny bit off can ruin the texture, especially with that filling! I’ve organized everything so you can shop or gather ingredients easily. Remember, the magic that makes those peaks soar starts with the egg whites being perfectly prepared. If you are looking for my favorite crust recipe, you can find the full instructions here; otherwise, here is what you need for the filling and that glorious topping.
For the Homemade Pie Crust
For this recipe, you’ll need one fully baked and cooled 9-inch pie crust. I always try to make mine the day before and let it chill completely. A cold crust is essential even though the filling is going in warm!
- 9-inch Pie Crust (fully cooled, partially baked)
For the Bright Lemon Filling
This filling has to be zesty enough to cut through the sweetness of the meringue, but thick enough to hold its shape when sliced. That’s where the cornstarch and the tempering come in handy! Don’t skip softening that butter at the end—it helps make the filling super smooth.
- 5 large egg yolks (save those whites for the topping!)
- 1.33 cup water (320ml)
- 1 cup granulated sugar (200g)
- 1/3 cup cornstarch (38g)
- 1/4 teaspoon salt
- 1/2 cup fresh lemon juice (120ml)
- 1 Tablespoon lemon zest
- 2 Tablespoons unsalted butter, softened to room temperature (28g)
For the Stiff Meringue Topping
Okay, listen up! This is the part that gives us those amazing tall peaks, so pay attention to the egg whites. They absolutely *must* be at room temperature. If they are cold, they won’t whip up to their full volume, and we want those towering clouds!
- 5 large egg whites, at room temperature
- 1/2 teaspoon cream of tartar (our secret weapon for stability!)
- 1/2 cup granulated sugar (100g)
- 1/8 teaspoon salt
Step-by-Step Instructions to Make Lemon Meringue Pie with Tall Peaks
Now that we have our ingredients lined up, it’s time to assemble this beauty! Don’t let the different stages intimidate you. We tackle this one section at a time, and I promise, the coordination between the warm filling and the stiff meringue creates the most stable, gorgeous pie you’ll ever see. We are making this Lemon Meringue Pie with Tall Peaks happen!
Preparing the Crust and Filling Base
First things first: that crust! You’ll want to make sure your homemade pie dough is totally ready. I stress this because you need time for it to chill in the fridge—at least two hours, or ideally, overnight if you’re planning ahead like I usually do! Preheat your oven to 375°F (190°C) and set that rack way down low, as close to the bottom as you can get it. Blind bake the crust in your 9-inch dish until it’s ready. Once it’s partially baked, drop your oven temperature down to 350°F (177°C). Don’t worry about fully baking the crust right now; putting the filling in slightly warm helps seal the bottom layer, which is a great trick against a soggy bottom!
Creating the Thick Lemon Filling
Grab your medium saucepan and whisk together the water, sugar, cornstarch, salt, lemon juice, and zest. You want to cook this over medium heat until it starts to get thick and you see those first few bubbles popping on the surface—this is usually about six minutes. While that’s happening, whisk your 5 egg yolks separately. This next part is crucial for an easy filling: tempering! Take a few large spoonfuls of that hot lemon mixture and slowly stream them into your yolks while constantly whisking the yolks. If you dump it all in at once, you’ll end up with scrambled eggs, and nobody wants that mess! Once tempered, slowly stream the egg yolk mixture back into the saucepan. Keep cooking over medium heat until the mixture is thick and large bubbles burst at the surface. Take it off the heat right away and whisk in those 2 tablespoons of softened butter. Spread this amazing, bright filling right into your waiting warm pie crust. It’s an incredible base, much like the filling you’d find in a wonderful cake like my apple dapple cake!
Whipping the Meringue for Tall Peaks
This is where the magic happens for our signature look. Make sure those 5 egg whites are at room temperature—I mean it! Put them in your clean mixer bowl with the cream of tartar and salt. Start whipping slowly for a minute. Then kick up that speed to high until you get those soft peaks forming—it takes about four minutes. Now, slowly pour in that 1/2 cup of sugar while the mixer is still running on high. Keep beating it until the peaks are stiff, glossy, and they stand right up when you pull the whisk away! That’s the sign of success. Gently spread this beautiful meringue right over the warm filling. Make sure you spread it all the way to the edges, touching the crust all around. This stops the notorious weeping problem. Use the back of a large spoon to make those dramatic swirls you love!

Baking and Cooling the Pie
Place the pie back into the oven, but keep it low—bake it on the lowest oven rack for about 20 to 25 minutes. Keep an eye on it! If those beautiful peaks start browning too fast before the filling is set, just tent a piece of foil loosely over the top so it doesn’t burn. Once it’s done, take it out and place it on a wire rack to cool at room temperature for exactly 1 hour. Don’t rush this part! After that hour, you can move it to the refrigerator for about 4 hours to fully set up. Trust me, you need that chilling time if you want clean slices. For more baking tips that really make a difference, take a peek at this guide on making savory pies, just for fun!
Tips for Perfect Lemon Meringue Pie with Tall Peaks
Listen, even the best recipes can hit a snag, but for a pie this beautiful, we need to know the tricks to avoid common disasters like weeping or shrinking. I learned these the hard way when I was trying to get that perfect bakery look at home!
First, let’s talk about flavor. You simply must use fresh lemon juice. That bottled stuff just tastes flat next to the vibrant punch you get from actually squeezing a real lemon. It makes a massive difference in our tangy filling!
If your meringue starts to shrink away from the crust while cooling, it usually means the meringue wasn’t sealed to the edges when it went into the oven. Remember how I told you to spread it all the way to touch the crust? Do that! It anchors the meringue down. If you miss those edges, the steam trapped underneath has nowhere to go and it pulls away.
Now, for the weeping—those little beads of syrup forming on top of the meringue. Oops! This is almost always because the sugar wasn’t fully dissolved into the egg whites before you hit that high-speed whipping stage. Keep beating until the sugar granules completely disappear, and the mixture feels smooth between your fingers. That’s how you get those rock-solid peaks too!
To get those spectacular, maximum height peaks, remember the cream of tartar is your stabilizer. It helps those egg whites build structure quickly. Also, make sure your mixing bowl is totally grease-free. Even a tiny smear of fat stops the whites from doing their job properly! If you follow these tips, you’ll have a showstopper every single time. If you love trying different textures, you might want to check out my apple crisp cheesecake bread next, because it’s wonderfully layered!

Making Lemon Meringue Pie with Tall Peaks Ahead of Time
I get it—sometimes the holidays or a big gathering means you need an early start! Luckily, this Lemon Meringue Pie with Tall Peaks recipe is fantastic for making ahead, but you have to be smart about which parts you tackle first so that meringue shines when it’s time to serve. We certainly don’t want to bake the meringue the day before; that guaranteed sadness!
The absolutely best part about planning ahead is that the pie crust really benefits from extra chilling time, remember? It’s much easier to roll out and handle when it’s nice and cold. So, go ahead and make that crust up to two days in advance, roll it out, fit it into your pie dish, crimp those edges, and keep it covered tightly in the fridge. Your future self will thank you!
Next up is the lemon filling. This component is actually better when made completely ahead of time. Once you cook the filling until those big bubbles burst, just spread it into the waiting crust. It needs that long four-hour chill time in the fridge anyway to set up firmly. Cover the cooled filling with plastic wrap—make sure the wrap is touching the surface of the filling to prevent a skin from forming. This can easily sit in the fridge for a full day before you tackle the meringue.
The one thing you absolutely must leave until the very last minute, no exceptions, is the meringue! Meringue looks its best, shiniest, and tallest when it’s freshly baked. If you make the meringue the night before, it starts to deflate, weep, and generally look tired by the time you serve dessert. So, plan to mix and bake your meringue topping just 20 to 30 minutes before you plan to serve. This allows you to bake it perfectly and get that gorgeous crust before bringing it out to cool for an hour. It’s the ultimate make-ahead strategy for a stunning pie!
If you are looking for other make-ahead dessert ideas that truly impress your family, you should take a peek at my recipe for that wonderful blackberry pretzel salad. It holds up beautifully!
Storage and Serving Suggestions for This Pie Recipe
Okay, you’ve successfully conquered the tall peaks and baked this magnificent beauty! Now we need to talk about keeping it looking picture-perfect until serving time. Lemon meringue pie is famous for being a little bit dramatic—it really prefers to be eaten the day it’s made, like a very temperamental but beautiful flower.
The notes in our recipe say it doesn’t keep well, and that’s the honest truth. The meringue is going to start wilting and maybe even weeping after about 24 hours in the fridge, so if you are making this for a holiday, definitely aim to finish the meringue the morning of the party!
For storage, you must cover the leftover pie and keep it in the refrigerator. Just place some plastic wrap or a cake dome over it. The cold keeps the lemon filling firm, which is necessary for clean slicing. If you want the absolute best flavor and those sky-high looks, try to eat leftover slices within the first day.
When it comes to serving, I think this pie is best enjoyed slightly chilled, but not ice-cold straight from the coldest part of the fridge. Let it sit out on the counter for about 15 to 20 minutes before you slice it. This softens the filling just a tiny bit, bringing out that bright lemon flavor! It pairs perfectly with a strong cup of coffee or maybe a simple, unsweetened black tea to really let that citrus shine through without adding more sugar overload.

Frequently Asked Questions About Lemon Meringue Pie
I get so many questions about this pie because people are nervous about the meringue! Don’t sweat it, though. We’ve ironed out all the tricky bits, and I think you’ll find this recipe much more accessible than you expect. Even if you need a shortcut, we have answers!
Can I use pre-made pie crust to make this dessert easy?
Absolutely, you totally can! If you are making this for a weeknight treat or just need to save some time, using a store-bought crust will make the easy part of the recipe shine even brighter. While I love the taste of a fully from scratch pie, using a pre-made crust won’t hurt the filling or the meringue one bit. Just make sure you follow the instructions for blind-baking it properly before you add that lovely lemon filling!
What causes the meringue on a Lemon Meringue Pie with Tall Peaks to weep?
Ah, weeping! That’s the nemesis of every meringue maker. Usually, weeping happens for one of two reasons—and we cover how to prevent both in the main instructions. First, it happens if the sugar hasn’t fully dissolved into the egg whites, so they separate later. Second, if the meringue doesn’t touch the crust all the way around the edge, the steam trapped underneath pulls away from the filling, creating those sad little syrup puddles. My key for achieving those Lemon Meringue Pie with Tall Peaks is making sure you spread that meringue to the very edge of the crust!
Is this a good holiday Pie Recipe?
Is it ever! This is one of my go-to holiday desserts. Everyone loves a classic, but they *always* gasp when they see the meringue peaks on this one. It’s bright and a little lighter than the heavy chocolate or pecan pies, making it a perfect palate cleanser after a big meal. Plus, it looks so festive and impressive on the table. It’s so family friendly because even the kids who don’t love super-sweet things go crazy for that tart lemon!
If you want to check out some more of my favorite comforting bakes, pop over and look at my ideas for a pumpkin pie yogurt bowl; it’s a fun twist!
Estimated Nutritional Information
Okay, let’s talk about the reality of enjoying this magnificent slice of heaven! Because we are making this Lemon Meringue Pie with Tall Peaks completely from scratch, using real sugar, butter, and yolks, it is definitely a decadent treat. You can’t have those dramatic peaks without a little indulgence, right?
Please remember that these numbers are just friendly estimates based on standard brands and the ingredient list we used (which includes a homemade crust). Your final numbers might shift slightly depending on the exact type of crust you decide to use, but this gives you a great ballpark figure per slice.
If you’re looking for other delicious, layered treats, you might enjoy seeing how I handle desserts over at my high-protein triple berry bake page!
Here is the estimated breakdown for one of the 8 generous slices:
- Calories: Approximately 410-450 kcal
- Total Fat: Around 18g
- Protein: About 6g
- Total Carbohydrates: Roughly 58g (This includes sugars from the filling and meringue)
It measures up pretty well for a holiday dessert, especially since you only need one slice to feel completely satisfied! Enjoy every single bite, especially those beautiful meringue swirls!
Share Your Stunning Lemon Meringue Pie with Tall Peaks
Wow, congratulations! If you’ve made it through tempering the yolks and whipping those beautiful, stiff peaks, you deserve a huge round of applause! I truly hope you are looking right now at the most stunning Lemon Meringue Pie with Tall Peaks you have ever created. That feeling of pulling a perfectly browned, towering pie out of the oven is just unmatched!
Now that you’ve conquered this classic, I need to know everything! Did your peaks stand up strong? Did you get that perfect balance of sweet and sour in the filling? Please, drop a comment below and let me know how it went for you. Hearing about your success stories—especially when it comes to that tricky meringue—makes my entire week!
And listen, if you took pictures of that gorgeous, glossy top, you absolutely have to tag me on social media! I love celebrating your baking wins. If you want to learn more about my kitchen adventures and see behind-the-scenes of my baking process, you can always check out my short bio right here. Happy baking, and enjoy every single slice of that sunshine yellow pie!
Lemon Meringue Pie with Tall Peaks
Ingredients
Equipment
Method
- Prepare your pie dough the night before. It needs to chill in the refrigerator for at least 2 hours before rolling out and blind baking.
- Preheat your oven to 375°F (190°C) and adjust your oven rack to the lowest position. Partially blind bake the pie crust in a 9-inch pie dish. Crimp or flute the pie crust edges.
- Reduce the oven temperature to 350°F (177°C).
- Whisk the egg yolks together in a medium bowl or liquid measuring cup and set them aside.
- Whisk the water, granulated sugar, cornstarch, salt, lemon juice, and lemon zest together in a medium saucepan over medium heat. Cook until the mixture thickens and begins bubbling, about 6 minutes. Reduce the heat to low.
- Temper the egg yolks: Very slowly stream a few large spoonfuls of the warm lemon mixture into the beaten egg yolks. Then, whisk the egg yolk mixture into the saucepan in a very slow stream. Turn the heat back up to medium. Cook until the mixture is thick and large bubbles burst at the surface.
- Remove the pan from the heat and whisk in the butter. Spread the filling into the warm, partially baked crust. Set the pie aside while you prepare the meringue. The warm filling helps seal the layers together.
- Make the meringue: Beat the egg whites and cream of tartar together with a mixer on medium speed for 1 minute. Increase the speed to high until soft peaks form, about 4 more minutes. Add the sugar and salt, then continue beating on high speed until glossy stiff peaks form, about 2 more minutes.
- Spread the meringue on top of the filling. Make decorative peaks with the back of a large spoon. Spread the meringue all the way to the edges so it touches the crust to help prevent weeping.
- Bake the pie on the lowest oven rack for 20 to 25 minutes. If the meringue browns too fast, tent a piece of foil over it without touching the meringue.
- When the pie is done, remove it from the oven, place it on a wire rack, and allow it to cool at room temperature for 1 hour before placing it in the refrigerator to chill for 4 hours before slicing and serving.