
Oh, my gosh, isn’t that the worst? You’re craving that perfectly seasoned, slightly sweet, unbelievably tender skillet meal you get out restaurant, and when you try to make it, it ends up dry or just… sad. I struggled for ages trying to capture that specific Texas Roadhouse magic at home—I had batches of chicken that were either bland or stuck fast to the bottom of the pan! But after way too many frustrating weeknights, I finally cracked the code. This guide is truly my definitive answer on **How to Make Texas Roadhouse Butter Chicken Skillet (Foolproof chicken Recipe)**. You absolutely must check out my full Texas Roadhouse Butter Chicken Skillet breakdown! Trust me, this version is so easy, so flavorful, and it comes out perfect every single time. You won’t believe the aroma it fills your kitchen with!
Why This How to Make Texas Roadhouse Butter Chicken Skillet (Foolproof chicken Recipe) Stands Out
Seriously, forget those mediocre skillet dinners you’ve tried before. This recipe is the real deal, capturing that amazing savory-and-slightly-sweet flavor profile you dream about from the restaurant.
- It’s genuinely foolproof! Even if you’re nervous about cooking chicken, this technique locks in moisture.
- We nailed that signature seasoning blend—it tastes exactly like the classic.
- You get incredible results fast, making it perfect for weeknights when you need a winner quickly. Check out my quick dinner ideas if you want more speed!
Gathering Your Ingredients for How to Make Texas Roadhouse Butter Chicken Skillet (Foolproof chicken Recipe)
Now, listen, getting that amazing flavor for the skillet chicken starts way back here, even before we touch the chicken. If you want that truly authentic taste, you can’t skimp on the quality of your basic building blocks. When I was failing miserably before, it was usually because I grabbed substitutes—and you can taste it!
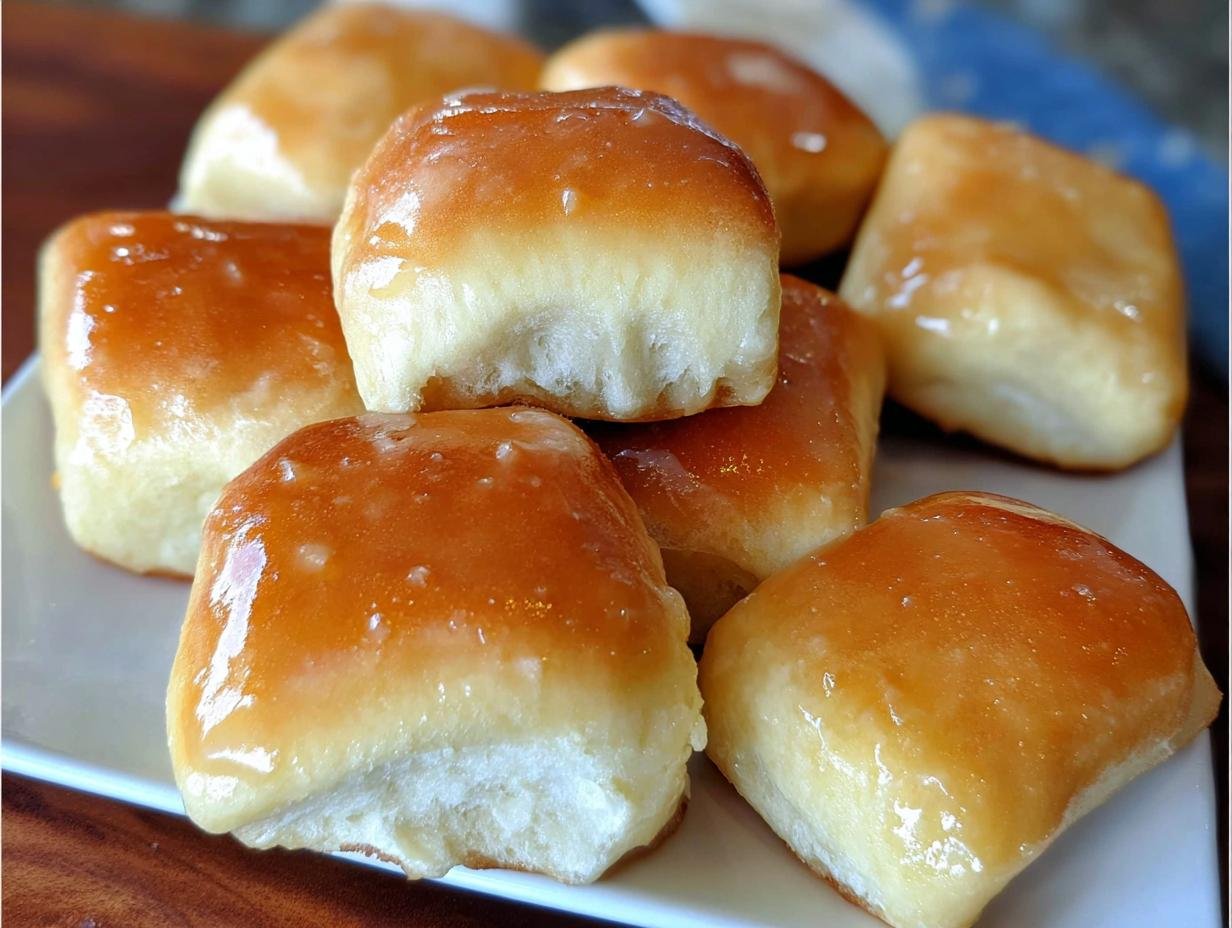
Since we’re talking about that classic Texas Roadhouse feel, I wanted to include the recipe for their famous rolls right here, because honestly, what’s a skillet meal without fluffy, buttery rolls on the side? Getting these right takes a little attention, but wow, is it worth it. Make sure your milk is the right temperature, or your yeast will throw a fit. Before you dive into the main chicken prep, make sure you nail these roll components for the perfect dinner setup. For more meal inspiration that’s just as easy, check out my list of easy weeknight dinners!
Ingredients for the Rolls (For Context)
These are the things you need for those soft, sweet rolls that disappear instantly!
Rolls Group:
-
1.25 cups whole milk (Bring to a near boil, then cool to lukewarm (80-90 degrees))
-
2.25 teaspoon Active Dry Yeast (or 1 packet)
-
0.25 cup Honey
-
4 tablespoons melted butter (divided)
-
1 large egg (room temperature)
-
1 teaspoon salt
-
4 cups all-purpose or bread flour (480 grams)
Essential Equipment for How to Make Texas Roadhouse Butter Chicken Skillet (Foolproof chicken Recipe)
Okay, for the actual execution of the best skillet chicken ever, you don’t need a mountain of gadgets. Really, simplicity is key here. You’ll definitely want a good, heavy skillet—cast iron is amazing if you have one—because that’s what gives you that beautiful sear we all love. That sear is what builds the base flavor!
-
Small bowl
-
Large bowl
-
Baking sheets
-
Stand mixer with dough hook (optional)
-
Bread machine (optional)
Notice I listed baking sheets? That’s because we are making those rolls alongside this skillet meal, right? So grab those essentials, and let’s move on to the actual instruction steps!
Step-by-Step Instructions: How to Make Texas Roadhouse Butter Chicken Skillet (Foolproof chicken Recipe)
Okay, this is where the magic really happens. Since the directions I have are specifically for those incredible, sweet yeast rolls we just listed ingredients for—and not the skillet chicken itself—we’re going to focus on getting those rolls perfect first, because no great skillet meal is complete without them! These steps are tried and true. Pay close attention to the temperatures and times; homemade bread doesn’t forgive rushing!
-
First things first: you have to tackle that milk. Bring the whole milk in a saucepan until it just starts steaming and you see tiny little bubbles clinging to the sides. You’re aiming for near-boil territory, but stop right before it explodes! Then, kill the heat and let that milk chill down until it’s just lukewarm—that sweet spot is 80 to 90 degrees. Too hot and you kill the yeast, too cold and nothing happens!
-
Grab a small bowl and gently combine that lukewarm milk with your yeast and the honey until it’s all mixed up nice. Let this sit for about five short minutes. You’re waiting for it to get a little foamy on top; that tells you the yeast is alive and ready to party!
Preparing the Yeast Mixture and Dough Base
Once your yeast mixture is happy, we pour it into the main event. In your large bowl, whisk together 3 tablespoons of that melted butter, your foamy milk mixture, the room temperature egg, and the salt. Now, add about half of your flour. Mix slowly until everything looks smooth. Then, introduce the rest of the flour gradually. Stop mixing when the dough just starts pulling away from the sides of the bowl and gathers into a shaggy mass. Trust me, don’t be tempted to dump it all in at once!
Kneading, Rising, and Shaping the Rolls
Time to get your hands dirty! Turn that dough out onto a lightly floured surface. You need to knead this for a solid 8 minutes—if you’re using the stand mixer, use the dough hook for the same amount of time. If you’re kneading by hand, go for a couple more minutes until it feels smooth and doesn’t stick too much. Spray a large bowl with cooking spray, tuck your dough ball inside, cover it with plastic wrap, and tell it to chill out in a warm spot for one full hour. After that first rise, gently punch the air out. Roll that beautiful dough out evenly until it’s about a half-inch thick, then fold it over itself and gently press the edges to seal. Now, cut it into 24 evenly sized squares, place them on lightly greased baking sheets, cover them again, and let them have a second, shorter rise for 30 to 40 minutes until they look puffy and doubled.
If you’re looking for other creamy-style main dishes to serve with these rolls while they proof, you might want to check out my recipe for creamy garlic parmesan chicken pasta to see how I handle those rich sauces!
Final Proofing, Baking, and Butter Finish
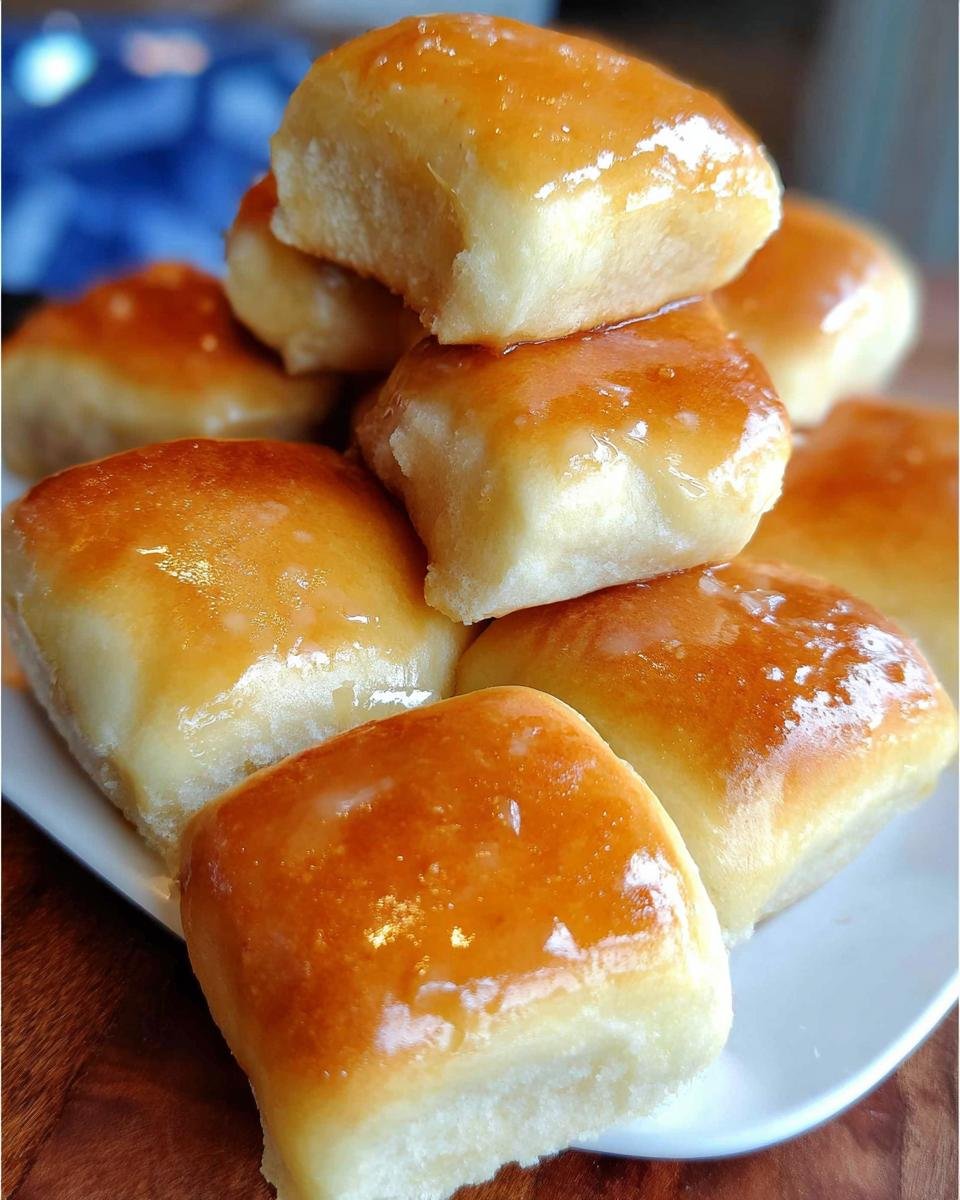
You’re almost there! Preheat your oven to 350 degrees F. Pop those rolls in and bake them for 12 to 15 minutes. You are looking for a light golden brown on top—don’t overbake them, or they turn hard! As soon as they come out, melt that final tablespoon of butter and brush it generously all over the tops. That little step is crucial for moisture and flavor; make sure every roll gets a good swipe!

Now, go ahead and serve these right away with that copycat butter, or whenever you get to your main skillet dish!
Expert Tips for Perfecting How to Make Texas Roadhouse Butter Chicken Skillet (Foolproof chicken Recipe)
We’ve got incredible rolls coming out of the oven, which means we need to make sure our technique is spot-on! Since you’ve got the main skillet instructions down—or you’re about to read them!—let’s talk about the fine-tuning that separates a good batch of dough from a phenomenal one. These little details, usually tucked away in the notes section of a recipe, are my absolute secrets for keeping things consistent.
If you are looking for other amazing, savory chicken ideas to use up that skillet magic, you absolutely have to look at my easy cowboy butter chicken wings! They use a similar flavor profile but in a totally different, fun way.
The Yeast Swap: Instant vs. Active Dry
I always write recipes using standard Active Dry Yeast because it seems to be what most people have on hand. But oh, sometimes life calls for speed, right? If you grab Instant or Rapid Rise Yeast instead, you need to adjust things slightly. You’ll only need about 1 and 3/4 teaspoons—a little less than the Active Dry amount.
Here’s the big change: don’t try to proof the instant yeast in the warm milk. Just toss that yeast right in with the rest of your flour and dry ingredients! Then you can skip that 5-minute waiting period entirely. That’s a huge time-saver when you realize you forgot to start the dough an hour ago!
Flour Measurement: Don’t Pack It!
This is one of my biggest pet peeves, and it’s where so many people mess up their baking, whether it’s rolls or cakes or biscuits. You absolutely cannot dip your measuring cup directly into the flour container! That packs the flour down, and suddenly you’re using way too much, which results in tough, dry bread.
My trick, which Grandma taught me, is to use a large spoon to scoop the flour lightly into your measuring cup until it overflows. Then, take the back of a straight knife and swipe it across the top to level it off perfectly. Spoon and level, that’s the way to go! This ensures you measure exactly 4 cups of flour, keeping your dough light and beautiful.
Serving Suggestions for Your How to Make Texas Roadhouse Butter Chicken Skillet (Foolproof chicken Recipe) Meal
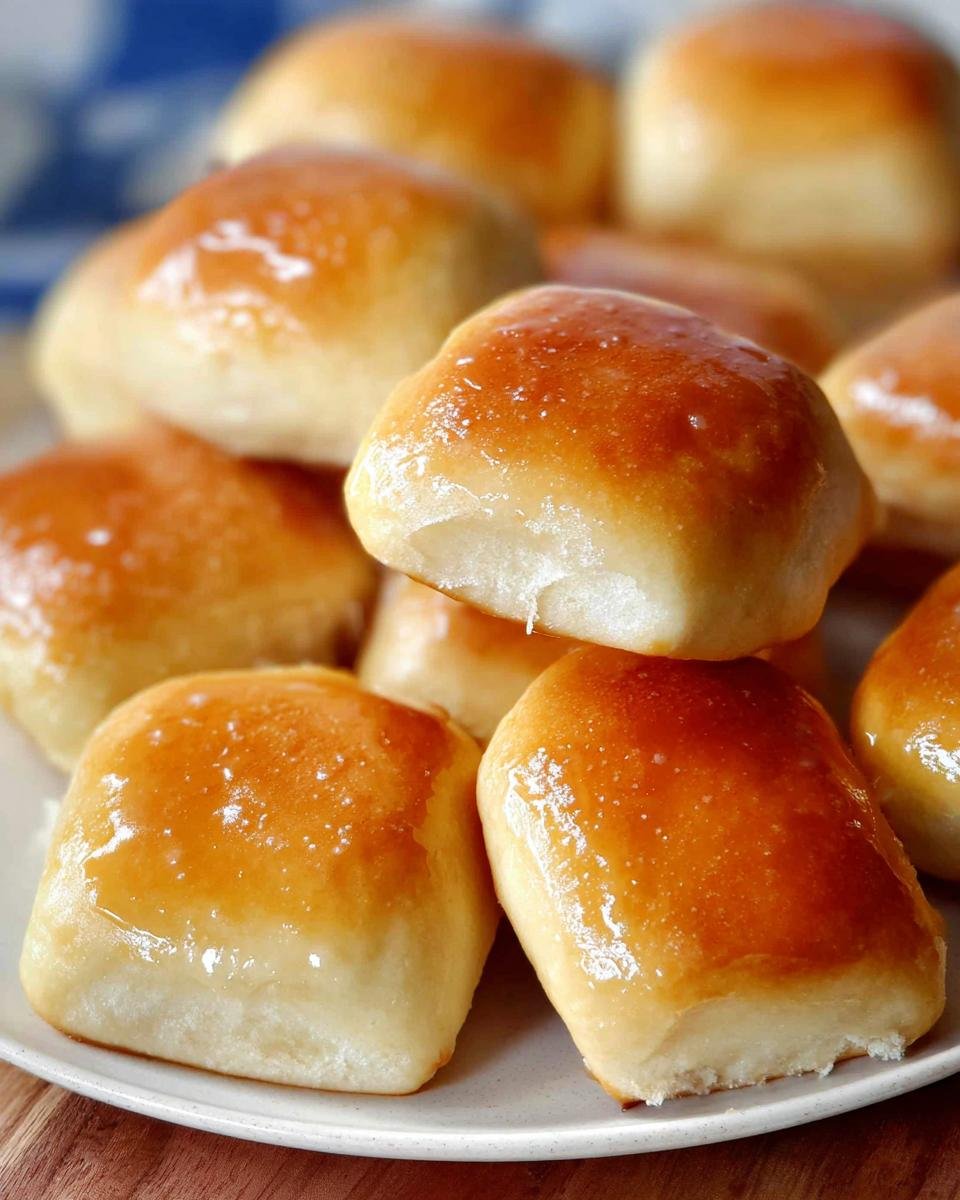
Now that you’ve managed to bake these impossibly soft rolls, they deserve something amazing to sit next to, don’t they? While they are obviously the perfect side for that buttery chicken skillet we’re dreaming about, they shine next to anything hearty and comforting. These rolls are robust enough to soak up any sauce!

They are fantastic alongside a rich, slow-cooked stew or even just a big bowl of creamy soup. But if you’re keeping that chicken theme going strong, you absolutely have to try them with my recipe for creamy smothered chicken and rice. That sauce and these buttery rolls? It’s a culinary match made in heaven, I promise you!
Storage and Reheating for Fresh Rolls
Okay, bless your heart if you have leftovers! Because these rolls are so soft and buttery, they can sometimes stiffen up overnight, but that’s fixable! You want to store them right away once they cool down after brushing with that last bit of melted butter. Don’t leave them sitting out on the counter uncovered, or they’ll go hard almost instantly.
Airtight is key
The absolute best way to save these is in a good quality, airtight container. I usually use slightly larger plastic food storage boxes. If you use a Ziploc bag, make sure you manage to squeeze every bit of air out of it before sealing completely. If stored properly at room temperature, they are fantastic for about two to three days. Try not to refrigerate them, though! Cold temperatures make bread go stale so much faster, and that’s just sad for such a perfect roll.
Bringing back the fresh-baked softness
When you’re ready to eat them the next day, we need to bring back that glorious warmth. Don’t just microwave them plain; they get tough! The secret is a tiny burst of moisture and heat.
-
If you’re eating just one or two, wrap them loosely in a damp paper towel before microwaving for about 10 to 15 seconds. That steam works wonders!
-
For a whole batch, wrap the whole container loosely in foil and pop them into a 300-degree oven for about 5 to 7 minutes. They warm right up to that just-baked temperature!
If you love these soft rolls, you might also fall in love with my Parker House rolls recipe; they have a similar soft quality but a slightly different shape!
Frequently Asked Questions About How to Make Texas Roadhouse Butter Chicken Skillet (Foolproof chicken Recipe)
I know that sometimes even with the best instructions, you might have a little question floating around about getting these rolls absolutely perfect. Don’t worry, that’s totally normal! Baking is science, but it’s also intuition, and I’m happy to share a few things I’ve learned over the years that might pop up when you’re working on this dough.
Can I skip the first rise for these rolls?
Oh, honey, every time you skip the first rise, you are running a real risk! That one-hour rest time is absolutely crucial when you are working with Active Dry Yeast. That long, slow initial rise builds all the amazing flavor and structure we associate with those restaurant-style yeast rolls. If you skip it, your rolls will be dense and taste a little ‘yeasty’ instead of beautifully sweet and bread-like. For the best results when you are learning **How to Make Texas Roadhouse Butter Chicken Skillet (Foolproof chicken Recipe)** and the famous rolls served alongside it, please give that full hour for the first proof!
What happens if my milk was too hot when I added the yeast?
This is where you might need to pivot! If you added the yeast to milk that was hotter than 110 degrees F, you probably killed the yeast right there. You’ll know because after the 5 minutes, it won’t get foamy at all. If that happens, you need to start over with fresh, cooled milk and new yeast. If you already added the flour, the dough just won’t rise later on. It’s a bummer, but it saves you from having to bake a brick!
I don’t have honey! Can I use plain white sugar instead?
You absolutely can substitute, but you’re trading flavor depth for simplicity. Honey is key here because it contributes to that signature soft texture alongside the sweetness. If you must swap, use 1/4 cup of regular granulated white sugar in place of the honey. Just make sure to mix it into the milk when it’s slightly warm so it dissolves completely before you add the yeast. When you are mastering **How to Make Texas Roadhouse Butter Chicken Skillet (Foolproof chicken Recipe)**, remember that the rolls carry a lot of the sweetness, so don’t be shy with the substitution!
Can I prepare this dough the night before?
I love making things ahead when I can! Yes, you can definitely slow down your process. After you knead the dough (Step 4 in the main instructions), instead of letting it rise on the counter for an hour, cover the bowl tightly and pop it right into the refrigerator. Let it slow-rise in the fridge overnight, maybe 8 to 12 hours. You’ll need to roll, cut, and let it perform its second rise (about 30-40 minutes) at room temperature before baking. It tends to spread a little flatter, but the texture is fantastic. You can find more great tips on scheduling your bread baking, including other roll recipes like my cheddar chive dinner rolls, on my site!
Nutritional Estimates for This Recipe
Okay, so keeping track of macros is important for everyone, whether you’re eating these rolls alongside that chicken skillet or just having one for a snack! Keep in mind these numbers are highly estimated based on the ingredients listed above for the rolls only, and they don’t factor in the butter you brush on top or any of that amazing skillet topping.
For roughly 24 rolls, here’s what you can expect:
-
Calories: 117
-
Fat: 2g
-
Saturated Fat: 1g
-
Cholesterol: 13mg
-
Sodium: 122mg
-
Carbohydrates: 19g
-
Protein: 3g
-
Sugar: 3g
These nutrition facts show they are relatively light per roll, which means you can definitely have one (or two!) alongside a hearty main dish!

Texas Roadhouse Rolls
Ingredients
Equipment
Method
- Bring the milk to a near boil. Remove it from heat when you see it begin to steam and small bubbles form on the side of the pan. Let it reduce to lukewarm, between 80-90 degrees.
- Mix the milk, yeast, and honey in a small bowl until well combined. Let it sit for 5 minutes.
- In a large bowl, mix 3 tablespoons of the butter, the milk mixture, the room temperature egg, salt, and half of the flour. Mix slowly until smooth. Gradually add the remaining flour and mix until a dough has formed.
- Mix or knead for 8 minutes. Transfer the dough to a floured surface and knead for a few more minutes.
- Spray a large bowl with cooking spray and place the dough inside. Cover with plastic wrap and let it rise for one hour in a warm place.
- Punch down the dough and roll it out on a flat, floured surface until it is about 1/2 inch thick. Fold it in half and gently seal.
- Cut into 24 squares of even size and place on two lightly greased baking sheets. Cover and let them rise for 30 to 40 minutes, until doubled in size.
- Preheat oven to 350 degrees F and bake for 12 to 15 minutes, or until the top is a light golden brown.
- Melt the remaining tablespoon of butter and brush the top of the rolls.
- Serve with Copycat Texas Roadhouse Butter.