
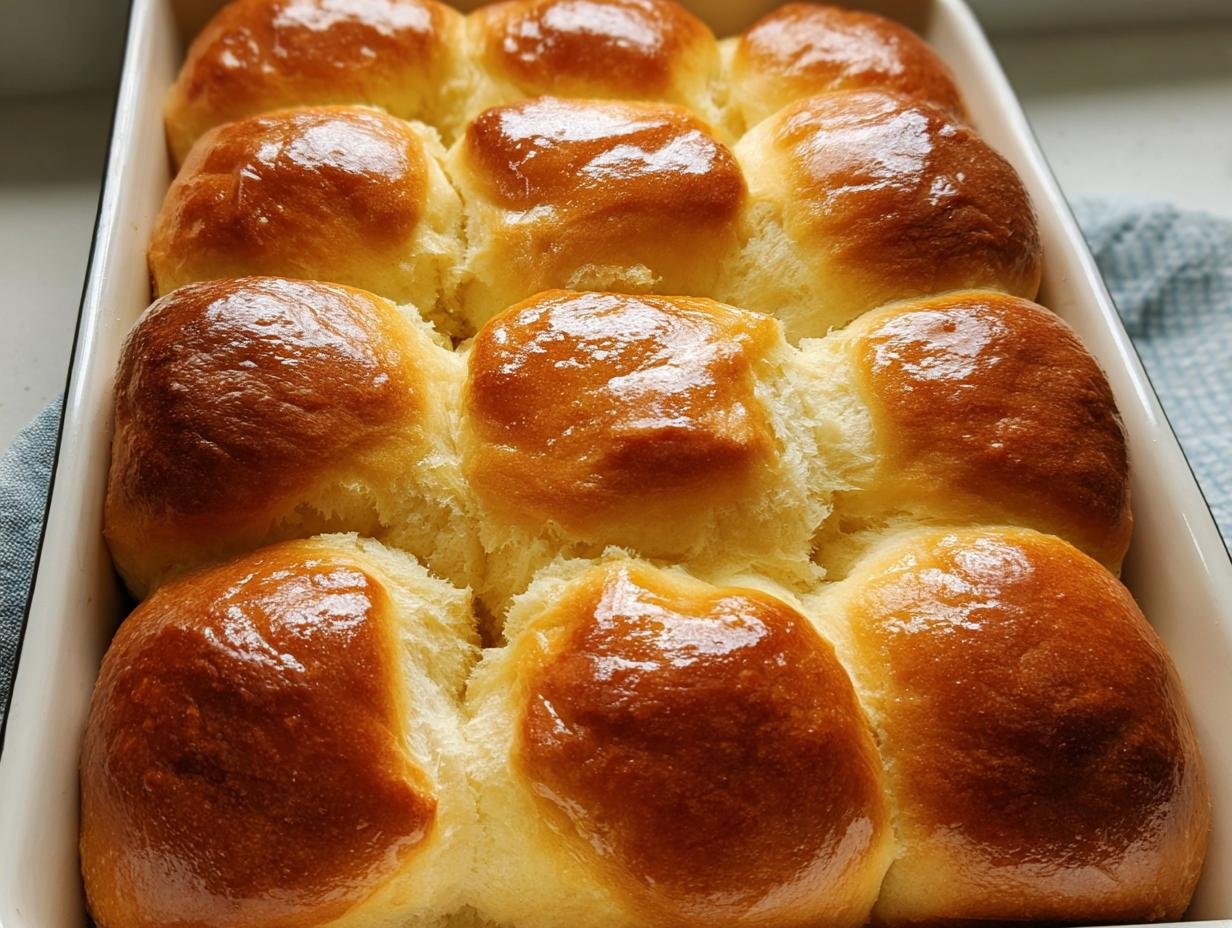
Oh, you simply have to try making bread from scratch, especially when it comes out like this! There is nothing in the world quite like a warm, sweet roll that pulls apart easily, showering your hands in soft, buttery crumbs. Forget the store-bought packages; we are making homemade Hawaiian Sweet Rolls Fluffy Pull Apart right here in your kitchen, and the secret ingredient is going to surprise you—a hint of tropical sweetness!
I still remember the first time I pulled a warm tray of these from the oven—the way the entire kitchen filled up with that incredible buttery, slightly tropical aroma. It was a moment of pure discovery. I was experimenting with ways to create super soft, fluffy breads that still felt nourishing, and this recipe turned out to be a small victory. Watching my family tear apart each pillowy piece with big smiles truly reminded me why I love sharing recipes: it turns simple moments into the best memories.
These rolls are so wonderfully easy, I can barely believe they’re made completely from scratch. Seriously, if you think you can’t handle yeast dough, trust me, this recipe is so forgiving, especially since we let the mixer do most of the hard work!

Why You Will Love These Hawaiian Sweet Rolls Fluffy Pull Apart
I know there are a million bread recipes out there, but honestly, these rolls hit different. I keep coming back to them, and I think you will too once you see how simple they are to master. We are talking next-level softness here!
- The texture is unbelievably soft and tender—truly the best Hawaiian Sweet Rolls Fluffy Pull Apart you’ll ever dunk in gravy or slather with butter.
- That subtle, unique sweetness comes from the pineapple juice, giving them a slight tropical lift that makes them special.
- Because we rely on the mixer, this is practically a no-knead situation. Forget wrestling with sticky dough!
- They are fantastic for meal prep; you can bake them on Sunday and still have amazing rolls ready for lunches later in the week.
- These freeze like a dream, making them the perfect make-ahead wonder for holidays or unexpected dinner guests.
Essential Ingredients for Hawaiian Sweet Rolls Fluffy Pull Apart
Okay, let’s talk ingredients! Even though this is a super easy recipe, that beautiful texture and flavor depend entirely on using the right things. The real star here, folks, is the canned pineapple juice. Trust me on this: it gives these Hawaiian Sweet Rolls Fluffy Pull Apart that signature soft, slightly fruity moistness that you just can’t replicate with regular milk or water. Make sure everything is at the right temperature, especially your liquids and eggs, or your yeast might get grumpy!
We are using bread flour because its higher protein content helps develop a strong gluten structure, which is what gives you that incredible stretch and chew when you pull them apart. Everything else is pretty standard, but paying attention to those small details—like using brown sugar for depth—makes a huge difference in the final buttery result.
For the Dough
- Canned Pineapple Juice: 1/2 cup, make sure it’s at room temperature (and please, no fresh juice here!).
- Whole Milk: 1/2 cup, warmed gently to about 100-110°F.
- Unsalted Butter: 5 tablespoons, melted down and then cooled just until it’s warm, around 85°F. We don’t want to kill the yeast!
- Granulated Sugar: 6 tablespoons.
- Light Brown Sugar: 6 tablespoons.
- Eggs: 2, make sure they are at room temperature for easy mixing.
- Vanilla Extract: 1 teaspoon.
- Instant Yeast: 2.25 teaspoons (that’s totally a standard single packet).
- Bread Flour: 4 cups, plus maybe one extra tablespoon depending on how humid your kitchen is.
- All-Purpose Flour: 1/4 cup.
- Fine Sea Salt: 1.5 teaspoons.
For Egg Wash & Finishing
- Egg: 1, lightly beaten for that beautiful golden sheen.
- Water: 2 tablespoons.
- Salted Butter: 1 tablespoon, melted, to brush on right when they come out of the oven. That’s the secret to the super buttery top!
Step-by-Step Instructions for Perfect Hawaiian Sweet Rolls Fluffy Pull Apart
Don’t let the yeast intimidate you! Since we are lucky enough to have a stand mixer, we can skip heavy kneading and still get that amazing stretch. This is where the magic happens, and following the order matters. We start wet, move slow with the dry ingredients, and then let time do the heavy lifting. Trust me, the reward—those perfectly soft, easy Hawaiian Sweet Rolls Fluffy Pull Apart—is absolutely worth the patience during the rising phases.
Mixing the Dough and First Rise
Grab your mixer bowl! First, we combine all the wet love: the pineapple juice, warm milk, cooled melted butter, both sugars, the two eggs, vanilla extract, and the instant yeast. Give that a quick stir with a wooden spoon, just to get everyone acquainted.
Now, add the all-purpose flour plus about two cups of your bread flour. Attach that dough hook and start mixing on low speed until it looks like a shaggy mess. Resist the urge to add more flour too soon! After it’s combined, toss in your salt. Then, crank the speed up to medium-high and let the mixer work for a solid 4 to 5 minutes until it cleans the sides and forms a smooth, soft ball. You might not need every last bit of that extra bread flour, so just add it gradually until tacky, not sticky.
Lightly grease your hands and a clean bowl. Pop that beautiful dough in, cover it up securely, and leave it alone for about 1 hour 30 minutes. This first rise is crucial for developing that signature fluff!
Shaping and Second Proofing
Once doubled and gorgeous, gently punch the air out of the dough. Now for the easy shaping part! You need to divide that dough into exactly 15 equal little pieces. I find a bench scraper makes this whole splitting process so much cleaner.
Roll each piece into a tight little ball with slightly damp hands—this helps keep them soft. Arrange them nestled close together in your greased 9×13-inch pan. They should look cozy in there! Cover the whole pan loosely with plastic wrap again. Now they need their second nap, which should take about 1 hour until they are perfectly puffy and touching each other.
Right before they go in the oven, mix that single remaining egg with 2 tablespoons of water to make your wash. Brush this gently over the tops of the rolls—this is what gives us that restaurant-quality golden glow.

Baking and Butter Finish
Preheat your oven to 375°F. We are baking them hot and fast so the insides steam into total fluffiness. Slide the pan into the hot oven and bake them for about 20 minutes. Keep an eye on them after 15 minutes; you want them deeply golden brown on top.
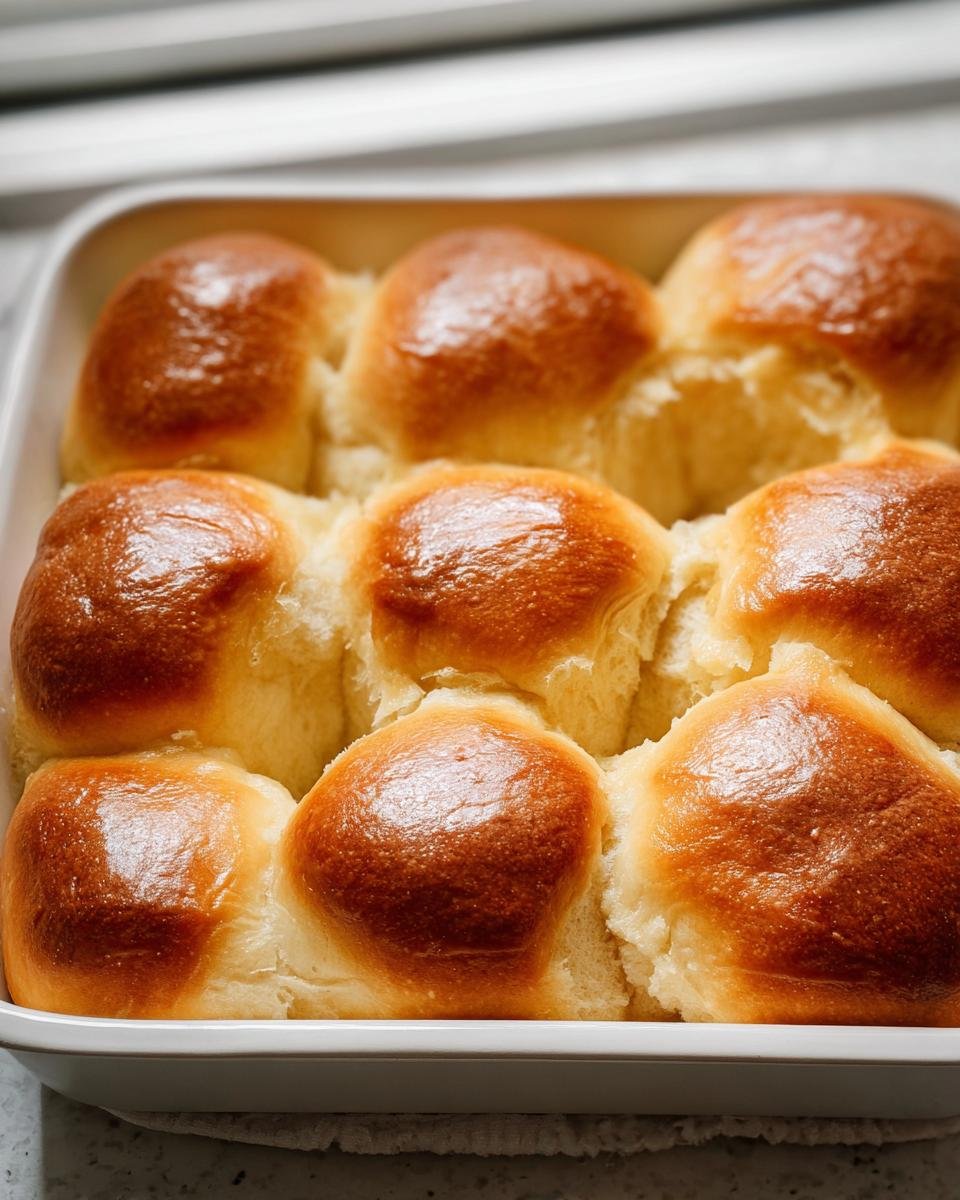
The absolute best part? The finish! As soon as they come out of the oven, you need to brush them generously with that tablespoon of melted salted butter. The heat will soak up every drop, locking in that rich, buttery flavor we all crave. Let them cool just enough that you can handle them, and then get ready to pull apart the best homemade rolls ever!

Expert Baking Tips for Fluffy Pull Apart Rolls
Even though this recipe leans towards being super easy—we practically skip the kneading dance—a few little tricks can push these rolls from “great” to “the best bread I’ve ever made.” I learned these the hard way, usually after a slightly flat batch or sticky dough disaster! Getting the temperature and flour right is everything when you are aiming for that pillowy, moist texture. If you follow these simple rules, you are guaranteed beautiful, buttery results every single time.
Here are the things I always double-check:
- Weigh Your Flour, Seriously! Measuring flour by scooping straight from the bag packs it down way too much, and you end up with a dense, dry roll. If you don’t have a scale (and I sometimes forget mine too!), try the spoon and level method. Gently spoon the flour into your measuring cup, then use a straight edge to level it off. This little move controls the water-to-flour ratio perfectly. It makes a bigger difference than you think.
- Temperature is Not Optional for Yeast: When you warm your milk, use a thermometer if you have one, aiming for that sweet spot between 100°F and 110°F. If it’s too cold, the yeast will sit around bored. If it’s too hot (over 120°F), well, you cook your little yeasties, and they won’t rise! The melted butter for the dough should also be just barely warm to the touch—not hot!
- Don’t Skip the Second Rise: After you shape the little dough balls and place them in the pan, they need that full hour to proof again. They should look visibly puffy and relaxed before they hit the oven. This final rise is what creates the ultimate “pull apart” experience; if you rush it, the rolls will bake dense and spring back too quickly.
- Keep The Dough Slightly Tacky: When you add the final flour during kneading, stop as soon as the dough is mostly smooth but still feels slightly tacky (sticky, but it doesn’t really cling to your fingers). Over-flouring is the fastest way to lose the soft, buttery quality. Remember, they will firm up slightly when they bake!
Making Hawaiian Sweet Rolls Fluffy Pull Apart Ahead of Time
This is my favorite thing about this recipe, honestly—you can totally get ahead of the game! As much as I love that immediate pull-apart experience, sometimes you just need to bake those Hawaiian Sweet Rolls Fluffy Pull Apart the next morning, right?
The dough handles cold proofing like an absolute champion. This is perfect for busy weeknights or planning ahead for a big breakfast or brunch gathering. You get maximum flavor development when you slow things down, and it means smelling warm rolls first thing in the morning without having to wake up at 4 AM to start mixing!
Overnight Cold Proofing the Dough
Once you finish the initial kneading and the dough has rested for its first rise (that 90-minute puff), you can stop the process right there before shaping. Put the dough ball into a lightly greased bowl, wrap it super tight with plastic wrap—like you mean it—and tuck it into the back of the refrigerator.
It can chill out there for up to 24 hours. I usually leave mine overnight for about 12 to 14 hours. The cold temperature slows down the yeast, but those complex sugars and the pineapple juice continue to add amazing depth to the flavor profile.
When you’re ready to bake the next day, take the bowl out of the fridge. Don’t punch it down! Just let it sit on the counter for about an hour to warm up slightly. Then, proceed exactly as the recipe states: shape the rolls, place them in the pan, cover them, and let them have that second, shorter rise (about 1 hour) until puffy, then brush with the egg wash and bake at 375°F.
Freezing Baked Rolls for Future Use
If you want them completely done and ready to go, you can freeze the baked rolls, too! Bake them until they are just slightly underdone—maybe pull them out around the 18-minute mark and let them cool completely.
Once fully cool, place them on a baking sheet and freeze until solid. Then transfer them to a freezer-safe, airtight container or bag. They last wonderfully for about two months this way. To reheat, just pull them out the day before you need them, let them thaw on the counter, and then warm them in a 300°F oven for about 5-8 minutes until completely heated through. They come back to life looking just as fluffy as when they first came out of the oven!
Ingredient Notes and Substitutions for Your Hawaiian Sweet Rolls Fluffy Pull Apart
I get asked all the time about the pineapple juice—it seems so weird, right? Why not just use water? Well, that canned juice is absolutely fundamental to achieving those soft, slightly sticky, incredibly tender Hawaiian Sweet Rolls Fluffy Pull Apart. The juice, especially when it’s from a can and not fresh-pressed, contains natural acids and sugars that work magic with the yeast and the overall crumb structure. Canned juice is more consistent in its sugar content, which means predictable results for us bakers!
Fresh pineapple juice sometimes has enzymes that can actually inhibit yeast performance, leading to sad, flat rolls. So, stick to the canned stuff! It’s your secret weapon for that signature buttery, slightly tangy flavor profile that makes these rolls so famous.
When it comes to swapping things out (because we all run out of ingredients sometimes!), approach it with caution if you want that perfect fluff.
Flour Choices and Sugar Swaps
While this recipe calls for bread flour for that great structure, if you are in a bind, you can definitely use all-purpose flour instead. Just watch the dough very closely! You might need slightly less of it, and the rolls might be just a tiny bit less chewy, but they will still be wonderfully soft. Be ready to stop adding flour sooner than the recipe says if you switch.
For the sugars—we need both the granulated and the light brown sugar because they work together to balance sweetness and retain moisture. If you are totally out of brown sugar, you can substitute it entirely with granulated sugar, but then I insist you add an extra teaspoon of molasses to the wet ingredients. That molasses adds back the color and the deep, rich undertone we want in these Hawaiian Sweet Rolls Fluffy Pull Apart.
If you wanted to try a liquid sweetener instead of the combined sugars (though I really don’t recommend it for this particular texture!), you would need to reduce the pineapple juice and milk significantly to compensate. For guaranteed success, try to stick to the sugar amounts listed!
Serving Suggestions for These Buttery Rolls Recipes Easy No Knead
Now that you have a pan full of the most amazingly soft, buttery rolls right out of the oven, the real fun begins! What do you serve them with? Truly, these are so delicious on their own, still warm with just a little melted butter brushed on top, but they are fantastic partners for almost any meal type. They bring that comforting, melt-in-your-mouth texture to your plate, whether you’re going savory or sweet!
Because they are subtly sweet, they bridge the gap between a standard dinner roll and a slightly sweet breakfast bread beautifully. I’ve mixed these into everything from weeknight dinners to big holiday spreads. You definitely don’t need a special occasion to enjoy these!
Savory Meal Pairings
When I’m making a big, juicy roasted chicken or sometimes even a smoky pulled pork sandwich, these rolls are the absolute best thing to soak up those extra pan juices. Don’t even think about serving chili or stew without a batch of these nearby! I also love using them for sliders—they hold up really well to barbecue sauce and pulled fillings without getting instantly soggy.
If you happened to catch my recipe for honey feta sweet potato rounds, these rolls are the perfect balancing side dish. The little bit of saltiness in the roll cuts through the sweetness of the potatoes and the tang of the feta beautifully. They are just so versatile!
Breakfast and Brunch Spreads
Forget boring toast! These rolls are a game changer alongside scrambled eggs or a stack of crispy bacon. They are firm enough to slice in half and toast lightly if they’ve cooled down.
For a sweeter start, try splitting them open and spreading thick layers of:
- High-quality fruit jam (strawberry or apricot are my favorites!)
- Cream cheese mixed with a little cinnamon.
- Thick slice of sharp cheddar cheese, warmed until it just starts to melt.
Honestly, serving these alongside a fruit platter makes any morning feel like a special treat. They are so much better than regular bread for dipping into coffee if you like that soggy-sweet texture, which I definitely do!
Optional Sweet Glazes to Elevate the Flavor
If you want to lean into the sweet side even further, a simple glaze takes about two minutes to whip up and completely transforms them into a dessert roll.
The classic glaze is just powdered sugar mixed with milk, but here’s my little trick for making the glaze truly sing:
- Use 1 cup of powdered sugar.
- Add just a splash of vanilla.
- Instead of milk, use **a teaspoon of that leftover canned pineapple juice** to thin it out.
It gives your glaze an added layer of complexity that really highlights the flavor in the rolls themselves. Drizzle this on while the rolls are still slightly warm so it melts just a touch.
Frequently Asked Questions About Hawaiian Sweet Rolls Fluffy Pull Apart
I know you must have questions, because when you bake something this soft and amazing, it feels almost too good to be true! I’ve gathered the ones I get most often since these Hawaiian Sweet Rolls Fluffy Pull Apart became a staple in my house. We’re covering texture, yeast choices, and how to keep these buttery delights fresh so you can enjoy them all week long.
Can I skip the stand mixer for this Rolls Recipes easy no knead?
Oh, absolutely you can! That’s why I call this a ‘no knead’ recipe—it’s really ‘minimal knead’ when you use the hook attachment. If you don’t have a mixer, you’ll just need to put a little elbow grease into it. After you mix the wet stuff and the initial dry ingredients together into that rough mass, you’ll need to turn it out onto a lightly floured surface.
When kneading by hand, you’ll need to work that dough for a good 10 to 12 minutes to develop the gluten structure properly. You are looking for that same smooth, elastic, and slightly tacky result you get from the mixer. It takes longer, but the result is still fantastic from scratch bread!
How do I ensure my Hawaiian Sweet Rolls Fluffy Pull Apart are extra buttery?
If you want that incredible, melt-in-your-mouth experience, the finish is everything! The butter you incorporate *into* the dough is necessary for flavor, but the butter you add *after* baking seals the deal on that buttery taste and shine. Don’t skimp on that final brushing step!
As soon as those pans come out of the oven at 375°F, while the rolls are still piping hot, you need to brush them liberally with that melted salted butter. The heat absorbs it instantly, and it makes the tops soft and gleaming. Using salted butter here adds just a tiny bit of needed contrast to the overall sweetness. If you plan to make ahead, you can re-crisp that nice outer layer by warming them up later, but that first coat of butter right after baking is non-negotiable for maximum flavor!
Can I use active dry yeast instead of instant yeast?
Yes, that’s a super common question for Rolls Recipes easy no knead! Instant yeast is my preference here because you just dump it right in because it handles being mixed with cooler liquids okay, but active dry yeast needs a little wake-up call first. If you use active dry, you must proof it first.
To use active dry yeast: Take the warm milk (make sure it’s just warm, not hot!) and stir in the yeast plus maybe a teaspoon of the sugar. Let it sit for 5 to 10 minutes until it foams up nicely. If it doesn’t foam, your yeast is dead, and you need a new packet! Once it’s foamy, proceed with the recipe as written, adding the yeast mixture to the other wet ingredients.
Why did my rolls spread out instead of rising tall?
This usually comes down to two things, most often related to the proofing stage. First, check the temperature of your liquids; if the milk/juice mix was too hot (>120°F), you shocked the yeast, and the dough couldn’t build up enough gas to rise properly. Secondly, and this is common when we rush the make ahead plans, the second rise (the proofing in the pan) wasn’t long enough.
If they spread flat, it often means they over-proofed or were too warm during one of the rises, causing the gluten structure to collapse before baking. They should look puffy and relaxed, but still have some tension when you gently touch them before baking. The total rise time is quite long (about 2.5 hours total), so just be patient!
How long can I store these rolls before they get tough?
These are best eaten the day they are baked, naturally, but because of the pineapple juice and butter content, they stay surprisingly soft longer than plain bread. Store them at room temperature in a well-sealed, airtight container—I usually use large Ziploc bags. They should stay wonderfully soft for about 3 days. After that, they tend to start drying out a bit, but then you can just reheat them!
Storage and Reheating Instructions
Oh, these fluffy rolls are so good that you will probably want some to eat the next day! They don’t really like to sit around getting stale, so storing and reheating them correctly is almost as important as baking them perfectly in the first place. I never like to keep them out longer than three days; after that, they begin to lose that glorious, tender pull-apart quality. You just need a little bit of planning!
Keeping Leftovers Fresh
The key to keeping these rolls soft is keeping the air out! Once they have cooled completely after baking—and I mean *completely* cool because warm bread will sweat and turn gummy inside the container—you need to transfer them immediately to an airtight container. A large, good-quality Ziploc bag that you squeeze all the air out of works wonderfully for this.
Store them at room temperature. Please don’t stick them in the fridge! The cold temperatures actually dry out bread faster, which is the opposite of what we want for these buttery beauties. They should maintain their softness for a good 72 hours this way. If you end up with too many, definitely check out my tips on freezing them baked, which works great!
Waking Up That Morning-After Fluff
If you have leftover rolls that have gone slightly stiff overnight, don’t worry, we can bring them right back to life! The secret to restoring that fresh-from-the-oven texture is moisture and gentle heat. You want to warm them just enough to get the butter soft again without drying them out completely.
The Oven Method (Best Results): This is my preferred way to revive them. Preheat your oven to a gentle 300°F. Place the rolls (maybe separated from the pan and placed on a baking sheet) into the oven for about 5 to 7 minutes. This gentle heat melts the butter slightly and steam the inside crumb back into softness. You’ll be amazed at the results!
The Quick Microwave Fix: If you only need one or two rolls and time is of the essence, the microwave works, but you have to be careful! Place the roll or two you want to eat on a paper towel. Microwave them on medium power for about 10 to 15 seconds. Any longer, and you risk turning them chewy or rubbery. They come out steaming hot and soft, ready for butter, though the oven method gives a nicer overall consistency, especially if you are reheating a whole section like I do sometimes when I serve them warm with dessert!
Share Your Homemade Hawaiian Sweet Rolls Fluffy Pull Apart
Well, that’s it! We’ve covered every single step needed to get these incredibly buttery and sweet rolls out of your oven and onto your table. I truly hope you enjoyed the process, especially watching how easily that dough comes together using the mixer—it really is one of the most rewarding Rolls Recipes easy no knead from scratch out there!
I poured my heart into perfecting this recipe, and now I can’t wait to hear about your success! Did you manage to sneak a couple of rolls before dinner? Did the pineapple juice trick work its magic in your kitchen just like it did in mine?
Please, don’t be shy! Take a picture of your gorgeous batch of Hawaiian Sweet Rolls Fluffy Pull Apart and tag me online! I love seeing your creations. And if you have any lingering questions about substitution or technique, drop them down in the comments below. Whether you want to know more about the buttery finish or how to best store them for that make ahead goodness, I’m here to help you troubleshoot.
If you tried this recipe, please take a quick moment to give it a star rating right below this section. Your feedback helps other bakers know they can trust this recipe too. Happy baking, friends!
Warmly,
By Emily Santiago – Wellness Writer & Content Editor

Fluffy Hawaiian Sweet Pull Apart Rolls
Ingredients
Equipment
Method
- Combine the pineapple juice, milk, melted butter, sugars, 2 eggs, vanilla, and yeast in the bowl of a stand mixer. Add the all-purpose flour plus 2 cups of the bread flour. Stir with a wooden spoon until the dough forms a rough, shaggy mass.
- Stir in the salt. Attach the dough hook to the mixer and turn to medium-low speed. Gradually add the remaining flour just until the dough comes together. You may only need some of the flour depending on your kitchen environment and flour brand.
- Continue kneading on medium-high speed for 4 to 5 minutes, until a soft and smooth ball of dough forms.
- Lightly grease or wet your hands and place the dough in a lightly greased medium-sized bowl. Cover with plastic wrap. Let rise until puffy and doubled in size, about 1 hour 30 minutes.
- Spray a 9×13-inch metal baking pan with cooking spray. Gently deflate the dough. Use a bench scraper or knife to divide the dough into 15 equal pieces. Shape each piece into a ball and place in the prepared pan.
- In a small bowl, combine the remaining egg with 2 tablespoons of water. Brush all over the rolls. Cover with plastic wrap and let rise again until doubled in size, about 1 hour.
- Preheat the oven to 375°F.
- Bake the rolls for 20 minutes, or until golden brown. Brush with melted butter. Serve warm.