
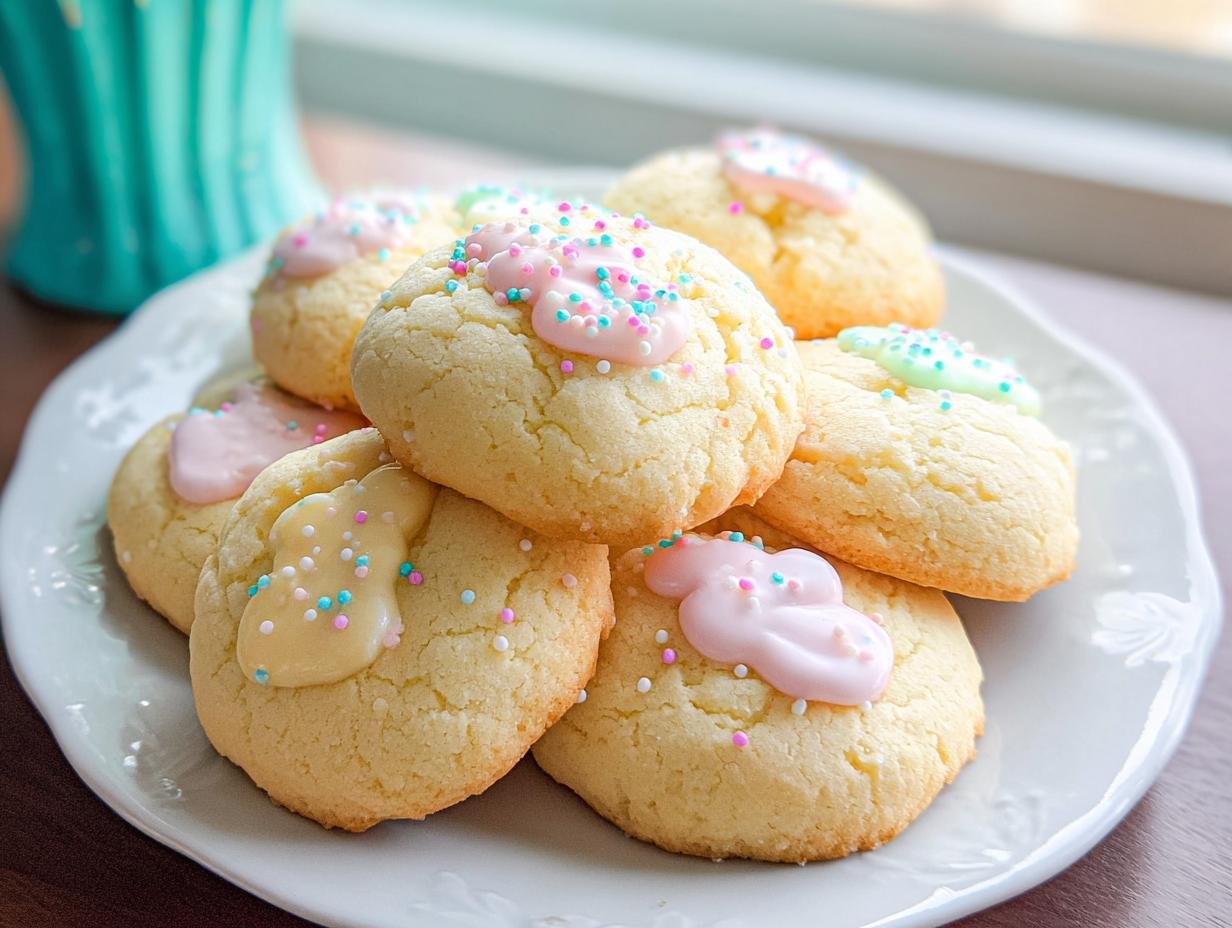
Oh, spring is finally here, and you know what that means! Time to ditch the heavy winter baking and bring out the sprinkles! Honestly, my favorite part of any holiday is getting messy in the kitchen, and nothing screams Easter celebration like perfectly shaped, colorful cookies. I swear, nothing beats the sheer joy of setting out a platter of handmade treats. That’s why I’m sharing my absolute go-to, foolproof easter cookies recipe today. These aren’t fussy at all; they are the quintessential, classic sugar cookies that bake up beautifully and hold every cutout shape—from tiny chicks to fancy Easter baskets—without spreading into sad little puddles.
I’ve tried dozens of recipes over the years, desperately trying to find that one that doesn’t crumble when you pick it up but is still tender when you bite it. This one, developed over many chaotic spring baking sessions, is the winner. It uses simple pantry staples, and trust me, consistency is key!
Why This easter cookies recipe is Perfect for Holiday Baking
When you’re juggling Easter brunch plans or trying to keep the kids busy before the egg hunt starts, you don’t have time for a recipe that fights you every step of the way. This cookie dough might be simple, but it’s incredibly reliable. It’s the one I turn to year after year because it just works! I even linked a few of my favorite light dishes for the holiday over at spring holiday menus, but these cookies are always the star.
Here’s why I rely on this straightforward method for our spring celebrations:
- It’s fast! We’re talking quick mixing, a short rest in the cold, and then they’re in and out of the oven before you know it.
- They don’t spread! If you’ve ever cut out a perfect bunny only to pull a melted blob from the oven, you know the pain. That doesn’t happen here.
- The flavor is clean! It’s a true sugar cookie base, which means it’s the perfect canvas for all your wild icing and sprinkle ideas.
Quick Prep and Bake Times
Seriously, look at those numbers! Only 30 minutes of active time, and then they bake in 8 to 10 minutes flat. That means you can have barely-warm cookies ready for decorating before lunch, which is huge. If you need a fast solution for a last-minute school party or just want to get the baking done early, this speed is a lifesaver.
Ideal Texture for Cookie Decorating
The magic here happens in the fridge. You absolutely must chill this dough, and I know it pushes your patience, but it’s non-negotiable for that crisp shape retention. After chilling, the dough is firm enough to roll out to about a quarter-inch thick. That thickness is what keeps those delicate bunny ears and tiny flower centers intact while they bake. They come out sturdy enough to handle thick royal icing.
Gathering Ingredients for Your easter cookies recipe
Before we even think about dusting the counter with flour, we need to talk about preparing our components. You can’t rush this part because this specific easter cookies recipe relies on everything playing nicely together when they meet in the mixer. My biggest tip, and this is where so many people slip up, is getting your butter right! It needs to be truly softened—you should be able to press your finger into it easily—but if it looks greasy or shiny, you’ve melted it, and we need to start over with new sticks.
When we cream the butter and sugar, we’re physically whipping air into the mixture, and that trapped air is what gives you that nice lift later on. That’s why the butter temperature matters, and why we need that happy, plump, room-temperature egg. Don’t swap for small eggs either; we need the structure that those large ones provide!
Cookie Dough Ingredients: Exact Measurements
Make sure you gather everything before you turn on the mixer, or you end up scrambling! I always like to measure out my dry things into one bowl and have the wet things ready on the counter so the butter doesn’t melt while I hunt for the baking powder.
- You need 1 cup of unsalted butter, and remember, it must be softened to that perfect, mushy-but-not-melted stage.
- For sweetness, grab 1 cup of granulated sugar.
- We’re using 1 large egg and 1 teaspoon of vanilla extract for flavor grounding.
- Then, for the bulk, measure out 3 cups of all-purpose flour, making sure you spoon and level it—don’t just scoop from the bag!
- Finally, for lift, we need 1 teaspoon of baking powder, and just a little bit of balance with 1/2 teaspoon of salt mixed in with the dry ingredients.
Essential Equipment for Making the Best easter cookies recipe
You don’t need anything fancy for this easter cookies recipe, which I love! Having the right tools just makes the process smoother. You’ll definitely want a good, sturdy mixing bowl and your mixer for creaming the butter. Then, grab your rolling pin and those fun Easter cookie cutters. And of course, you need a couple of standard baking sheets lined with parchment paper!
Step-by-Step Instructions for Your easter cookies recipe
Alright, now that we have our ingredients lined up and we know not to be scary around the melted butter, let’s get this dough mixed! Remember, the whole point of this easter cookies recipe is simplicity, but precision in mixing is what separates a good cookie from a truly great one that holds its shape when painted with royal icing. This process is fast, but you have to pay attention to the texture changes in your bowl!
Mixing the Dough: Creaming and Combining
First things first, get that softened butter and the sugar into your big mixing bowl. You need to beat these two together until they are totally lightened up—pale yellow and fluffy. I usually start low and then bump it up medium speed for about two full minutes. This is when you’re building structure, so don’t rush the creaming! Next, drop in your single egg, followed by that whiff of vanilla extract. Mix just until you see it disappear into the buttery cloud.
In a separate bowl—yes, you need two bowls for this, trust me—whisk your flour, baking powder, and salt together so they are fully acquainted. Now, the most important part: adding the flour mixture. You have to go gradually! Add about a third of the dry stuff, mix on the absolute lowest setting until you *just* see it incorporated. Then stop! Scrape down the sides, and add another third. We are trying hard here to avoid overmixing! If you beat too much flour, you build gluten, and suddenly your tender sugar cookie turns into a mini bread roll. Once the last bit of flour is added, mix until you just see streaks disappear, and bang! Turn that mixer off immediately.
Chilling and Preparing to Roll
This step is where we save our cute little Easter shapes from doom! Divide that soft dough right in half. It’s easier to chill and roll this way, too. Flatten each half into a disc—don’t worry about perfection, just get it somewhat flat—then wrap it tight in plastic wrap. Into the refrigerator they go for a minimum of 30 minutes. I try to leave mine closer to an hour if I have time, just to be safe. While that’s chilling, it’s the perfect moment to get your oven prepped. Set it to 350 degrees F (175 degrees C). Since we’re making a big batch for decorating fun, line those baking sheets with parchment paper. Parchment paper is my secret weapon for easy cleanup, especially when preparing for fun holiday baking like this! I also always make sure to preheat that oven fully. You want consistent heat right when the cookies hit the rack.
If you are looking for more quick holiday prep ideas, check out these tips I found for quick and easy prep strategies for when the holiday rush hits!
Cutting, Baking, and Cooling
Once your dough is thoroughly chilled, grab one disc and dust your counter surface—a little flour goes a long way! Roll that dough out evenly to about 1/4 inch thickness. This thickness is crucial; too thin and they burn easily; too thick and they bake unevenly. Now bring out those adorable Easter cookie cutters! Press them firmly into the dough. If the dough starts sticking, just dust the cutter lightly with flour. Carefully place your cut shapes onto the parchment-lined baking sheets, making sure there’s about an inch of space between each one so they have room to breathe without touching.
Bake them for 8 to 10 minutes max. Watch the edges! You want a tiny hint of light golden brown creeping around the sides—the centers should still look set and slightly pale. Quick tip: if you notice one side browning faster, rotate the sheets halfway through! Once they look done, pull them out. Here’s essential cooling advice: let them sit right there on the hot baking sheet for a full 5 minutes. This lets the cookies firm up gently. If you try to move them straight away, they’ll just crumble. After those five minutes, gently slide them onto a wire rack to cool completely before you even think about touching them with icing.
Tips for Success with This Classic easter cookies recipe
Listen, I’ve been there—I’ve rushed the chilling, I’ve overmixed the flour, and my beautiful holiday cookies ended up looking like pale, tough Frisbees. It happens to the best of us! But since this easter cookies recipe is so straightforward, if you follow just a couple of common pitfalls, you get perfection. I learned these lessons after burning through way too many sticks of butter when I first started my holiday baking journey. I want you to avoid my past mistakes, so here are the crucial extra tips that ensure a tender cookie that holds its shape beautifully.
If you are curious about cookies that bake up slightly differently but still great for holidays, I wrote a whole post about adapting some of my favorite chocolate chip cookie secrets that might spark some inspiration!
The Importance of Cold Dough
I know I hammered this point home earlier, but it bears repeating because this is the number one reason cookies spread! The butter in your dough needs to be hard when the cookies hit the hot oven. When the dough is cold, the butter stays solid longer, so the cookie holds its shape while it slowly heats up. If the butter melts too fast, it releases a grease slick underneath your dough, and boom—your bunny is now a blob spreading toward the next cookie line. Don’t skip that chilling time, even if you’re in a hurry!
Avoiding Overmixing the Flour
Remember what I said about gluten? Flour has proteins that, when hydrated and worked too hard, link up like tiny chains. That’s great for chewy bread, but terrible for a tender sugar cookie. As soon as you add the flour mixture, you should only mix until you stop seeing white powdery streaks. If you keep the mixer going until it looks perfectly smooth and uniform, you’ve developed that gluten, and your cookies will turn out tough and chewy—the opposite of what we want for delicate easter cookies.

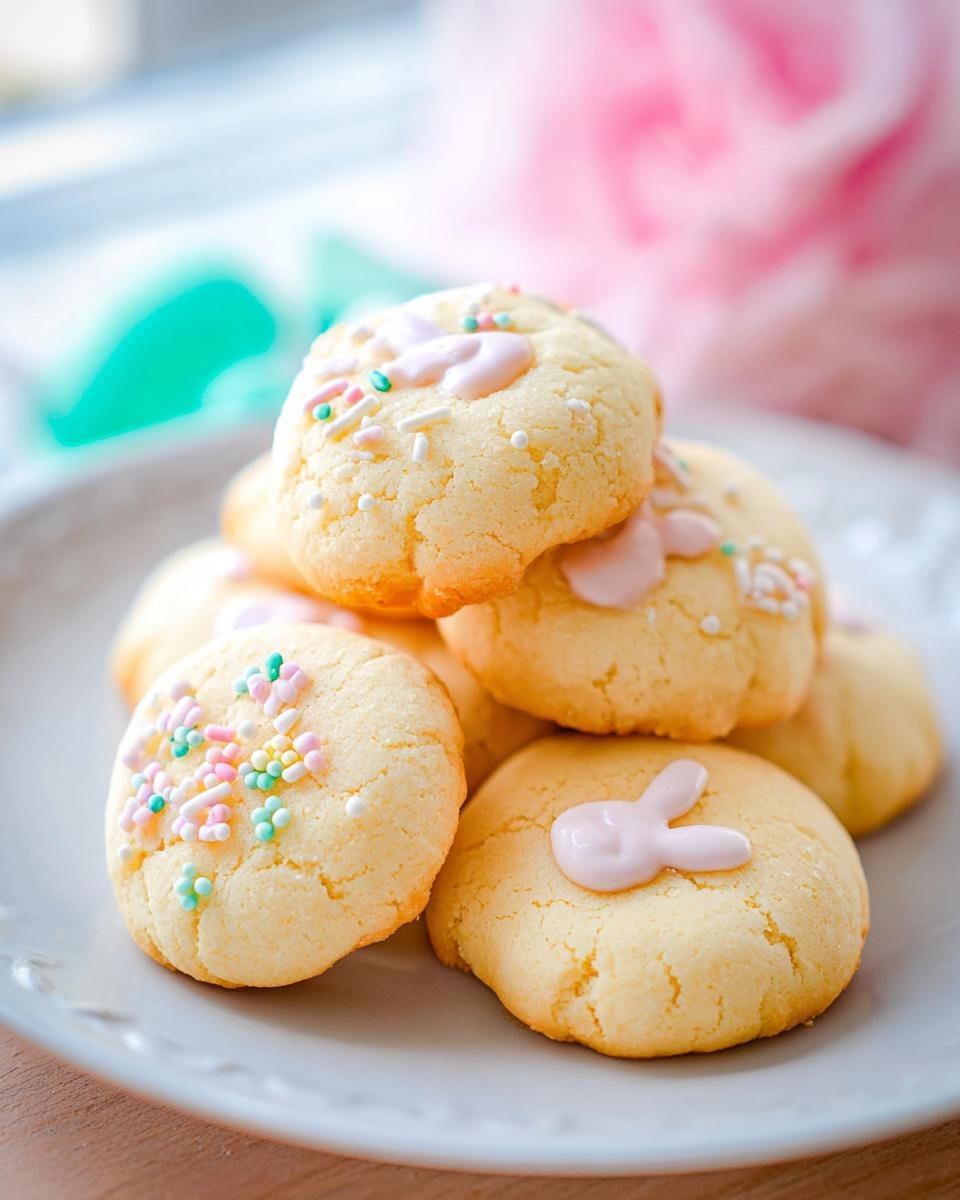
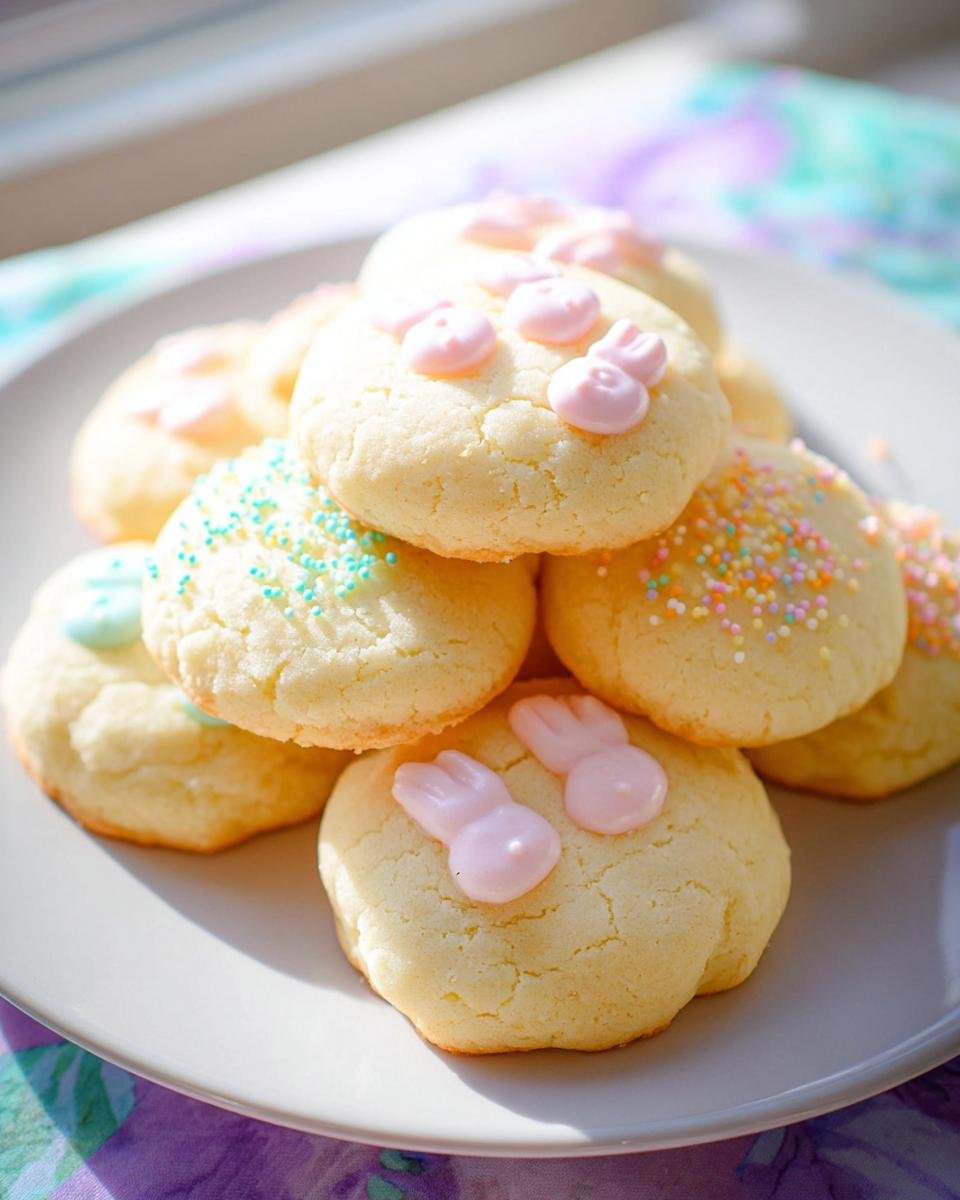
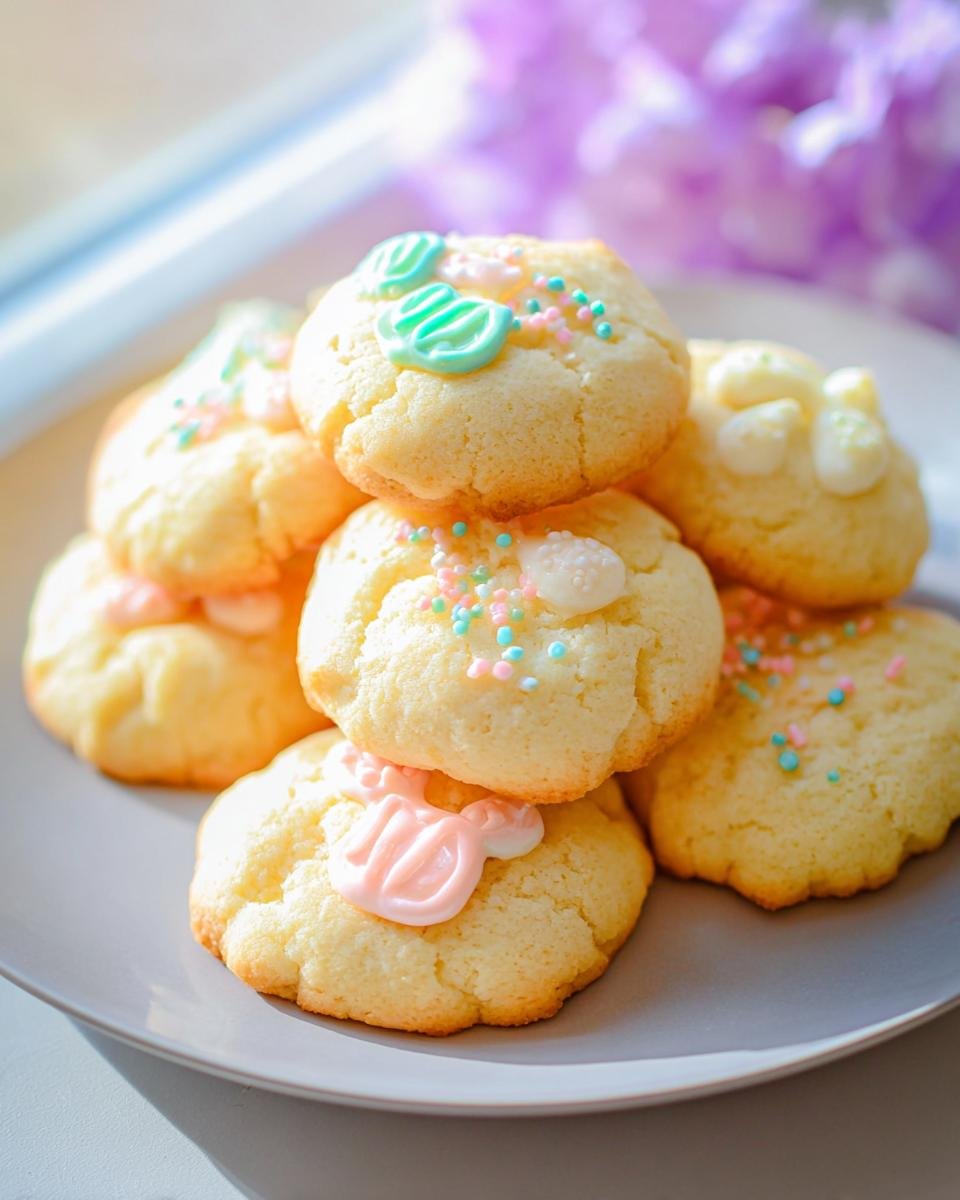
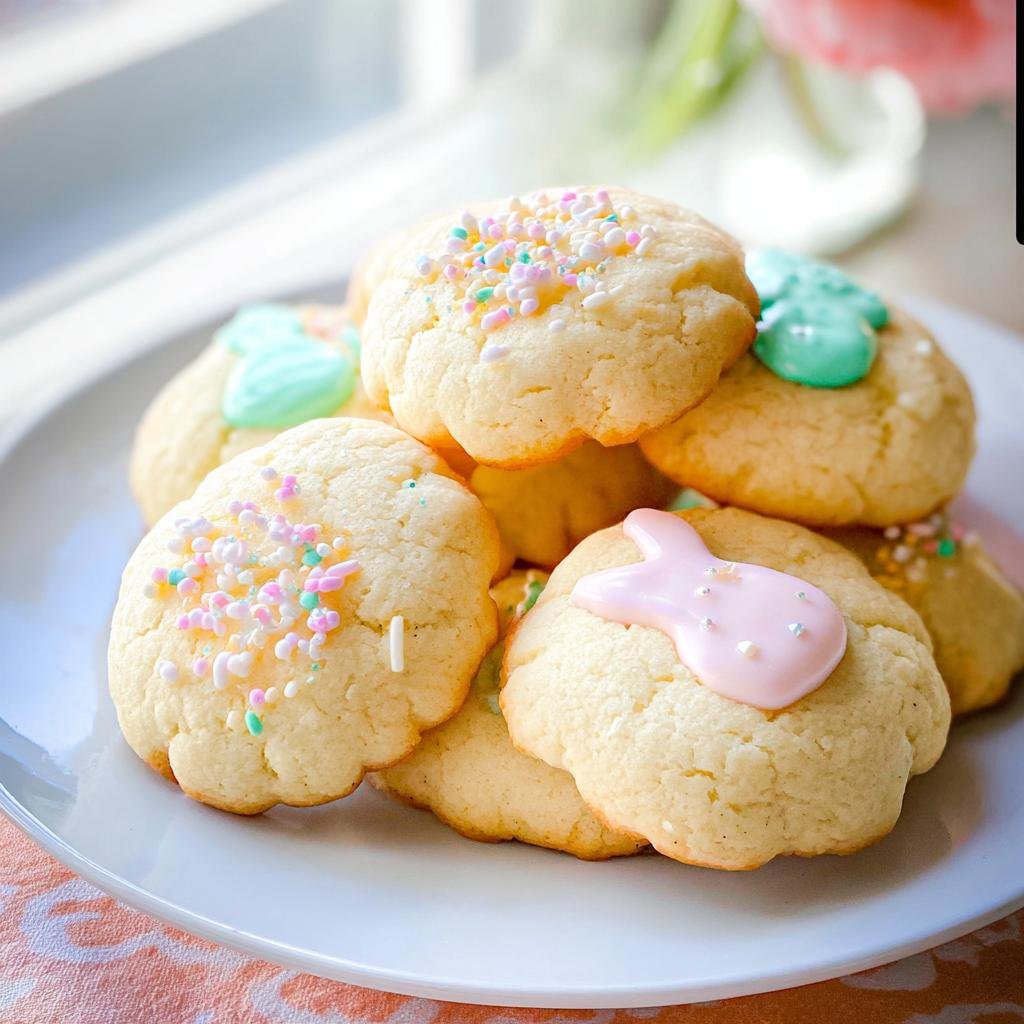
Decorating Your Finished easter cookies recipe
Now for the real fun! Baking the cookie is only half the battle when you’re making a batch for cookie decorating, right? These simple sugar cookies are your blank canvas, and they have to be completely, 100% cool before you start anything decorative. If you touch them with even slightly warm icing, you’re asking for a melty, sad puddle of color all over your cooling rack. Don’t do it to yourself!
You have a couple of great options for what to put on top. You can go for a thick, hard-setting royal icing, which is amazing if you want intricate piping details or need the cookies to stack well for gifting. Royal icing takes a little more effort, but those decorated cookies will last for ages.
My personal favorite for a high-volume easter cookies recipe like this one is just a good, simple powdered sugar glaze. It sets up quickly and gives a nice, shiny coating. As the recipe note mentions, you can use whatever icing you love best! For the glaze, I usually just whisk powdered sugar with a little bit of milk and vanilla—sometimes I add a drop of lemon juice for brightness. If you’re using a glaze rather than royal icing, you can usually get away with applying it when the cookies are just barely room temperature, since the pressure isn’t as intense as it is with piping.
Remember to be patient! Decorating takes time, especially when you’re doing a whole batch for holiday baking. Take breaks, enjoy the quiet moment after all the baking chaos, and don’t feel bad if your first bunny looks a little wobbly. After all, they are homemade, and they’re made with love!
Storage and Make-Ahead Options for Holiday Baking
One of the best things about a sturdy sugar cookie is that you can totally fake your way through holiday baking by getting ahead of the game! I always try to bake my cookies a day or two before I plan to decorate them. It makes the actual decorating day feel so much more relaxed when you aren’t worried about oven times and cooling racks.
For the raw dough, I find mixing it up and refrigerating it is a lifesaver. You can wrap those discs tightly in plastic wrap, and they stay absolutely perfect for up to three days in the fridge. Trust me, that cold dough rolls out like silk, even better than if you chilled it for just 30 minutes. If you need to go even further out, you can wrap those dough discs in a double layer of plastic and then a layer of foil, and they freeze beautifully for up to three months. Just let them thaw overnight in the fridge before rolling them out!
When it comes to the baked cookies, you have options depending on if they are frosted or plain. If they are naked (no icing), store them in an airtight container at room temperature. At least two dozen of these easter cookies recipe leftovers will last nearly a week, which is amazing. If you decorated them with royal icing, they are fine sitting out on a platter for a couple of days, but if you made a simple glaze, they are best stored in one layer in an airtight container.
If you’re interested in more recipes you can prep ahead of time to save your sanity on the actual holiday, I was just reading some great tips over at meal prepping that gave me a few new ideas for easy weekday breakfasts, too!
Just remember never to store undecorated cookies with decorated ones if they are next to each other for a long time; sometimes the moisture transfers, and we don’t want that!
Common Questions About This easter cookies recipe
When you’re trying out a new easter cookies recipe, especially one you plan to use for decorating gifts or family events, it’s only natural to have a few questions pop up. I remember worrying about everything from the dough texture to storage before I baked my first dozen years ago! I gathered up the few things I always get asked about when friends try my classic sugar cookies for the first time. Hopefully, these quick answers help you on your holiday baking adventure.
Can I use different cookie cutters for this recipe?
Absolutely, yes! That’s the beauty of a sturdy, well-chilled dough like this one. If you have tiny ones, big ones, Easter eggs, carrots, lambs—it doesn’t matter one bit! The only thing you have to keep in mind is the thickness when you roll them out. If you have a really intricate cutter, you might want to roll the dough out to a slightly thicker 3/8 inch, and make sure you chill it extra well beforehand. If your dough gets even slightly warm while you’re cutting, those fine little details will start getting soft around the edges, and we don’t want that!
How long do these cookies stay fresh?
This is such a practical question, especially when you’re doing a massive baking day ahead of time. For undecorated cookies, which I sometimes store on a tray covered lightly with plastic wrap, they stay fresh and crisp for about 5 to 7 days on the counter. They are almost always best on day two, once they’ve cooled down completely and set up. If you decorated them with that simple glaze I mentioned, they tend to soften just a tiny bit faster, so I aim to decorate those within 3 days of baking. If you used a hard royal icing, they can last even longer, sometimes up to two weeks, provided you store them in a cool, dry spot away from strong odors!
Nutritional Estimates for Simple Sugar Cookies
Now, I know for most of us, if we’re making a classic easter cookies recipe, calorie counting probably isn’t the first thing on our minds! These are holiday treats meant for joy and sharing, right? But I always get a few questions about the general breakdown, especially for those tracking macros or just curious about the ingredients we packed into these treats. Because we used full-fat butter and a good amount of sugar, they are definitely on the indulgent side, perfect for a special occasion.
I always like to share these numbers as a baseline. If you swap ingredients, of course, things change! I’ve included a link below to some other helpful resources if you’re looking for lighter options, but for this classic batch, here are my best guesses for what you’re looking at per cookie (based on 24 cookies):
You can find more insight into general baking estimates over at calorie-smart recipe ideas, but keep in mind these are based on standard prep!
- Calories: Approximately 160-180 kcal
- Total Fat: Around 8g
- Protein: Roughly 2g
- Total Carbohydrates: About 22g
A quick note of caution: Please remember these are just estimates based on the standard ingredients listed above—the butter, sugar, and flour! If you load these darlings up with thick royal icing, sprinkles, and edible glitter (which, let’s be honest, we all do!), those numbers will definitely tick upwards. This estimate is for the cookie itself, baked fresh. It’s just a guideline, not a strict rule, so go ahead and enjoy your beautiful sugar cookies!
Share Your Easter Baking Creations
Well, that’s it! We’ve mixed, we’ve chilled, we’ve baked, and hopefully, you’ve had some serious fun decorating!
This simple easter cookies recipe is meant to be shared, and honestly, seeing what colors and shapes you all come up with is half the fun for me. Whether your icing skills are professional-level, or you just ended up with a gooey, sprinkle-covered masterpiece that tastes amazing, I want to hear about it!
Don’t be shy! Drop down into the comments below and tell me how your sugar cookies turned out. Did you use rabbits? Did you try the royal icing or stick to a simple glaze? Rate this recipe out of 5 stars so other bakers know how much you enjoyed the process. And if you snapped a picture of your beautifully decorated Easter cookies, please share it on social media and tag me! I love seeing these classic holiday treats come to life in your kitchens. Happy Easter baking, everyone!
Simple Easter Sugar Cookies
Ingredients
Equipment
Method
- In a large bowl, cream together the softened butter and granulated sugar until the mixture is light and fluffy.
- Beat in the egg and vanilla extract until combined.
- In a separate bowl, whisk together the flour, baking powder, and salt.
- Gradually add the dry ingredients to the wet ingredients, mixing on low speed until just combined. Do not overmix.
- Divide the dough in half, wrap each half in plastic wrap, and chill in the refrigerator for at least 30 minutes.
- Preheat your oven to 350 degrees F (175 degrees C). Line baking sheets with parchment paper.
- On a lightly floured surface, roll out one portion of the chilled dough to about 1/4 inch thickness. Use Easter-themed cookie cutters to cut out shapes.
- Place the cut-out cookies onto the prepared baking sheets, leaving about 1 inch between them.
- Bake for 8 to 10 minutes, or until the edges are lightly golden. The centers should look set.
- Let the cookies cool on the baking sheets for 5 minutes before transferring them to a wire rack to cool completely before decorating.