
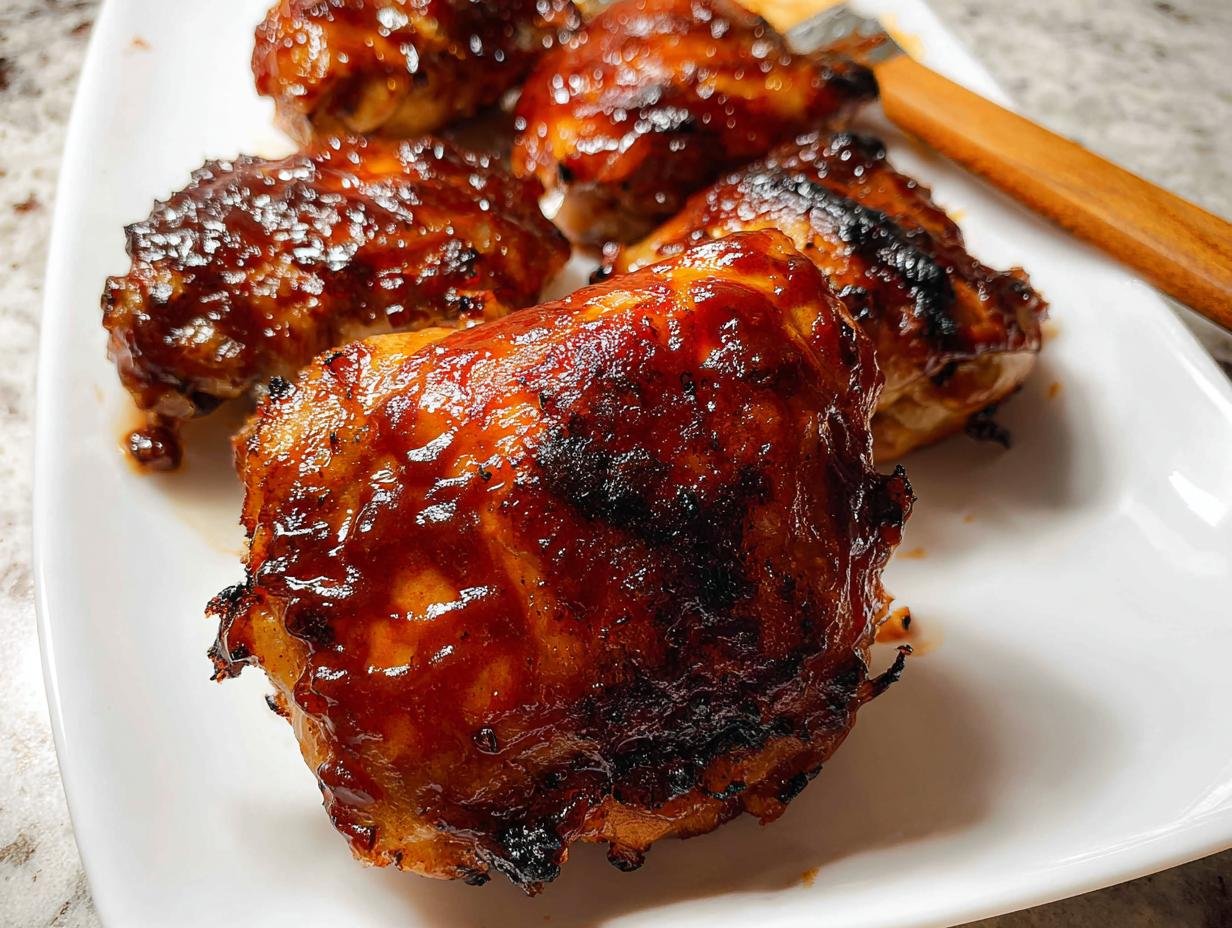
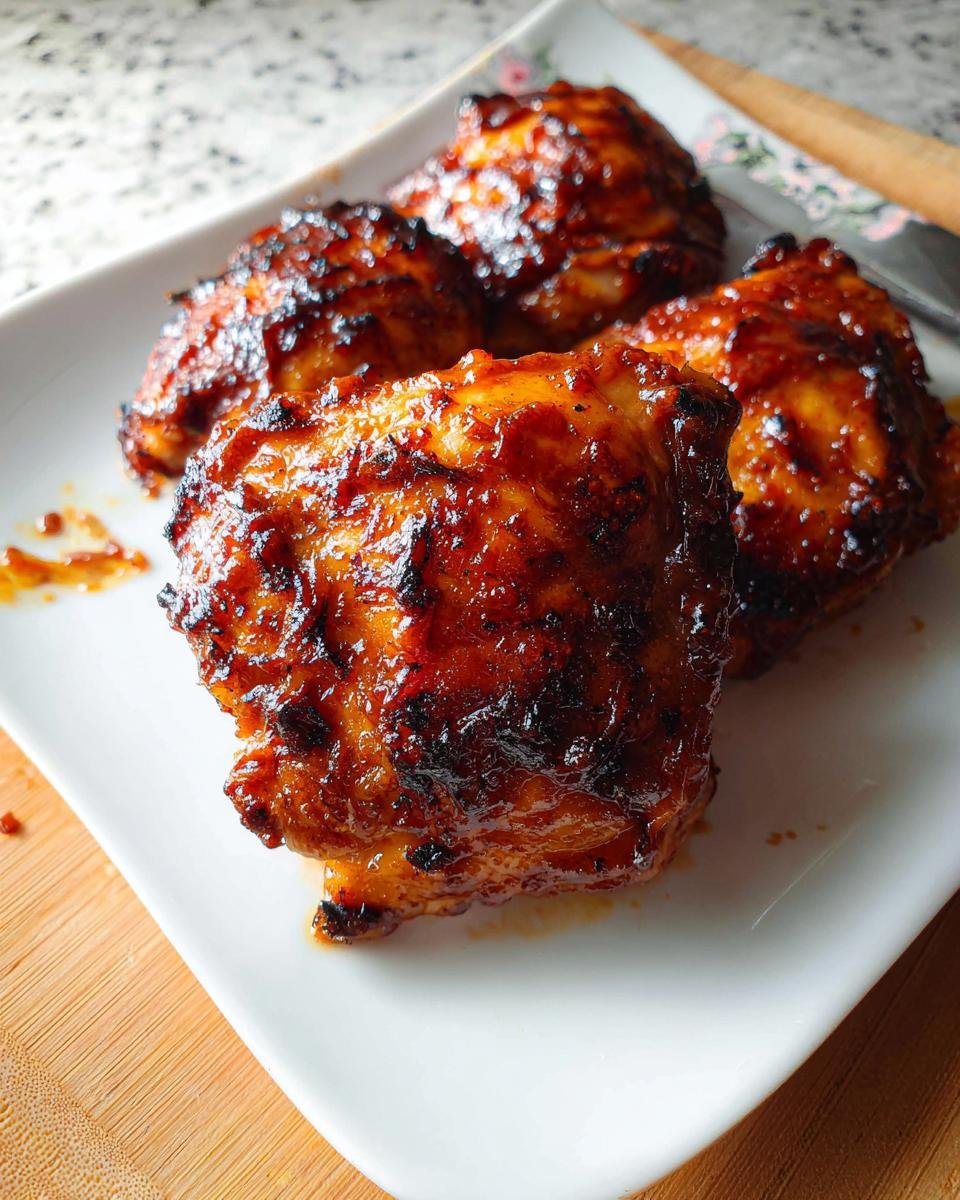
Oh, I totally get it—sometimes you need dinner on the table faster than you can decide what to watch next. That’s why my air fryer has basically become my favorite kitchen appliance! If you’re looking for the absolute fastest way to get dinner done without sacrificing flavor, you need this recipe. We are talking about perfectly cooked, impossibly crispy-skinned bone-in chicken thighs drenched in a rich, sticky glaze. These Air Fryer BBQ Chicken Thighs Sticky Glaze are my secret weapon for busy weeknights. I’ve made this batch after batch, dialing in the timing just right so you never end up with soggy skin. Seriously, it’s a game changer for weeknight meals!
Gathering Ingredients for Air Fryer BBQ Chicken Thighs Sticky Glaze
You know I rely on simple pantry staples for my favorite meals, and this recipe is no exception! To get that incredible flavor and crust, we break the ingredients down into two easy groups: the dry rub that gets right against the skin, and the glaze that we brush on later. I always try to have everything measured out before I even think about turning on the air fryer—it makes cleanup a breeze! You can find more ideas for mixing up healthy meals with everyday ingredients on my site.
For the Seasoning Mix
- 1/2 tsp garlic powder
- 1/2 tsp onion powder
- 1/2 tsp red chili powder or cayenne pepper (I like a little kick!)
- 1/4 tsp black pepper
- 1/2 tsp salt
For the Sticky Glaze and Chicken
Don’t skimp here; the skin is what makes or breaks this dish!
- 6 chicken thighs bone-in, with skin (These are mandatory for the best crispiness, trust me!)
- 1/2 cup barbecue sauce (Use your absolute favorite brand!)
Preparation Steps Before Air Frying Your Air Fryer BBQ Chicken Thighs Sticky Glaze
Before we even plug in the air fryer, we need to set these thighs up for success. This is the stage where a mediocre thigh becomes a masterpiece, so pay attention!
First thing: look at those thighs. If there’s any big, floppy bits of excess fat around the edges—especially under the skin or attached to the bone—trim them off. I just use kitchen scissors. It helps everything cook evenly and reduces messy flare-ups later.
Next up is the most crucial step for getting that shatteringly crisp skin: you have to dry them out. I mean really dry. Grab a stack of paper towels and press them firmly all over that skin. Moisture is the enemy of crispiness, so the drier the skin going in, the better the result. I always say that drying the skin ensures the heat can work its magic on the fat, rendering it out nicely instead of steaming the chicken.
Finally, I give the skin a few shallow cuts—we call that scoring—right down to the flesh. Don’t cut through the bone, obviously! This helps the seasoning get down into the meat and lets the skin tighten up beautifully as it cooks. Check out my tips for getting super juicy chicken thighs if you want even more secrets!
Seasoning and Initial Cook for Air Fryer BBQ Chicken Thighs Sticky Glaze
Now that our chicken is patted dry and scored, it’s time for the flavor party to start! We are making a super simple dry rub that packs a punch. You don’t need anything fancy here, just basic pantry spices mixed together.
Grab that little bowl we talked about and toss in the garlic powder, onion powder, chili powder, pepper, and salt. Give it a good whisk or shake—make sure everything is evenly distributed so you don’t bite into a pocket of straight salt! You can find tons of inspiration for other healthy chicken recipes using simple spices like this on the blog.
Toss your seasoned thighs into the large bowl and use your hands to work that spice mixture all over every single piece, making sure to get it between the skin flaps too. They become little spice packets!
Time to preheat! Set your air fryer to 400F. High heat right at the start is key, especially for the skin. Once it’s preheated, arrange the thighs snugly in the basket, but please, please don’t overcrowd them! We need that hot air to circulate. Put them in skin-side *down* first, and let them roll for a solid 10 minutes. This initial blast cooks off some fat and starts to crisp things up nicely before the sticky glaze goes on.
We aren’t shooting for fully cooked yet, but we need a good base temperature. Keep in mind that the final internal temperature we are aiming for is 170F. That little bit of cooking time lets the meat firm up so when we flip them, they won’t fall apart!
Glazing Technique for the Perfect Air Fryer BBQ Chicken Thighs Sticky Glaze
Okay, this is where the magic happens! We’ve cooked the thighs for 10 minutes skin-side down, rendering some of that extra fat out. Now, we’re ready to introduce the barbecue sauce, but timing is everything so we don’t burn that sweet sugar! Don’t pull the basket out and walk away—stay close for this part.
Carefully flip those thighs over—skin-side up now—so the cooked side is facing down. Take your pre-measured 1/2 cup of BBQ sauce and brush a decent layer right over the exposed side. You don’t want to drown them, just give them a good coating.
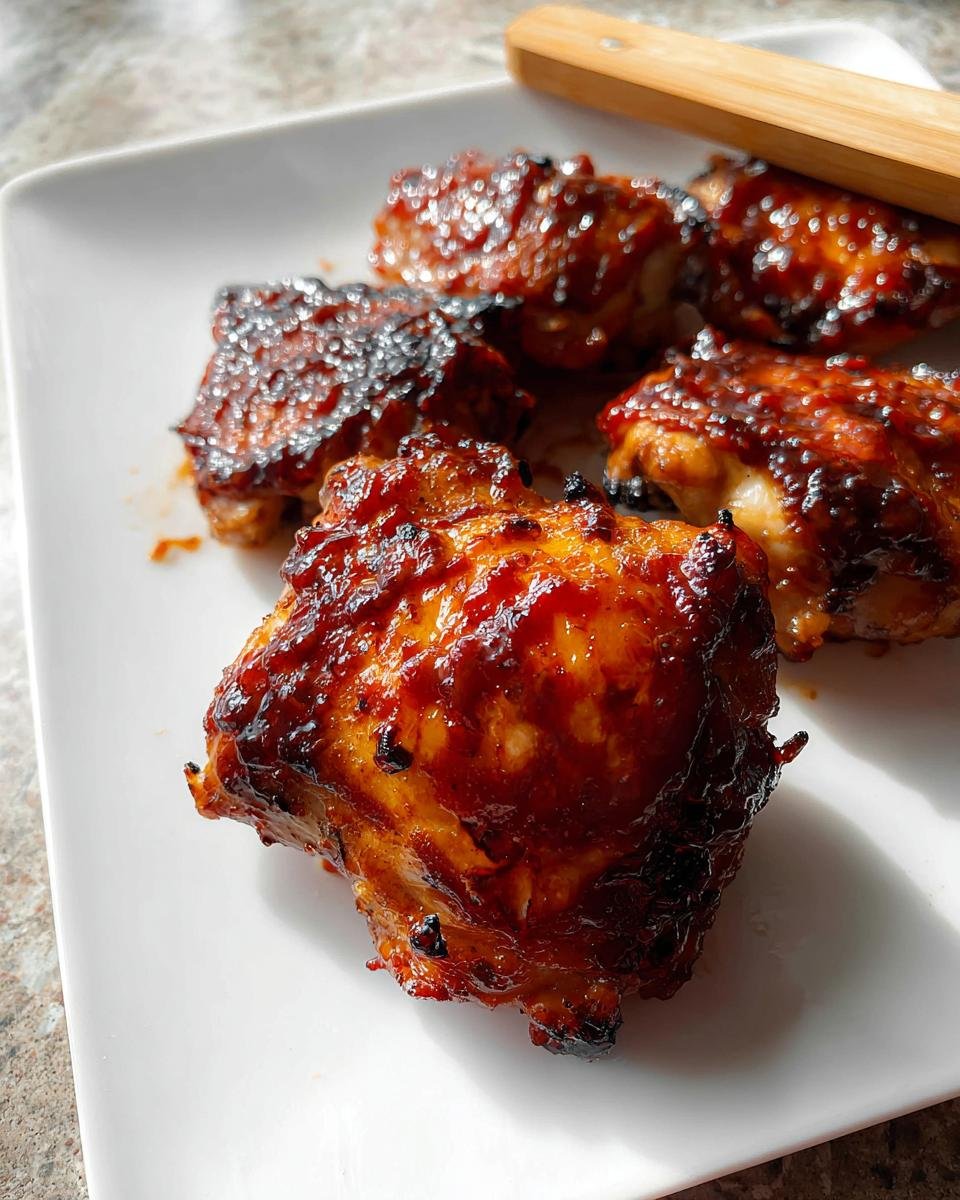
Pop them back in for just 5 more minutes. This briefly sets the first layer of sauce and starts heating it up. When those 5 minutes are done, take them out again. Give them another generous brush of sauce—this is really what builds that delicious, shatteringly sticky exterior we are hoping for.
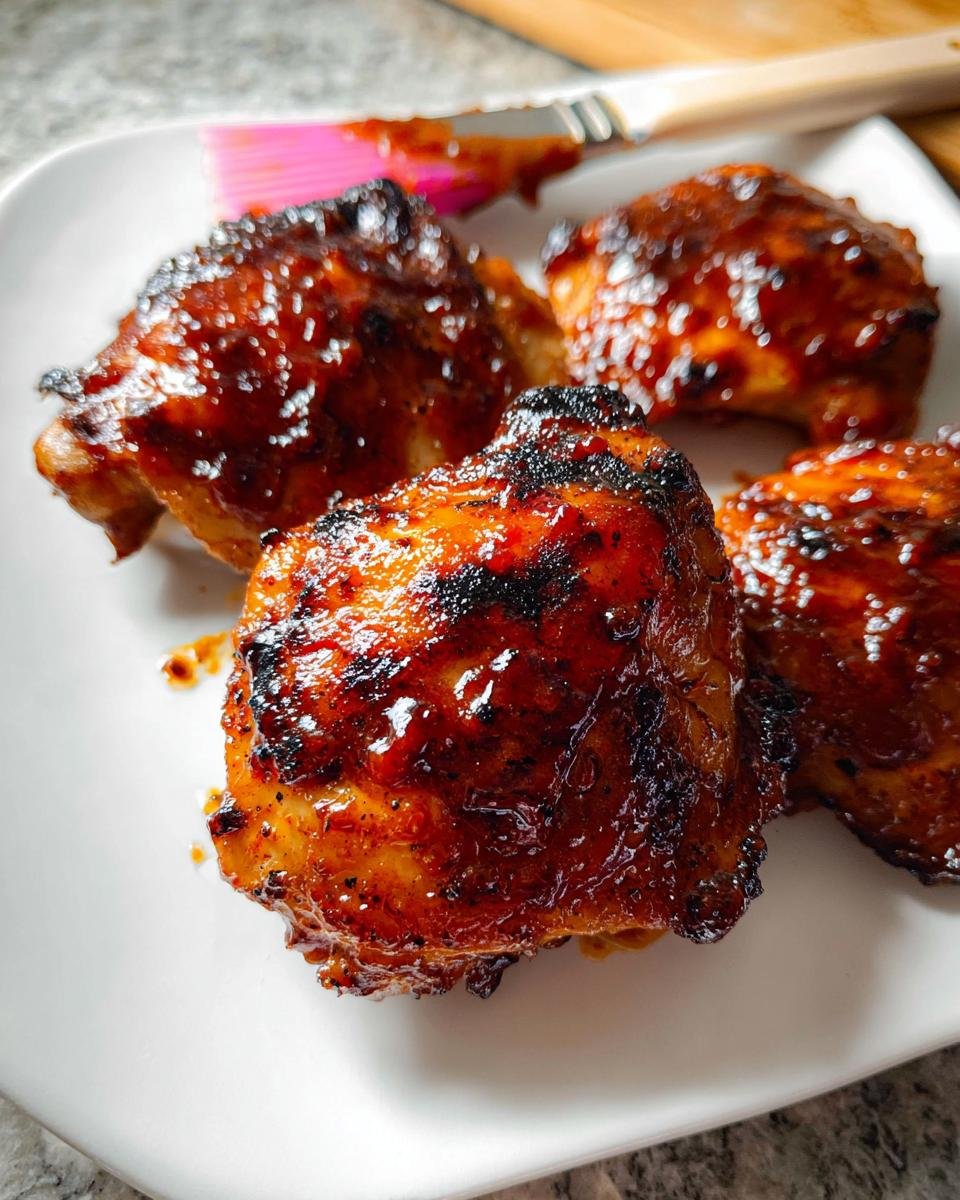
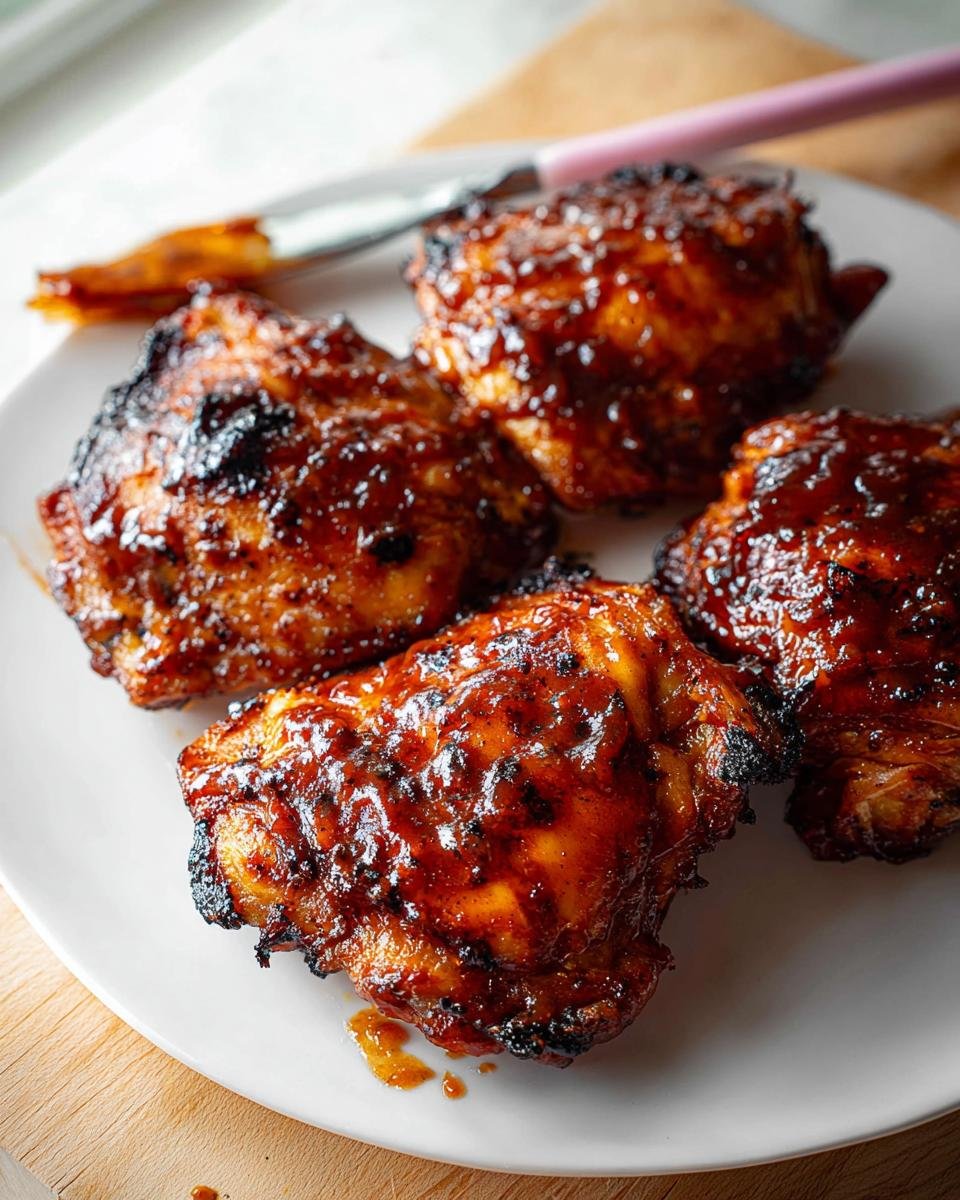
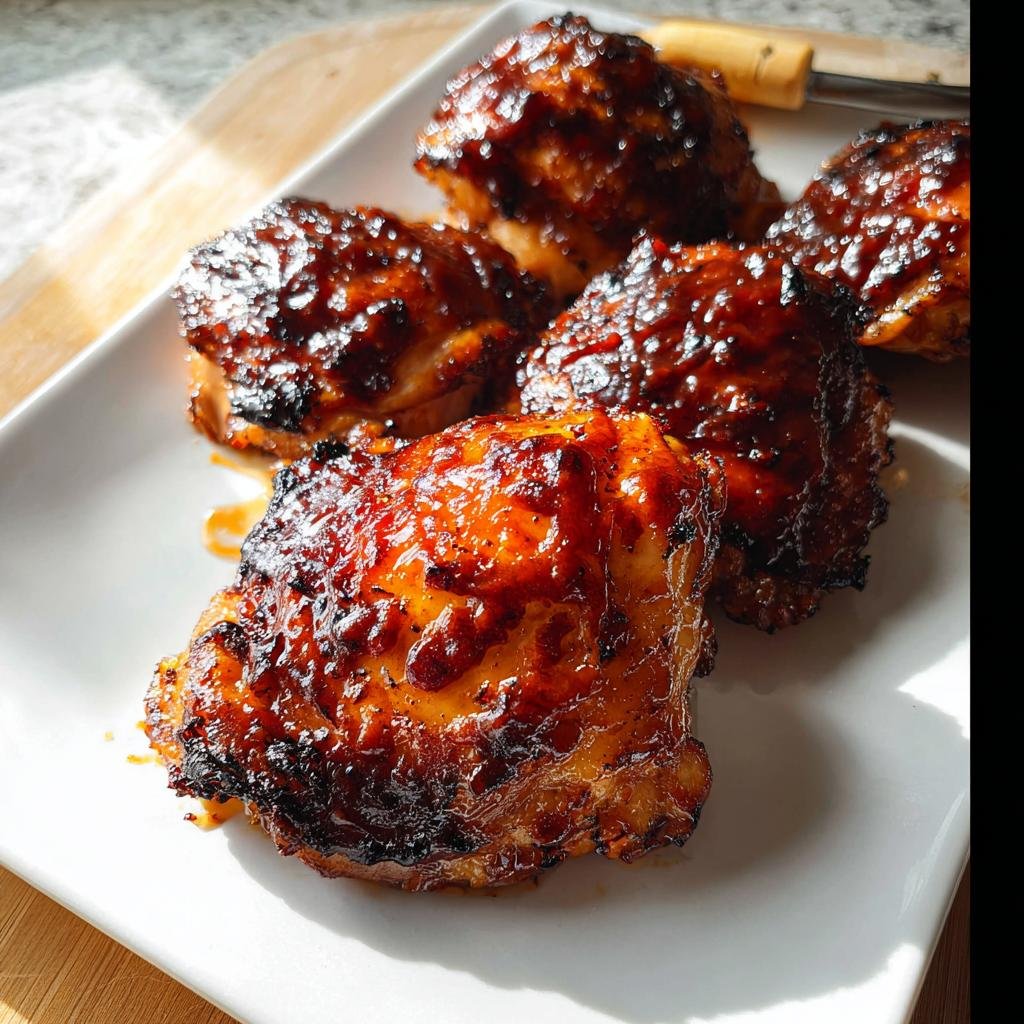
For the final 3 to 5 minutes, you need to watch them like a hawk! This final blast of heat caramelizes the sugars in the BBQ sauce, giving you that beautiful charred look. We want rich color; we don’t want black mush! Pull them out as soon as the skin looks deep mahogany and you’re hitting that safe internal temp of 170F in the thickest part. This method ensures you get the best result every time you make these quick, healthy dinners!
Achieving Crispy Skin: Pro Tips for Your Air Fryer BBQ Chicken Thighs Sticky Glaze
Look, I appreciate speed, but if those chicken thighs come out soggy, what was the point? The crisp factor is non-negotiable for me when I make these Air Fryer BBQ Chicken Thighs Sticky Glaze. The most important thing is airflow. I learned this the hard way when I tried to fit six thighs in my basket when I felt rushed. Big mistake!
When you overcrowd the air fryer, the moisture they release gets trapped around the chicken instead of escaping. You end up steaming them, and that beautiful skin turns into sad, rubbery leather. Never stack them!
Always make sure there is visible space between each thigh so the hot air can circulate all around. It’s better to cook in two batches—seriously—if you have to. And remember that finishing temperature: 170F internal temperature is the sweet spot for thighs. It’s cooked through, super juicy, but safe. That last minute of high heat, unglazed, really seals the deal on the crispiness!
Essential Equipment List for This Recipe
You don’t need a whole workshop of gadgets for this recipe, which is part of why I love it so much for a quick dinner! Having the right tools just makes the process smoother, especially when you’re working against the clock. Trust me, having these few things on hand means you spend less time searching and more time eating that delicious sticky chicken!
Here are the absolute necessities you’ll want ready before you start trimming those thighs:
- An Air Fryer: This is our star player! It’s what gives us the speed, the crispy skin, and the perfect cooked texture without turning on the big oven.
- A Large Bowl: You need room to toss those six chicken thighs around with the spices without flinging them all over the counter.
- A Small Bowl: This is just for quickly mixing up those dry seasonings before they hit the meat. It keeps things neat!
That’s it! No fancy thermometers or immersion circulators needed here. It’s truly about simple preparation leading to maximum flavor.
Serving Suggestions for Air Fryer BBQ Chicken Thighs Sticky Glaze
So you’ve got these gorgeous, sticky, rich BBQ chicken thighs staring back at you, right? Because the glaze is so flavorful and a little heavy, you really need things on the side that are quick to make and offer a nice, bright contrast. We want balance on the plate to make it feel like a truly satisfying, balanced meal, even if you only spent 30 minutes cooking!
I keep my sides super simple when I’m making these because the focus needs to be on that chicken flavor. Here are the three things I always turn to:
- Quick Slaw: A fresh, crunchy coleslaw is the perfect palate cleanser. I don’t mean the heavy, mayo-loaded kind. Just thinly shredded cabbage and carrots with a splash of vinegar, a tiny bit of sugar, and salt. The acidity cuts right through the richness of that BBQ sauce like a dream!
- Roasted Broccoli or Green Beans: These take almost no effort. Toss some broccoli florets or green beans with a little olive oil, salt, and pepper. Since the air fryer is already hot, you can often cook these right alongside the chicken after the final flip, maybe on a lower rack if your model allows, or right after the chicken comes out. They get a little char and balance out the starchiness if you happen to have some, or just make it a veggie powerhouse!
- Simple Corn on the Cob (If it’s summer!): Honestly, sometimes you just need summer on a plate. I’ll toss a couple of husked cobs right into the air fryer basket for the last 10 minutes while the chicken is glazing. They steam up nicely and are just begging to be slathered with butter.
See? Quick, easy, and they complement that amazing sticky glaze perfectly. Dinner is served!
Frequently Asked Questions About Air Fryer BBQ Chicken Thighs
Since I’ve made these Air Fryer BBQ Chicken Thighs Sticky Glaze so many times, I’ve run into every little issue you might face! It’s totally normal to have questions when you’re trying to master a new appliance or tricky cut of meat. Here are the things readers ask me about most often, hoping to keep their dinner fast and delicious!
Can I use boneless, skinless chicken thighs instead?
You certainly can, but you won’t get the same result, and you absolutely must adjust your timing. Boneless thighs cook way faster, usually in about 15 to 18 minutes total, depending on how thick they are. The main thing you lose, obviously, is that amazing crispy skin! Since there’s no skin, you can actually apply the BBQ sauce for the whole last 8 minutes instead of dividing it up. You still want to check for that 170F internal temperature, though, because that’s where the juiciness is!
How do I stop the BBQ sauce from burning in the air fryer?
This is the number one problem folks run into with any saucy chicken in an air fryer! If you put the BBQ sauce on at the very beginning with the dry rub, that sugar content heats up too fast and turns into crispy, black char before the chicken even finishes cooking. It’s a disaster!
My rule, which I swear by for these sticky thighs, is saving almost all the sauce for the last 8 to 10 minutes of cooking. We cook the chicken plain with just the spices first—that’s the 10-minute skin-side down heat blast we talked about. That initial cook renders the fat and firms up the meat. Then—and only then—do we start layering on that gooey glaze, giving the sugars just enough time to caramelize beautifully without incinerating!
What internal temperature should I look for when they are done?
This is important for food safety, but also for texture! For bone-in chicken thighs, I pull mine out of the air fryer when they hit 170F. While turkey and breasts need to reach 165F, thighs have more connective tissue and actually become more tender and better textured when they coast up to that slightly higher 170-degree mark after you pull them out of the basket. Remember to check the thickest part, avoiding the bone!
Can I use a different kind of sauce, like honey mustard?
Go for it! The beauty of this recipe is that the dry rub is delicious on its own, so it acts as a fantastic backup. If you want to switch things up and use honey mustard, a spicy Korean gochujang glaze, or even a teriyaki sauce, you absolutely can. Just treat it exactly as you would the BBQ sauce—apply it only during the last 8-10 minutes of cooking so that sugar doesn’t burn on you. It’s fun to experiment!
Storage and Reheating Instructions
Nobody wants to waste leftovers, especially when cooking something this flavorful! The great news is that these chicken thighs actually keep really well, provided you store them correctly. I always make sure our family has extras because my husband likes packing them for lunch the next day. You can safely store any leftovers in an airtight container in the refrigerator for about 3 to 4 days. Any longer than that, and I start getting nervous about the texture and safety, even if they seem fine.
Now, the biggest challenge with any air-fried food is reheating it without losing that glorious crispiness we worked so hard for. Please, step away from the microwave! Microwaves are great if you plan on making mashed potatoes, but they turn perfectly crisp skin into sad, sweaty rubber in about thirty seconds.
We need to bring the crisp back. This is where the air fryer earns its keep again, which is why I love making healthy meals ahead of time!
Here’s how I revive the sticky goodness:
- The Air Fryer Method (Best): Place the cold thighs back into the air fryer basket in a single layer—no stacking! Set the temperature to about 350F. You only need 4 to 6 minutes. This gets the inside hot, and the dry heat quickly crisps the skin back up. If the glaze looks a little dull, brush on a tiny bit of extra sauce in the last minute or two.
- Oven Method (Good): If you need to reheat a bigger batch, use your regular oven set to 375F on a baking sheet. I line mine with foil so cleanup is zero fuss. Bake them for about 10 minutes. They won’t get quite as crackly as the air fryer, but they’ll be much better than the microwave!
The key takeaway is using dry heat at a moderate temperature. Save those glorious leftovers and enjoy them the next day!
Air Fryer BBQ Chicken Thighs with Sticky Glaze
Ingredients
Equipment
Method
- Trim excess fat from the chicken thighs and pat them dry with paper towels.
- Score the chicken skin side by making a few cuts down to the flesh so the seasoning penetrates deeper.
- In a small bowl, mix the onion powder, garlic powder, black pepper, and red chili powder.
- In a large bowl, mix the chicken thighs with the spice mixture until they are fully coated.
- Preheat the air fryer to 400F. Place the chicken thighs skin-side down and cook for 10 minutes.
- Brush the chicken with barbecue sauce. Cook for another 5 minutes.
- Turn the chicken thighs skin-side up and brush with more barbecue sauce. Air fry for another 3 to 5 minutes until the skin is crispy and lightly charred, or until the internal temperature reaches 170F.
- Brush with additional barbecue sauce if desired and serve warm.