
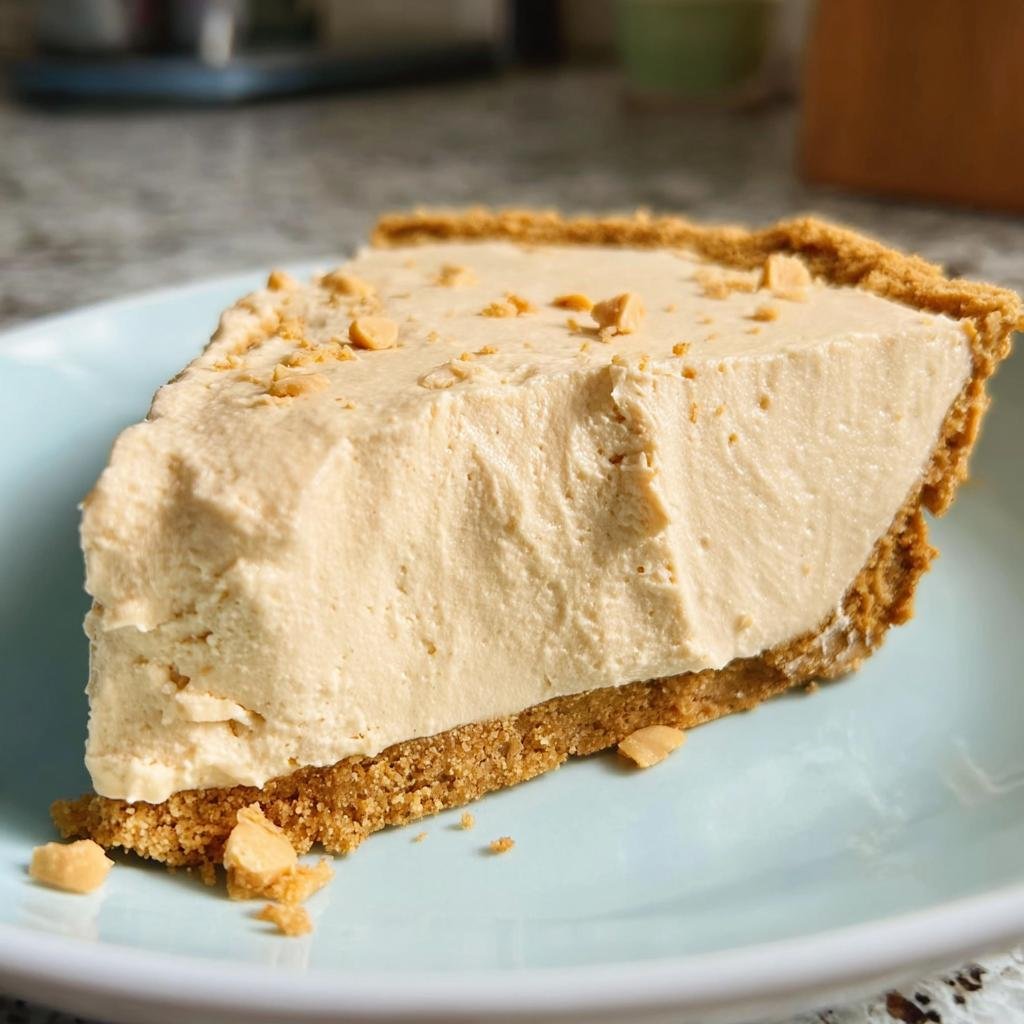
Oh my gosh, if you’re anything like me, sometimes you just need a dessert miracle that doesn’t involve turning on the oven, especially when it’s blazing hot outside! That’s why this recipe is my absolute favorite in times of sudden sweet cravings. Trust me when I say this No-Bake Peanut Butter Pie is the simplest, creamiest thing you will ever make. It sets up like a dream in the fridge!
I keep all the ingredients stocked because you never know when inspiration will strike. You literally just mix, press, whip, and chill. It delivers that rich, salty-sweet peanut butter flavor we all crave with zero baking stress. It’s seriously the best peanut butter dessert for when you need something impressive but have zero patience!
Why This No-Bake Peanut Butter Pie Recipe Shines
I’m telling you, this recipe hits different because it skips the oven entirely, saving you time and keeping the kitchen cool. It’s the kind of dessert you can switch to after dinner and have ready the next day. It feels fancy but it’s truly beginner-proof.
- It’s lightning fast! Active prep time is only 20 minutes.
- No oven required—just fridge time to set everything perfectly.
- The texture is beyond compare: impossibly light and unbelievably creamy.
Quick Preparation for Your No-Bake Peanut Butter Pie
Twenty minutes! That’s all you spend actively working on this incredible No-Bake Peanut Butter Pie. You’re mostly just crushing crackers and mixing things in bowls. I can whip this up while the kids are finishing homework. It’s dessert in a rush!
The Perfect Creamy Texture
Baked pies? They can get dense, right? Not this one! The secret weapon is folding in that cold, airy whipped cream right at the very end. It makes the filling light as a cloud, balancing out the richness of the peanut butter and cream cheese. It just melts in your mouth.
Essential Ingredients for the Best No-Bake Peanut Butter Pie
Okay, since we aren’t baking anything, the quality of what we *do* use matters so much! Because this is just a simple mix-and-chill dessert, there’s no hiding behind oven power. I always lay out my ingredients first just to make sure I have everything ready to go. Don’t skip the careful notes here, especially about the peanut butter—it’s a game-changer!
For the Graham Cracker Crust
You need just three things to make that sturdy, buttery base. Make sure your butter is melted, but not scorching hot when you mix it in.
- 1 1/2 cups graham cracker crumbs (That’s about 10 full sheets crushed up finely, by the way!)
- 1/4 cup granulated sugar
- 6 tablespoons unsalted butter, melted
For the Creamy Filling
This is where the magic happens! You absolutely have to use that good old-fashioned, shelf-stable creamy peanut butter—the natural stuff separates and gets oily when you mix it with this much sugar and cream cheese. Also, your cream cheese needs to be soft, or your mixer will cry!
- 1 cup creamy peanut butter (Again, please, no natural style peanut butter!)
- 8 ounces cream cheese, softened completely
- 1 cup powdered sugar
- 1 teaspoon vanilla extract
- 1 cup heavy whipping cream, kept ice cold
Optional Topping Components
If you want the classic diner look, you just need these final touches. Make sure that whipped topping has had plenty of time to thaw out on the counter before you try to spread it over that firm filling.
- 1 cup whipped topping (like Cool Whip), thawed
- 2 tablespoons miniature chocolate chips, for garnish
Step-by-Step Instructions to Make a No-Bake Peanut Butter Pie
Alright, grab your mixing bowls! Since this is a no-bake situation, we move fast on the assembly line. The key here is keeping your crust nice and cold while we build up that amazing filling. Don’t rush the chilling, or you’ll end up with a peanut butter soup instead of a sliceable pie!
Assembling the No-Bake Crust
First things first, we need a home for our creamy filling. In a standard mixing bowl, toss those graham cracker crumbs with the granulated sugar. Now pour in the melted butter—just enough to make it all stick together. Mix it well until it looks like wet sand. Press that mixture down really firmly and evenly into your 9-inch pie plate. Use the bottom of a measuring cup to pack it tight against the bottom and the sides. Stick that crust in the freezer while you handle the filling part.
Creating the Smooth Peanut Butter Filling
Here’s where the electric mixer earns its spot! I always start by beating the softened cream cheese until it’s absolutely lump-free. If you skip this part, you’ll have hard bits in your pie, and we don’t want that! Once smooth, drop in the peanut butter, powdered sugar, and vanilla extract. Beat it good until everything is completely incorporated and looks creamy. I know some recipes suggest mixing by hand, but for this smooth texture, the mixer is your best friend.
Folding in Whipped Cream for Lightness
This next step gives us that melt-in-your-mouth texture. In a *separate, clean* bowl, take your cold heavy whipping cream and beat it until you get stiff peaks—you know, when you lift the whisk and the cream stands up straight. Now, gently fold that whipped cream into your peanut butter base. I mean gently! You want to keep all those beautiful air bubbles in there. Do it in two additions so you don’t deflate all your work.
Chilling and Finishing the No-Bake Peanut Butter Pie
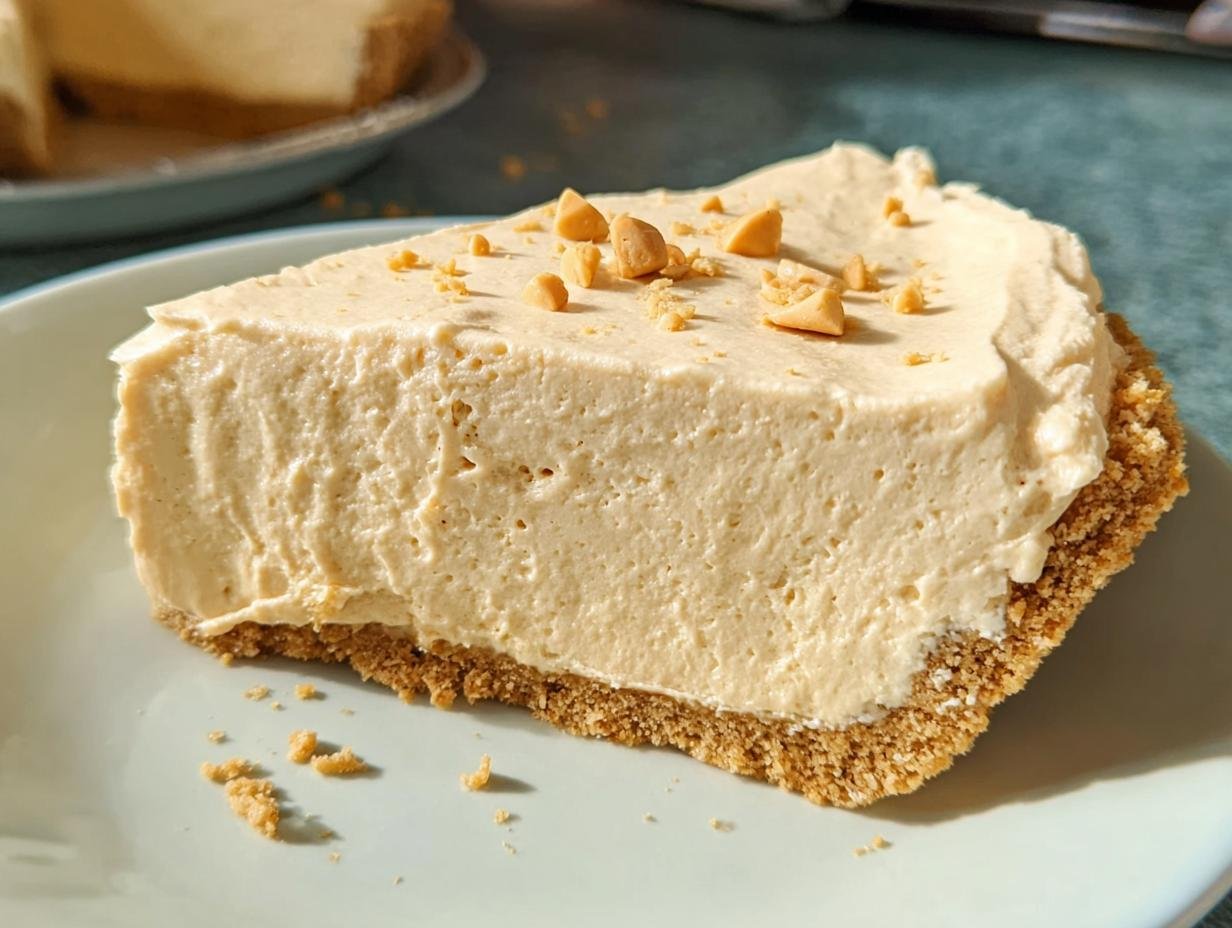
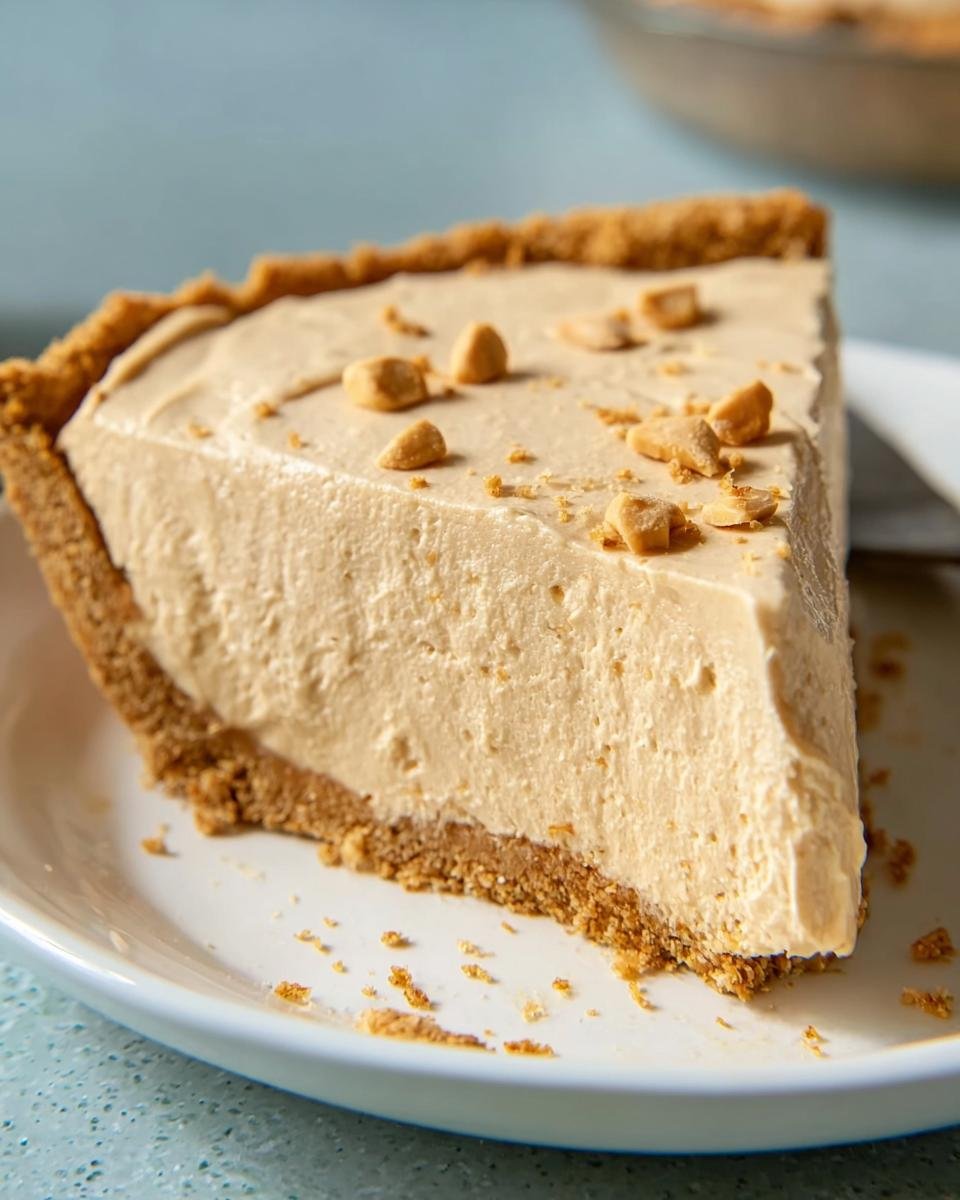
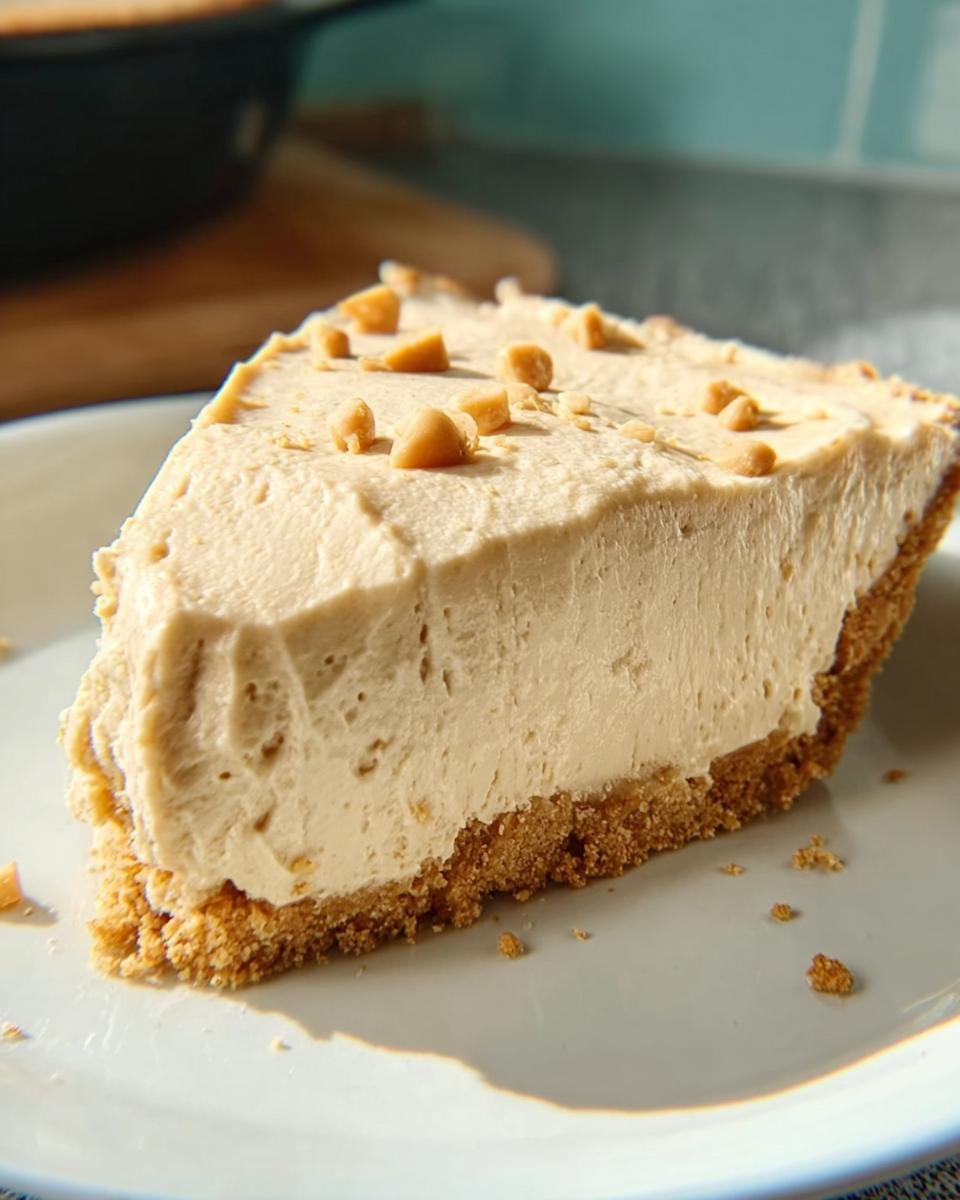
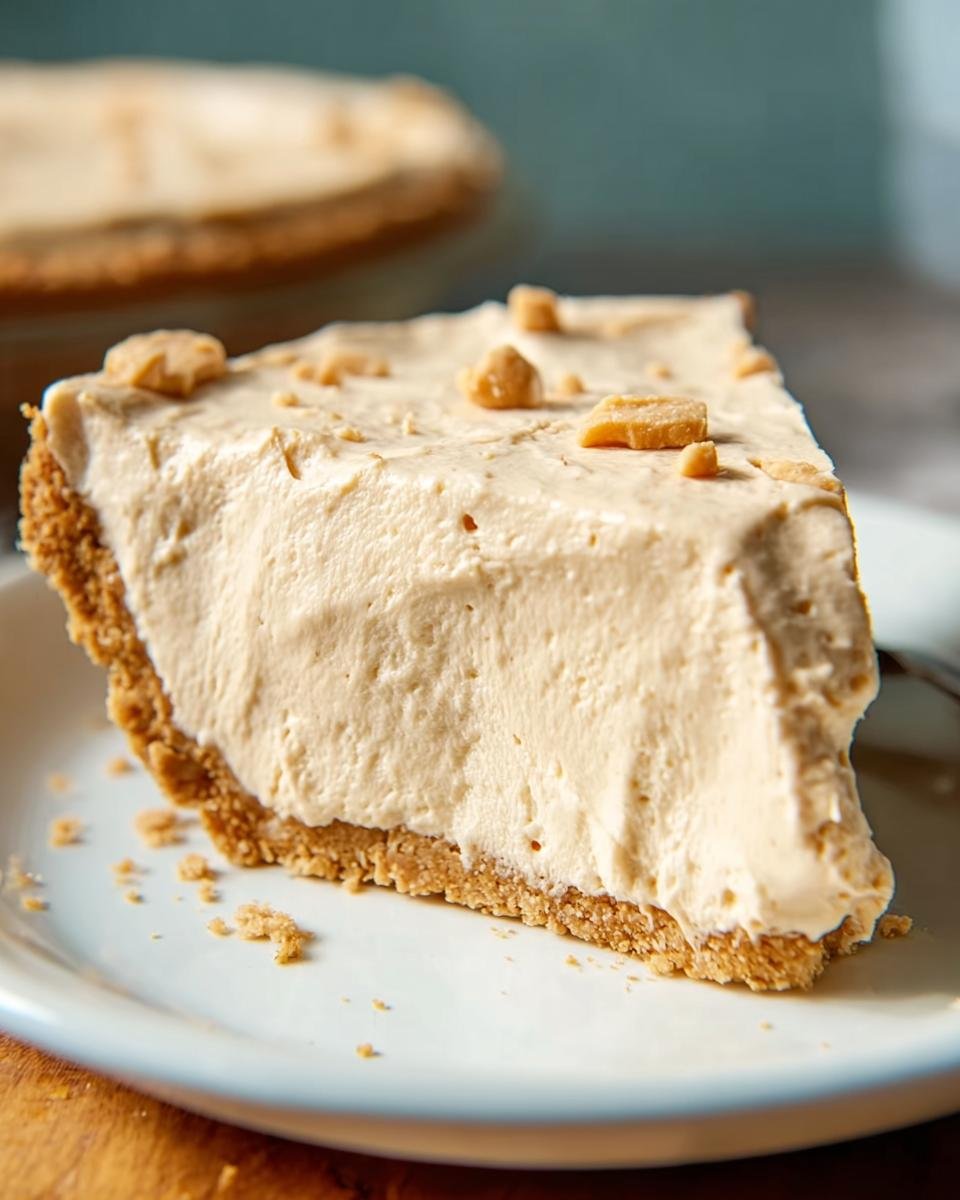
Spoon that glorious, fluffy filling right into your chilled crust. Use an offset spatula to smooth the top if you want it looking neat. Now, cover it loosely so the plastic wrap isn’t actually touching the surface, and pop it into the refrigerator. It needs at least 3 hours, but honestly, overnight is better for a truly firm slice. If you’re going for the store-bought topping look, spread that thawed whipped topping on top right before you serve it, and sprinkle those mini chocolate chips on top. I sometimes look at recipes like these for inspiration on how to dress up the top!

Tips for the Ultimate No-Bake Peanut Butter Pie Success
You might think because this is a no-bake peanut butter dessert that you can just throw things in a bowl, but oh no, the temperature of your dairy makes all the difference! Getting this right is how you earn that ‘Expert’ badge for this incredibly easy pie.
Ingredient Temperature Matters for Your No-Bake Peanut Butter Pie
Listen closely: your cream cheese absolutely must be soft, room temperature soft! If it’s cold, you’ll end up with little painful lumps that never blend away. On the flip side, that heavy whipping cream needs to be ice cold straight from the fridge. If it’s not cold, it won’t whip up to stiff peaks, and that’s the airiness that stops this lovely pie from tasting like a brick!
Achieving a Flawless Pie Surface
Once the filling is settled into the crust, you want a beautiful, smooth top before it chills. Don’t just use the side of a spoon; you’ll get ugly ridges. Instead, use the back of a spoon or, if you have one, a small offset spatula. Gently glide it across the top surface. It’s such a small thing, but it makes the pie look completely professional when you pull it out of the fridge three hours later!
Serving Suggestions for Your No-Bake Peanut Butter Pie
Because this pie is so rich and delicious, sometimes you want something on the side that cuts through the sweetness just a little bit. It’s already a total showstopper on its own, but I love serving it with something tart or fruity!
If you want to lean into the chocolate, a drizzle of warm fudge sauce is just divine. But honestly, my favorite thing to pair this peanut butter dessert is a side of fresh raspberries or strawberries. The brightness of the berries is the perfect contrast to that creamy filling. Or, if you’re serving it after a hearty meal—maybe after some fantastic honey butter cornbread—a cup of strong black coffee is all you really need!
Storing Leftovers of Your No-Bake Peanut Butter Pie
Good news! This peanut butter dessert keeps really well. Since there’s no egg custard or anything that needs special handling, you can keep leftovers tucked away in the fridge for several days. You get 8 perfect slices out of this recipe, so if you’re hosting a small gathering, you’ll definitely have some left.
The main thing you need to watch out for is keeping it airtight. Peanut butter is great at soaking up smells from whatever else you have lurking in your refrigerator! To prevent that, always cover your pie plate tightly with plastic wrap. If the plastic wrap touches the topping, you’ll end up with weird smooshed spots when you unwrap it later. I usually stick a few toothpicks around the edges of the filling before covering it to create a little tent of plastic wrap over the top.
You should aim to eat it within about four or five days. After that, the flavor really starts to lose its fresh zing. If you want to save it longer, freezing works too! Just wrap it really well in a layer of plastic wrap first and then a layer of foil. Thaw it in the fridge overnight before serving.
Frequently Asked Questions About This No-Bake Peanut Butter Pie
I get so many questions about this recipe—it’s just one of those crowd-pleasers everybody wants to know the secrets to! Since this is such an easy pie to throw together, people often wonder about swapping ingredients or timing. Here are the things I hear most often about making the ultimate peanut butter dessert.
Can I use crunchy peanut butter in this easy pie?
You absolutely can, but you need fair warning! If you swap the creamy for the crunchy version of peanut butter, the texture of the final filling will change quite a bit. You’ll get little bits of peanut scattered throughout, which some people actually prefer! However, for that totally smooth, cloud-like texture that makes this No-Bake Peanut Butter Pie so legendary, you really need to stick to creamy.
How long does the No-Bake Peanut Butter Pie need to chill?
For safety and structure, you must chill it for a minimum of 3 hours. If you try to slice it before that, you’ll just end up with peanut butter sludge oozing everywhere! But if you can manage it, chilling it overnight is truly best. It lets the filling firm up perfectly, making those 8 slices so clean and beautiful. It’s worth the wait!
Can I freeze this peanut butter dessert?
Yes, you definitely can freeze this wonderful peanut butter dessert! The only thing I’ve noticed is that when you thaw it, the whipped topping might weep a little bit, and the texture of the filling can soften slightly from the initial freezing. If you plan to freeze it, skip adding the whipped topping until after it has thawed and is ready to serve. You can find more pie thoughts over on my pie recipes page too!
Estimated Nutrition Facts for One Slice of No-Bake Peanut Butter Pie
Now, I’m not going to pretend this is a health food—it’s peanut butter pie, after all! But since we’re talking full transparency just like any good cook should, here are the estimated facts based on 8 slices. Don’t stress too much over these numbers, but it’s good to know what you’re diving into!
- Calories: 410
- Total Fat: 23g
- Sugar: 30g
- Protein: 9g
Remember, these are just estimates based on the standard ingredients listed above. If you use different toppings or brands, things might shift a little! What matters most is that it tastes like heaven, and this No-Bake Peanut Butter Pie certainly delivers on that front!
Share Your Creamy No-Bake Peanut Butter Pie Experience
That’s it! You’ve made the best No-Bake Peanut Butter Pie imaginable, and now it’s time for the best part: enjoying it! I really hope you loved watching it set up in the fridge and that the first creamy slice tasted as amazing as you hoped.
But honestly, I want to hear all about it! Did you stick to the chocolate chips, or did you try something wilder for a topping? Did the crust come out perfectly pressed? Please, tell me everything in the comments section below!
It means the world to me when you take a moment to share your results. If you loved this ridiculously easy pie, please give it a rating out of 5 stars right down there. Your feedback helps other busy bakers know they can trust this recipe too! Happy eating!
No-Bake Peanut Butter Pie
Ingredients
Equipment
Method
- Prepare the crust: Mix the graham cracker crumbs and granulated sugar in a medium bowl. Pour in the melted butter and mix until the crumbs are evenly moistened.
- Press the crumb mixture firmly and evenly into the bottom and up the sides of a 9-inch pie plate. Place the crust in the freezer while you prepare the filling.
- Make the filling: In a large bowl, use an electric mixer to beat the softened cream cheese until smooth. Add the peanut butter, powdered sugar, and vanilla extract. Beat until fully combined and smooth.
- In a separate, clean bowl, whip the cold heavy cream until stiff peaks form. Gently fold the whipped cream into the peanut butter mixture until no streaks remain.
- Spoon the peanut butter filling into the chilled crust. Smooth the top with a spatula.
- Cover the pie loosely with plastic wrap and refrigerate for at least 3 hours, or until the filling is firm.
- Before serving, spread the thawed whipped topping over the pie, if using. Sprinkle with miniature chocolate chips.