
Let’s be honest, sometimes you just need a show-stopping dessert, but the thought of turning on the oven in July (or whenever the mood strikes!) is just too much. That’s where this incredible pie comes in! I’m telling you right now, this is The Dreamiest No Bake Peanut Butter Pie Recipe Ever Created, and I have truly perfected this no-bake method over many, many gatherings and late-night cravings.
It’s so rich, so incredibly creamy, and the best part? You don’t even need an oven. The chocolate wafer crust snaps perfectly against the unbelievably smooth filling. I promise you, the first time you pull this beauty out of the fridge, you’ll wonder why you ever bothered baking a peanut butter pie from scratch. It’s foolproof, folks, and absolutely decadent!
Why You Will Make The Dreamiest No Bake Peanut Butter Pie Recipe Ever Created
Honestly, once you try this, you’ll be making it weekly! It hits all the right notes without any fuss. I keep coming back to this recipe because:
- It sets up perfectly firm every single time, slicing beautifully.
- There is zero oven time required—just mix, press, and chill!
- The texture is decadent; it’s light like mousse but tastes like pure peanut butter bliss.
If you’re looking for quick, impressive dessert solutions, this is the one. Check out more great pie recipes on my trends page when you get a chance!
Gathering Ingredients for The Dreamiest No Bake Peanut Butter Pie Recipe Ever Created
Okay, getting the right ingredients is half the battle here, and trust me, you want to be prepared! Since this is no-bake, the texture relies completely on what you put into it. Don’t stress too much; most of this stuff is probably already in your pantry. I only keep things simple, so you only need three main groups of ingredients for this pie.
For the Crust
- 1 1/2 cups chocolate wafer cookie crumbs (you’ll need about 45 cookies total)
- 6 tablespoons unsalted butter, melted
For the Filling
This is where the magic happens, so pay attention to the peanut butter! We need the smooth, shelf-stable kind because the natural, oily kind just won’t set up right. It needs that stabilizer!
- 1 cup creamy peanut butter (and remember, I mean the regular, spoonable kind—not the stir-it-up style!)
- 8 ounces cream cheese, softened to room temperature (this is crucial so it mixes smoothly!)
- 1 cup powdered sugar
- 1 teaspoon vanilla extract
- 1 container (8 ounces) frozen whipped topping, thawed (you know, like the tub of Cool Whip—don’t try to use fresh whipped cream here, it gets too loose!)
For Topping (Optional)
This part is completely up to you, but chocolate and peanut butter are a match made in heaven, so I rarely skip this step!
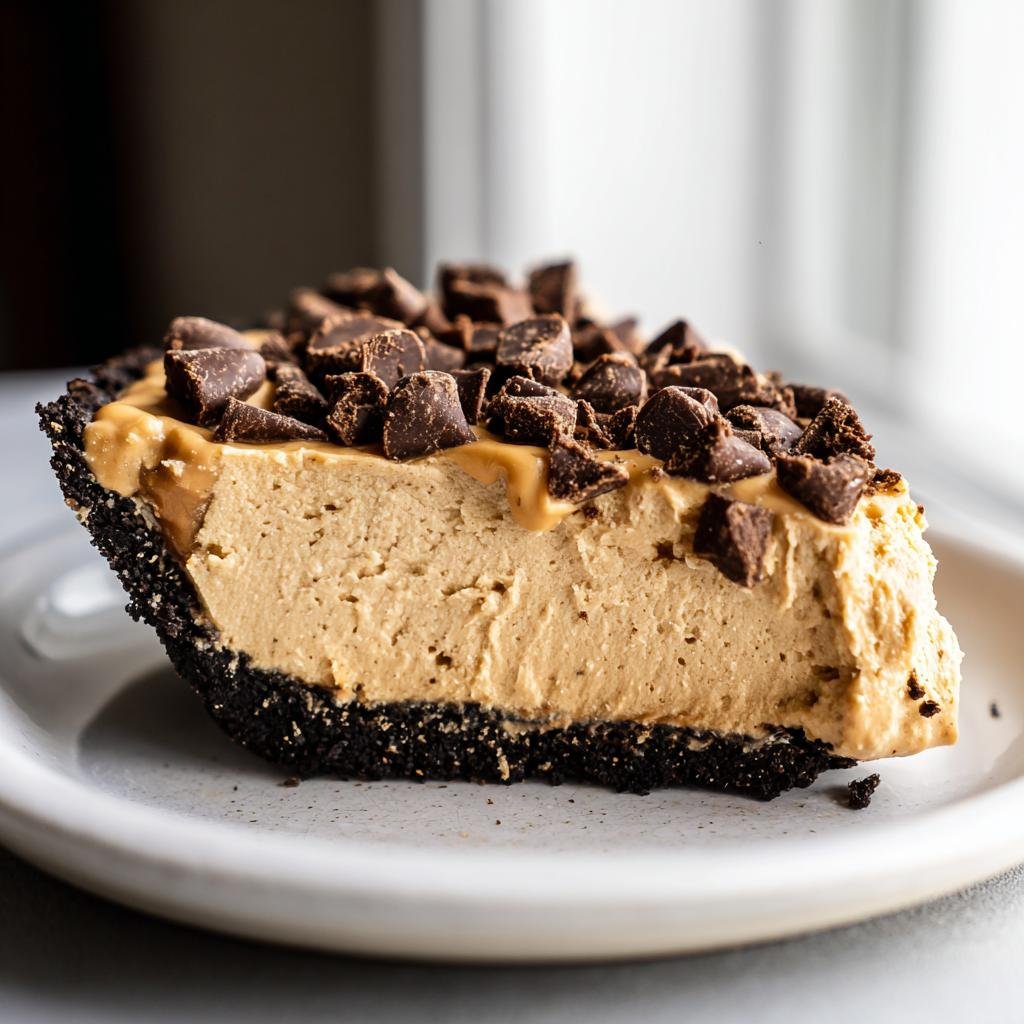
- 1/2 cup mini chocolate chips
Step-by-Step Instructions for The Dreamiest No Bake Peanut Butter Pie Recipe Ever Created
Now that we have all our supplies ready, we can get this pie into the fridge as fast as possible! Since there’s no baking involved, the steps are dead simple, but the timing of the chilling is absolutely crucial if you want that perfect texture. Trust me, patience pays off here.
Preparing the Chocolate Wafer Crust
First things first, let’s tackle that delicious chocolate base. Just dump your chocolate wafer crumbs and melted butter into a nice medium bowl. Now, here’s my little trick for E-E-A-T success: use the bottom of a measuring cup or a flat-bottom glass to really press the mixture down firmly into the 9-inch pie plate. You want a nice, sturdy shell that won’t crumble when you slice it. Once you’ve got that packed tightly on the bottom and running up the sides about an inch, slide it right into the freezer while you whip up the gooey center. About 15 minutes in the freezer is perfect.
Mixing the Creamy Peanut Butter Filling
Grab your electric mixer—handheld or stand mixer, I don’t care, just get whipping! In a big bowl, beat the softened cream cheese and that creamy peanut butter together. You need this part to be perfectly smooth before adding anything else. Once it looks uniform and there are no lumps of cream cheese hiding—which is my biggest pet peeve—you can beat in the powdered sugar and vanilla extract until it’s all incorporated.
The final addition is the thawed whipped topping. This is important: you MUST gently fold this in with a spatula. If you try to mix it fast with the electric mixer, you’ll deflate all that fluffy air, and the filling won’t be light enough. We are folding until we just see the last bit of white streak disappear. Seriously, stop mixing the second it looks combined!
Assembling and Chilling The Dreamiest No Bake Peanut Butter Pie Recipe Ever Created
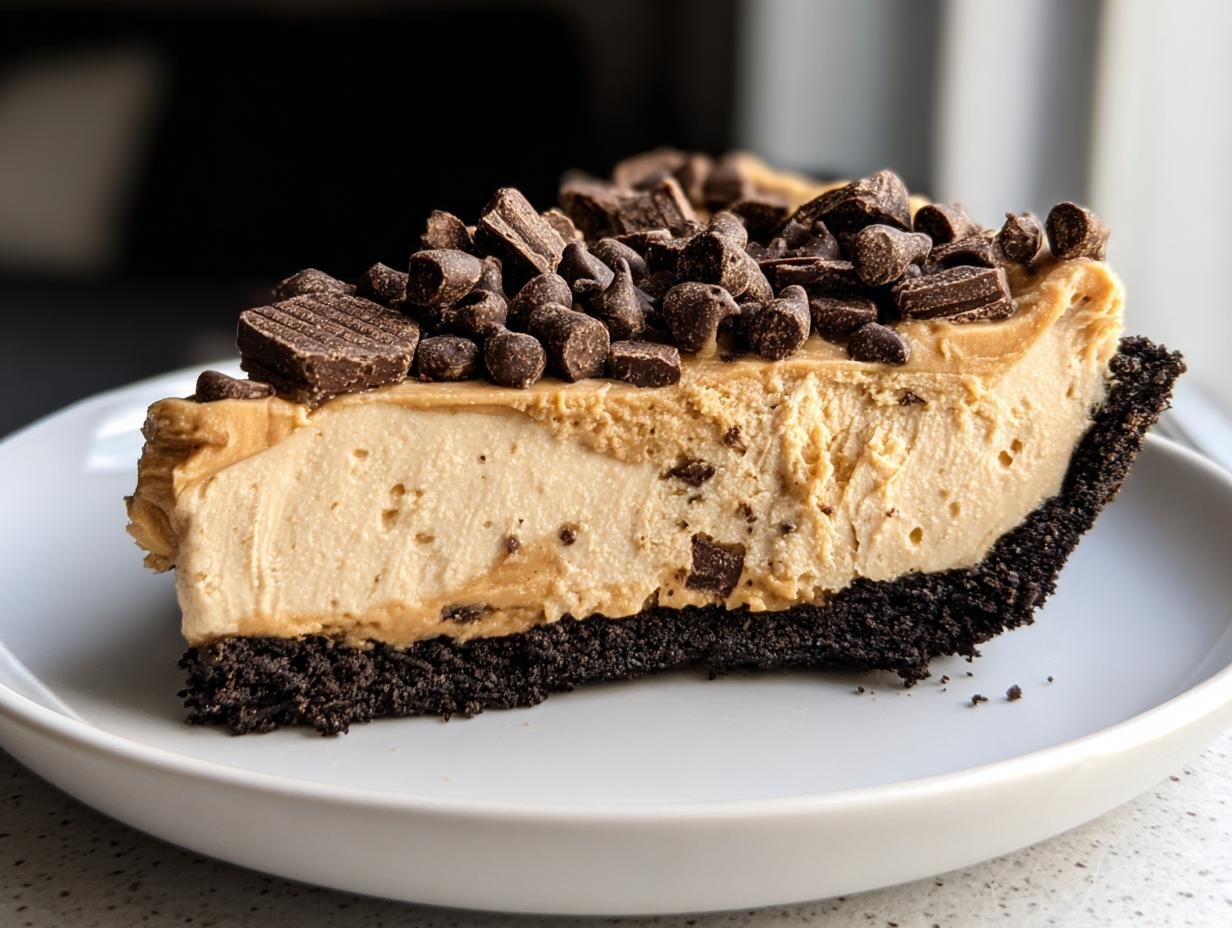
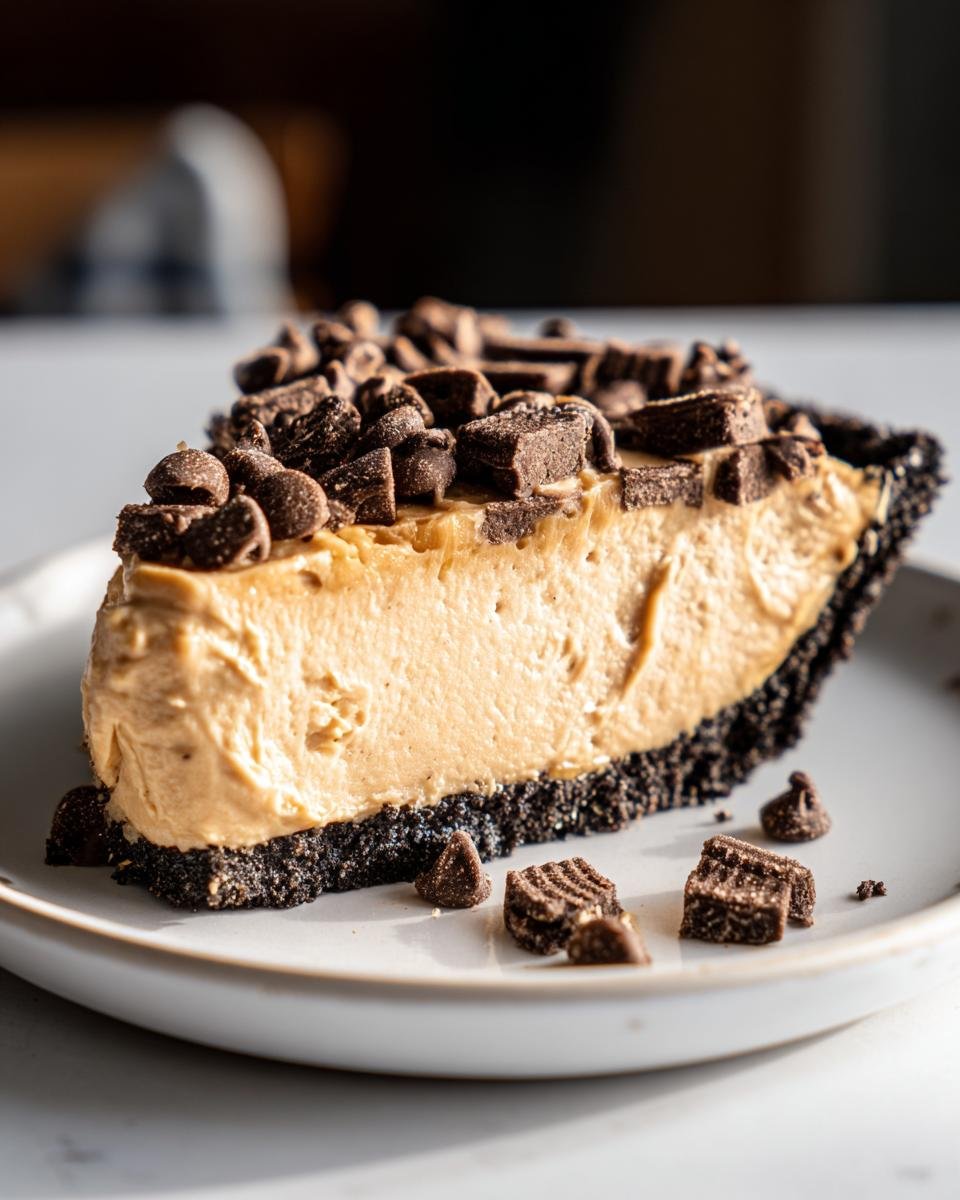
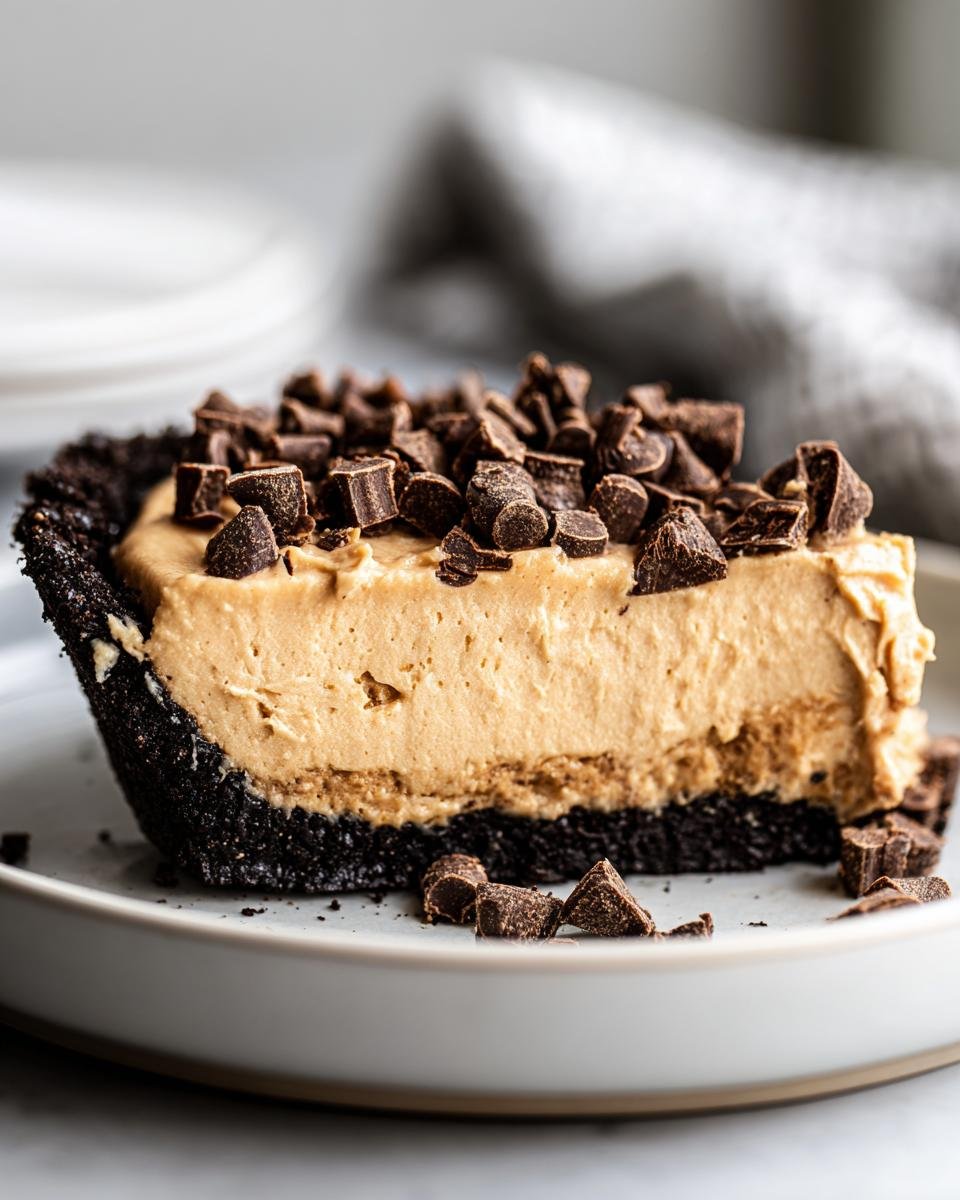
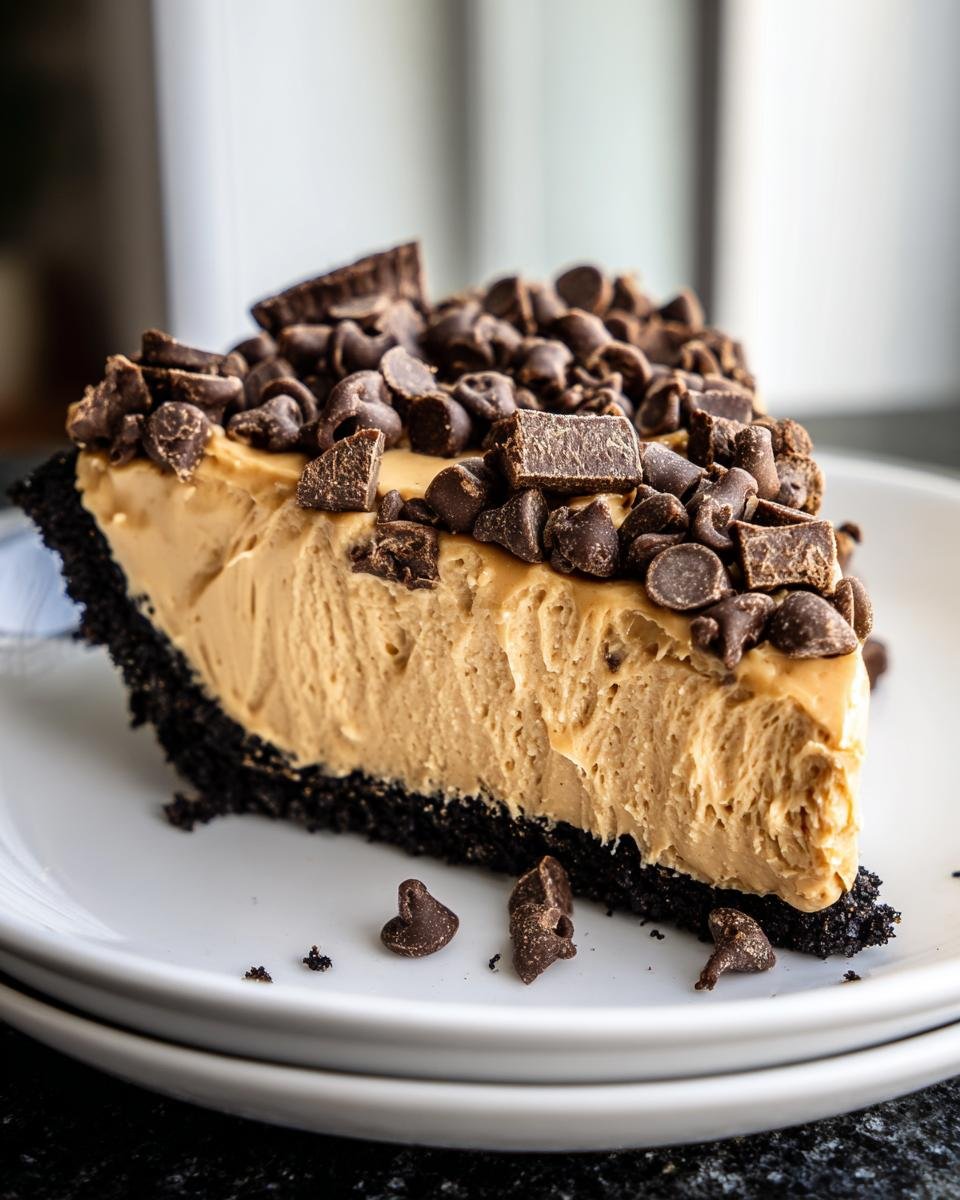
Get that chilled crust out of the freezer. Spoon all that glorious peanut butter filling into the crust and use an offset spatula to smooth the top evenly. If you’re feeling fancy, sprinkle your mini chocolate chips over the top now. Then, wrap that pie loosely in plastic wrap—make sure the plastic doesn’t touch the chips, or they’ll stick!
Now comes the hardest part: waiting. This pie needs a good chill to set up right. You need at least four hours in the refrigerator, but honestly, if you can leave it overnight (which is what I recommend for the absolute best slice!), it’s even firmer and tastes richer. You can sneak a peek at some quick tips for efficient kitchen work while you wait!
Tips for Success with The Dreamiest No Bake Peanut Butter Pie Recipe Ever Created
Because this pie relies on ingredients staying cool and bound together, success comes down to hitting a few key temperature checks. First up: that cream cheese! If it’s too cold, it won’t ever blend properly with the peanut butter into that silky texture we love. Let it sit out for at least 30 minutes so it’s truly soft.
My biggest non-negotiable tip is about folding the whipped topping. You’ve spent all that time whipping up the base ingredients beautifully, so don’t ruin it by crushing the air out of the topping! Use a spatula and a gentle figure-eight motion—just enough to incorporate it. If you stop folding when you see only a few small white streaks, you’ve gone long enough. The rest disappears while chilling.
And really, really don’t rush the chill time. While 4 hours is the bare minimum, I’m telling you that 8 hours or overnight makes the difference between a good slice and a slice that demands you write down the recipe. If you love the PB and chocolate combo, you have to check out my chocolate peanut butter cookies recipe next!
Ingredient Notes and Substitutions for Your No Bake Peanut Butter Pie
When you’re making something truly simple like this pie, those little ingredient choices become super important—they make or break the texture! I’ve gotten a few questions over the years about substitutions, so let me set the record straight on what I think works best for that dreamiest, firmest filling.
The biggest thing I need everyone to pay attention to is the peanut butter. Seriously, skip the fancy natural peanut butter for this one! Anything that separates into oil and solids just won’t work its magic in setting up this filling correctly. You need the standard, emulsified peanut butter because the stabilizers in it help the cream cheese and whipped topping bond into that firm, sliceable cloud we want.
If you aren’t a huge fan of the chocolate crust, don’t sweat it! You can absolutely swap those chocolate wafer crumbs out for classic graham cracker crumbs. Just use the exact same amount of melted butter in the recipe, press it in just as firmly, and freeze it for that same amount of time.
As for the whipped topping, I know some folks prefer homemade fresh whipped cream. While you *can* use it, you have to be extra careful when folding it in, and even then, the pie might stay a little softer. That shelf-stable topping is engineered to hold up against rich ingredients like peanut butter and cream cheese, so I stick to it for reliability. If you skip the topping entirely, the pie will be much denser—more like a peanut butter cheesecake texture, which isn’t bad, but it’s not the “dreamy” texture we are aiming for!
Serving Suggestions for The Dreamiest No Bake Peanut Butter Pie Recipe Ever Created
Once this beauty is chilled and set, the fun really begins because you get to decide how decadent you want to go! Since the pie itself is so incredibly rich and creamy, sometimes less is actually more, but I rarely follow that advice when peanut butter is involved!
The Classic Chocolate Touch
Even if you skipped the mini chips in the filling, you absolutely have to top it with something textural when you serve it. A delicate shaving of dark chocolate looks so elegant. If you want to serve it immediately after chilling, you can make a quick, thin chocolate drizzle. If you use good quality chocolate, melting it down with just a tiny splash of coconut oil makes it wonderfully glossy and easy to handle.
I like to get a little abstract with it. I warm up about half a cup of chocolate chips and use a fork to flick thin ribbons all over the top just before serving. It looks homemade but fancy! You can find my favorite technique for getting that perfect, drippy look over on my chocolate drip cake tutorial, which applies perfectly here.
Creamy Counterpoints
Because the pie is so intensely flavored, sometimes a slightly lighter topping balances everything out perfectly on the palate. A dollop of freshly whipped heavy cream—whipped until it just barely holds soft peaks—is stunning next to a slice. It cuts through the richness nicely.
If you’re serving this after a big meal, forget the sugar entirely on top and go for fresh fruit! Seriously! A small pile of raspberries or thinly sliced strawberries on the side adds a really bright, tart burst that makes the peanut butter flavor pop even more. It’s heaven. Don’t skip trying the berries!
Pairing it Up
If you are serving this as the centerpiece of a dessert spread, tiny squares work perfectly because it’s so rich. Pair a small piece with a strong cup of coffee—that bitterness really complements the sweet peanut butter. If you are feeling really indulgent, a small glass of milk, cold as ice, makes for the perfect nostalgic accompaniment. It just brings you right back to childhood!
Storage and Make-Ahead Options for Your No Bake Pie
This is genuinely one of my favorite things about this recipe—it’s built for make-ahead convenience! Who has time to bake a fussy pie the day of a big event? Not me! Since this pie sets up perfectly in the cold, it actually tastes better the next day anyway, which is always a huge win in my book.
If you are planning for a party or a weekend gathering, you can get the entire pie assembled, topped (if you’re using chips), and completely chilled the day before. I always wrap mine up tightly, but make sure you use plastic wrap that doesn’t stick to the topping. I usually tent a piece of aluminum foil over the top of the plastic wrap just to keep everything extra secure in the fridge. It will easily last 3 to 4 days refrigerated like this, and the texture stays incredibly creamy and firm.
Now, can you freeze it? Yes, you absolutely can, though I try to avoid it because the texture of the whipped topping changes slightly when thawed, even though it stays edible. If you *must* freeze it because you made it too far in advance, make sure it’s fully set first. Wrap it extremely well—foil first, then plastic wrap—and pop it in for up to a month. Thaw it slowly in the refrigerator overnight before serving. It’s perfect for busy weeks, which reminds me, I have a post about great make-ahead lunch and dinner ideas if you’re looking to streamline your meal planning!
The fact that you can prepare this completely ahead of time means you just pull it out of the fridge, slice, and serve. No last-minute panicking required!
Frequently Asked Questions About The Dreamiest No Bake Peanut Butter Pie Recipe Ever Created
I know you’ll love this pie so much that you’re probably already thinking about variations or troubleshooting, just in case! Since everyone wants that perfect, firm slice, I’ve gathered the questions I get asked the most about making this no-bake wonder consistently fantastic.
Why is my no bake peanut butter pie too soft?
Oh, that’s the worst when it happens! It always comes down to one of two things: temperature or ingredient quality. If your cream cheese wasn’t fully softened or if you used natural peanut butter instead of the creamy style, your filling won’t bond correctly and it will stay a little mushy. Also, if you skipped the minimum chilling time, it simply hasn’t had a chance to firm up! Give it the full time, and you’ll keep it firm every time.
Can I use a different crust for this recipe?
Absolutely! If chocolate wafers just aren’t doing it for you, graham cracker crumbs are the perfect substitute. You use the exact same amount of crumbs and the same amount of melted butter. Make sure you press that graham cracker mixture in very firmly, just like we did with the chocolate ones, and freeze it for that initial 15 minutes. It holds up beautifully!
How long does this pie need to chill?
I know you want to dive right in, but you do need patience here. The absolute minimum time required for the pie to set enough to slice without collapsing is four hours in the refrigerator. However, and I say this every time, the flavor and texture deepen so much more if you let it chill overnight. If you plan ahead just a little, the slicing will be a dream!
Estimated Nutritional Data for This Easy Dessert
Since we aren’t hiding anything, here is the estimated nutritional rundown for one slice of this rich, easy dessert, based on eight servings. Remember, because these pies are so decadent, a small slice goes a long way!
- Calories: Approximately 450 per slice
- Fat: Around 25 grams
- Protein: About 10 grams
- Carbohydrates: Roughly 45 grams
- Sugar: About 30 grams (That powdered sugar adds up!)
Please keep in mind that these numbers are just estimates! If you use salted butter or add extra chocolate chips, the sodium and sugar counts will shift a bit. I mostly just track the deliciousness factor, which is off the charts!
Estimated Nutritional Data for This Easy Dessert
Since we aren’t hiding anything, here is the estimated nutritional rundown for one slice of this rich, easy dessert, based on eight servings. Remember, because these pies are so decadent, a small slice goes a long way! I always tell people to look at this information with a grain of salt—or maybe a pound of peanut butter—since exact nutrition really depends on the specific brands you grab.
- Calories: Approximately 450 per slice
- Fat: Around 25 grams
- Protein: About 10 grams
- Carbohydrates: Roughly 45 grams
- Sugar: About 30 grams (That powdered sugar adds up!)
Please keep in mind that these numbers are just estimates! If you use salted butter or add extra chocolate chips, the sodium and sugar counts will shift a bit. I mostly just track the deliciousness factor, which is off the charts! If you’re trying to keep an eye on how you eat, make sure you check out my post on calorie-smart recipes for similar treats!

No Bake Peanut Butter Pie
Ingredients
Equipment
Method
- Combine the chocolate wafer crumbs and melted butter in a bowl. Press the mixture firmly into the bottom and up the sides of a 9-inch pie plate.
- Place the crust in the freezer while you prepare the filling.
- In a large bowl, use an electric mixer to beat the peanut butter and softened cream cheese together until the mixture is smooth.
- Beat in the powdered sugar and vanilla extract until fully combined.
- Gently fold in the thawed whipped topping until no white streaks remain. Do not overmix.
- Spoon the peanut butter filling evenly into the chilled crust.
- If using, sprinkle the mini chocolate chips over the top of the pie.
- Cover the pie loosely with plastic wrap and refrigerate for at least 4 hours, or until firm. Chilling for longer, such as overnight, improves the texture.
- Slice and serve cold.