
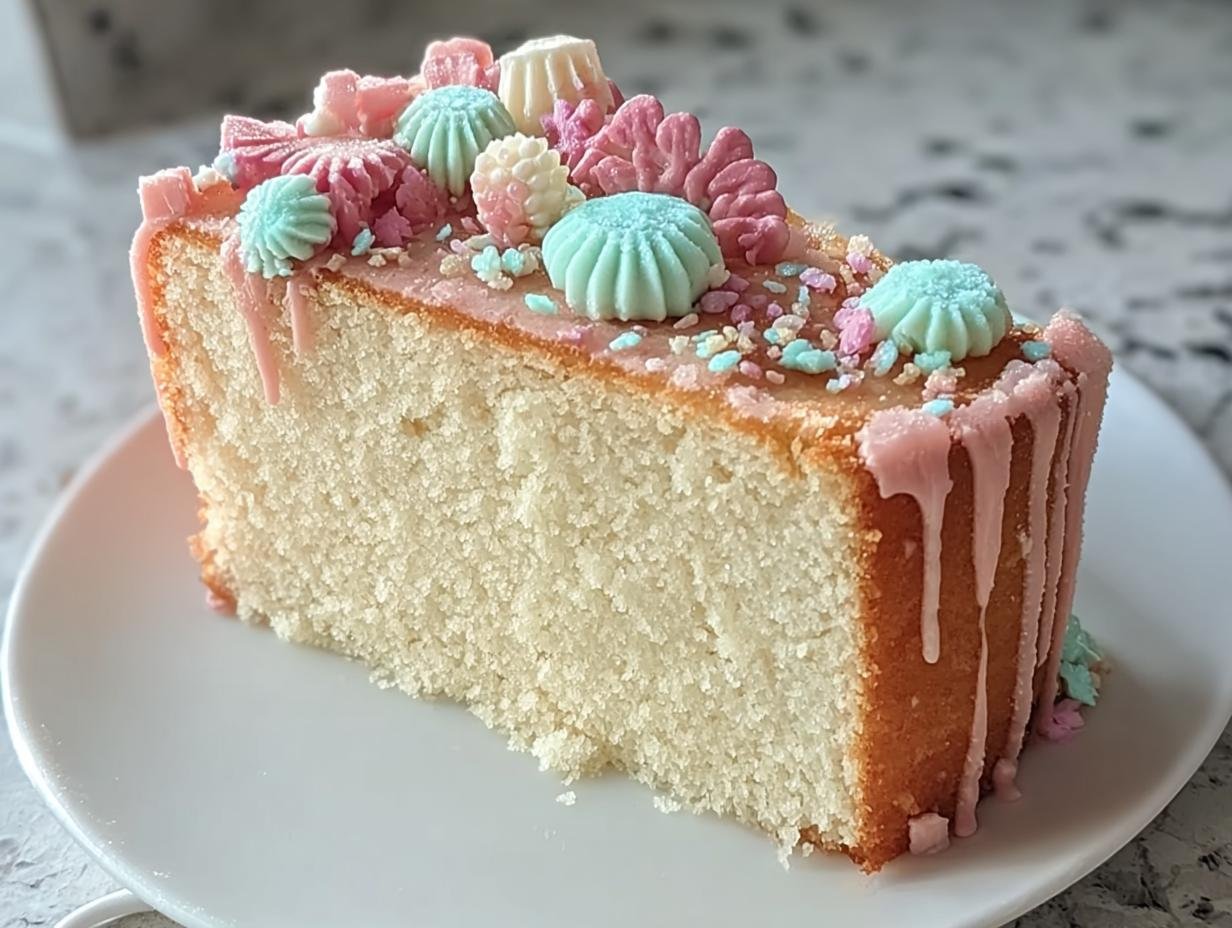
There is nothing quite as satisfying as pulling two perfectly golden layers out of the oven, knowing they are ready for whatever beautiful chaos you plan to inflict on them next! I’ve spent years baking, and I’ve learned that the real showstopper isn’t usually the recipe itself, but what you do *after* it comes out of the oven. That’s why this simple vanilla sponge is my absolute go-to foundation. It’s sturdy enough for gravity-defying **New cake designs** and tender enough to melt in your mouth. Trust me, mastering this plain base is the absolute cornerstone for achieving those intricate **New cake decoration** looks you see all over your feed!
Why This Simple Vanilla Sponge is the Base for New Cake Designs
When you’re planning something big—like those tiered wonders or maybe a cool drip effect—you cannot afford a flimsy cake layer. This vanilla sponge is my secret weapon because it’s flavor-neutral, meaning it honestly tastes great with everything, but structurally it’s a tank! It holds up perfectly when you stack two, three, or even four layers high.
If your base collapses or crumbles when you pick it up, all that beautiful, advanced **New cake decoration** work you planned goes right out the window. Think of this recipe as your reliable canvas. I’ve used it for everything from simple naked cakes to wild sculpted designs. It just performs beautifully. If you’re ready to move up to more complex **New cake decoration**, you first need this dependable foundation. Why not check out how it pairs with other flavors, like this matcha vanilla swirl? It shows you how adaptable this standard recipe truly is!
Achieving the Perfect Crumb for New Cake Decoration
The crumb has to be just right—moist enough so it doesn’t taste dry, but firm enough so it won’t turn to dust when you start carving or applying heavy coats of frosting. That’s where technique, not just ingredients, wins the day.
Here’s my one crucial baking tip to avoid turning your sponge into tough bread: when you add the flour mixture, mix it by hand or on the absolute lowest speed, and stop stirring the second you stop seeing white streaks. Seriously, stop! Overmixing develops gluten, and gluten is what makes bread chewy, not what makes a delicate cake layer perfect for intricate **New cake decoration**.
Ingredients for Your Foundation: The Simple Vanilla Sponge
You can’t build a tall, magnificent structure without knowing exactly what every component is, right? This recipe keeps things beautifully straightforward because we want the structure to shine, not confusing flavors. We’re using standard pantry staples, but the preparation of those staples is where we earn our keep. You’ll need enough batter for two 8-inch rounds, which is perfect for most moderate stacking we’ll do before trying those huge **New cake designs**.
Look closely at the list—this is your blueprint for success. Every step matters because we need this standard sponge to stand up to whatever colorful masterpiece you envision for your **New cake decoration** project.
Ingredient Clarity and Preparation
Preparation is everything, folks! You can’t just scoop things out of the cupboard and hope for the best, especially when relying on this cake for structural support.
- First up, the dry stuff: Your all-purpose flour absolutely has to be sifted. Sifting mixes air in gently, which is key because we are trying to keep that gluten development down later on.
- The butter needs to be softened—and I mean truly softened, room temperature soft, not melted. If it’s too hard, it won’t cream properly with the sugar, and you lose your air pockets! This is crucial for stability.
- For the liquid, just use regular milk. It works perfectly here. Make sure your vanilla extract is the good stuff; you want that full flavor since this is a vanilla cake base.
Don’t skip those notes about softening and sifting; they’re my way of guaranteeing you trust this basic foundation for whatever amazing **New cake decoration** you dream up next!
Baking Instructions for Your New Cake Designs Canvas
Alright, now that we’ve got our ingredients prepped—sifted, softened, and ready to go—it’s time for the actual baking. The oven temperature has to be spot-on, 350°F (175°C), and make sure those two 8-inch pans are greased AND floured. I learned the hard way early on that if you skip the flour dusting after greasing, your perfectly baked layers will try to hug the pan forever!
The order in which you mix everything is what makes this cake such a reliable base for **New cake decoration**. We aren’t just dumping things in willy-nilly; we’re building structure layer by layer. And listen up, cooling time is *not* optional. I once rushed pulling a layer out because I was excited to start frosting, and the whole center sagged like a sad pancake. It was a disaster! Letting it cool in the pan for 10 minutes allows it to firm up slightly before you dare turn it out onto the rack to cool completely. Patience pays off when you want tall, professional-looking **New cake designs**. This sponge is so good, it’s even adaptable if you want to try something different like a matcha swirl!

Mixing Technique: Avoiding Common Sponge Cake Pitfalls
The creaming of butter and sugar is step one, getting that light and fluffy texture—that pulls beautiful air into the batter. But the real danger zone comes when we add the flour and milk. Remember what I said about gluten? This is where we respect the process!
You absolutely must alternate the dry ingredients (flour mixture) with the milk. Start and end with the flour. Why? If you dump all the liquid in at once, it can break up those lovely air pockets you just beat into your butter and sugar. If you dump all the flour in at once, you have to beat it forever to get it smooth, which spells instant toughness! Mixing just until the last streak of flour disappears is the secret handshake for a tender sponge that can handle any **New cake decoration** you attempt.
Baking Times and Testing for Doneness
Bake time is usually right around 25 to 30 minutes for 8-inch rounds at 350°F. But you know I never trust the timer completely! You have to test it visually and physically.
First, look at the edges. If the cake has pulled away just a tiny bit from the sides of your prepared pan, that’s great news. Then, go in with a toothpick. I stab it right in the center—if it comes out clean, you are golden. If it has wet batter, give it three more minutes and test again. Once they are done, get them out and let them rest in those pans for ten minutes. They need that gentle transition time before you invert them onto the cooling rack. They must be completely, utterly cool before you even *think* about frosting or stacking for your **New cake designs**!
Essential Equipment for Creating New Cake Decoration
You can have the best cake batter in the world, but if your tools aren’t up to the task, your beautiful **New cake designs** are going to suffer. Thankfully, for this simple sponge, the equipment list is pretty basic, which I love! It means you probably have everything you need right now stashed in your kitchen cupboards.
For this round, the essentials are two 8-inch round cake pans, a decent electric mixer (handheld or stand, either works if you’re patient!), and a couple of good mixing bowls for your wet and dry components. The pans are where I want to spend a second emphasizing something vital for **New cake decoration**.
You absolutely need two 8-inch pans. You can’t wing it with one 9-inch pan and try to slice it into layers later—that always results in uneven thickness and wasted cake, making those perfect, sharp edges needed for modern **New cake designs** impossible. Even layers bake evenly, cool consistently, and stack beautifully. Don’t compromise on the pans if you’re serious about your final decorative outcome!
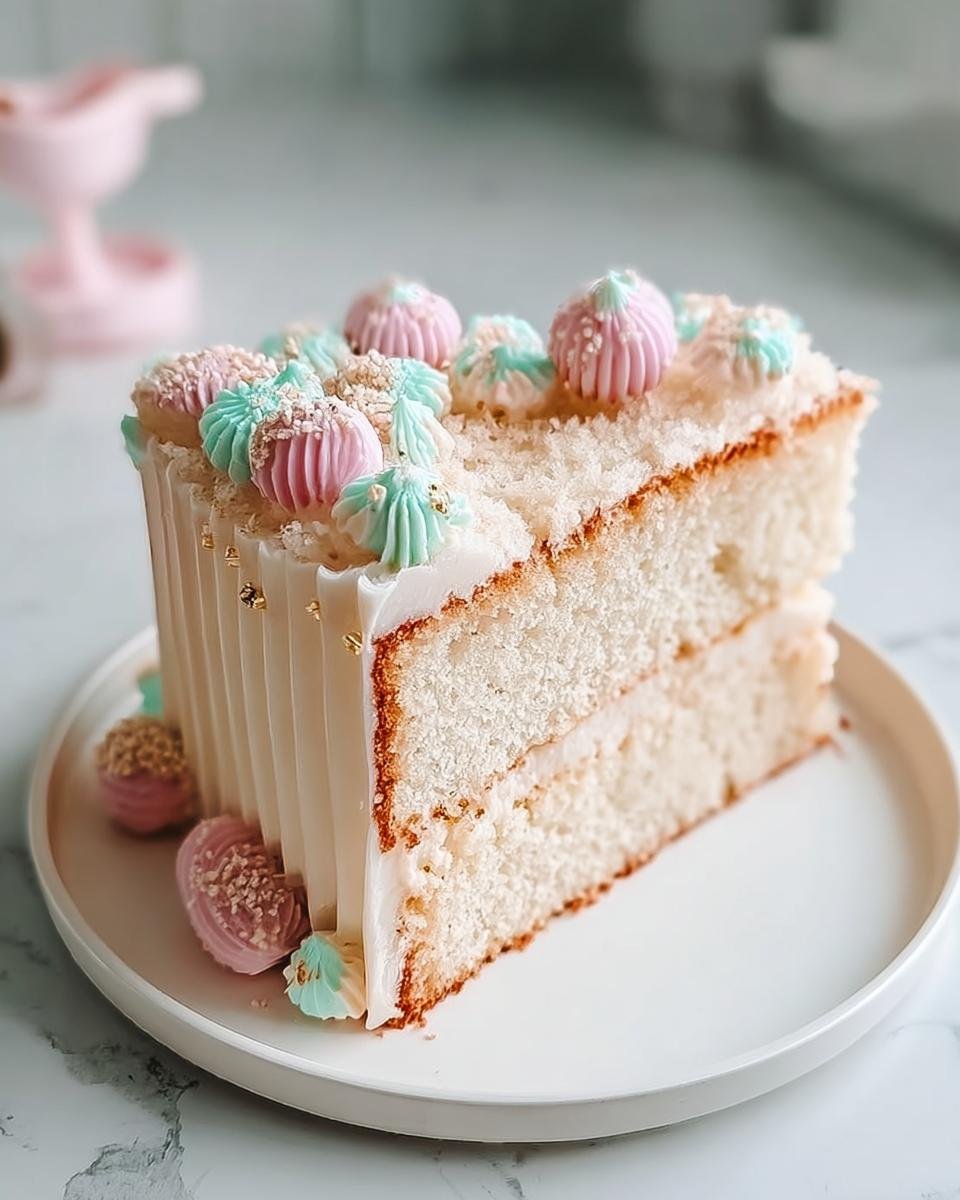
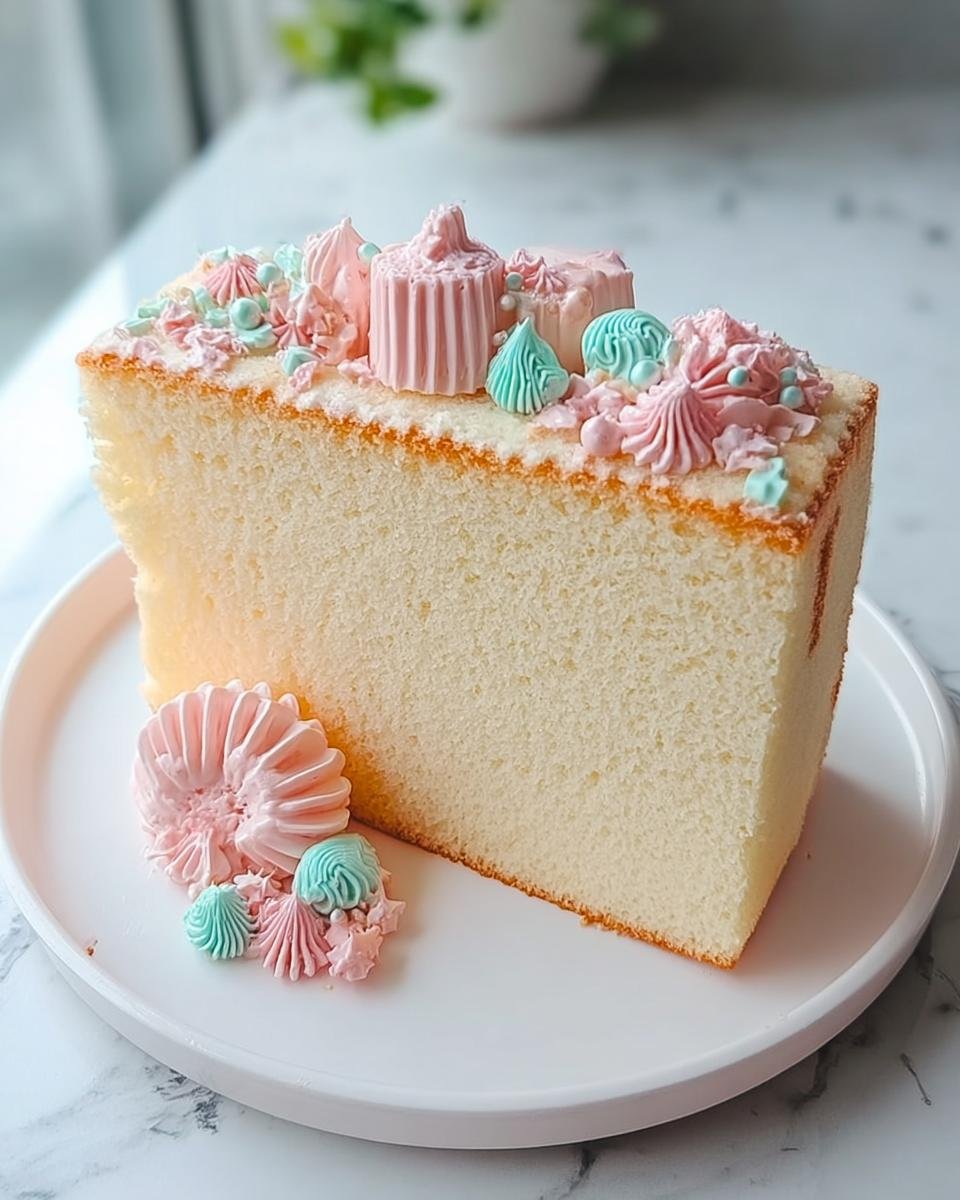
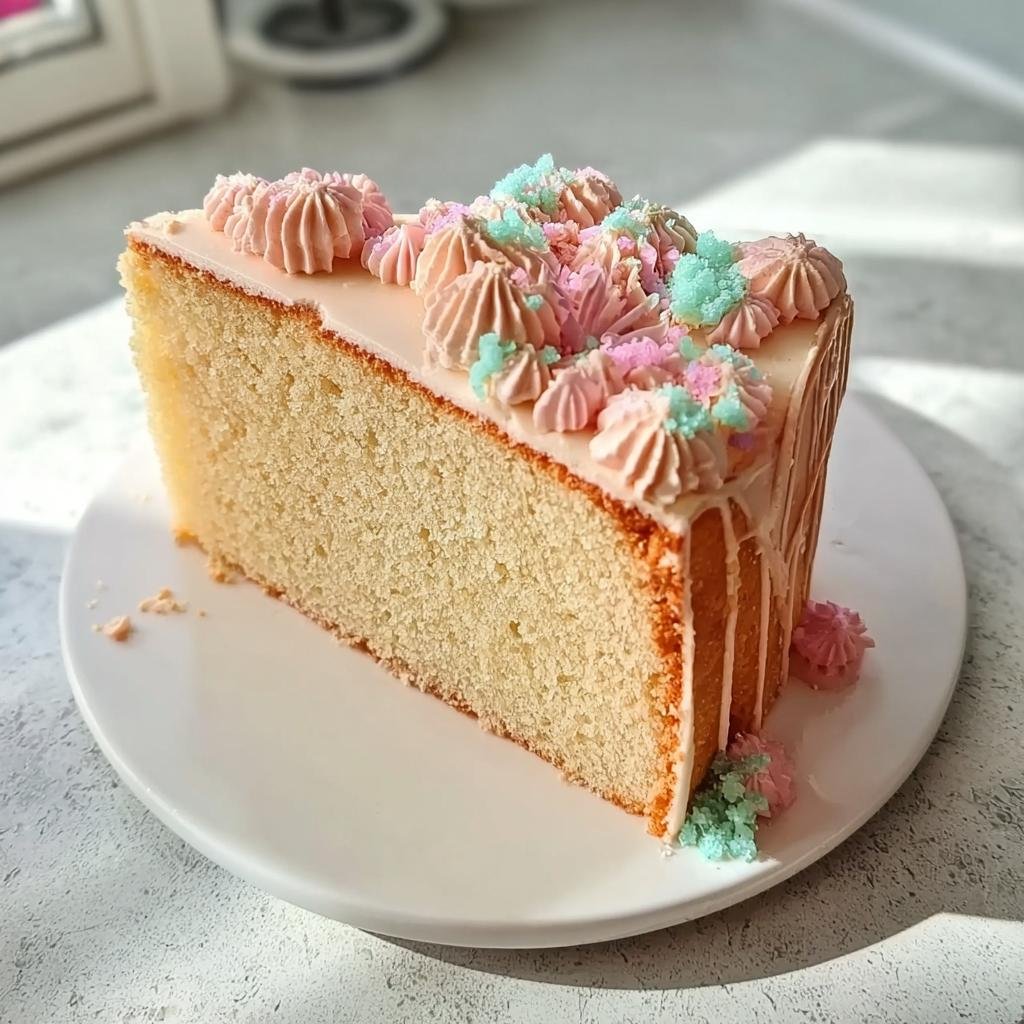
From Sponge to Showstopper: Tips for New Cake Designs
Once those layers are completely cool—and I mean touch them and they feel like they just came from the fridge cool—it’s time to transition from baker to artist! Trust me, this foundation is now ready for anything. If you’re planning on a tall, impressive stack or one of those trendy drip cakes, you need to take one non-negotiable extra step. It moves your project from ‘homemade’ to ‘bakery quality’ real quick.
I love seeing what folks come up with for **New cake designs**! Before you even think about that final pretty layer of buttercream, you have to deal with any natural domes on top of your cakes. A dome means an uneven surface, and uneven surfaces make for terrible, slanted **New cake decoration**. You want perfection before you start!
If you’re practicing your layering skills, definitely check out how a chocolate drip flows on a sturdy base like this; I have some tips over at my chocolate drip cake post that would look amazing on this sponge!

Leveling and Crumb Coating for Flawless New Cake Decoration
First things first: leveling. You’ll need a long serrated knife or a dedicated cake leveler. You just gently slice off that slight dome on the top of each layer so that you have a perfectly flat surface to work with. If you notice your layers are shrinking a bit while they cool, that’s okay! Just shave off the high spot until it’s perfectly flat.
Next, we deal with crumbs. The enemy of a clean finish is loose cake dust, especially when you’re trying to achieve crisp lines with your **New cake decoration**. This is where the crumb coat comes in. Take a very thin layer of your chosen frosting—and I mean whisper-thin, almost transparent—and brush it all over the entire surface of the stacked cake. It acts like glue for all those pesky crumbs.
Once that thin coat is on, pop the whole thing into the fridge for about 20 minutes. It just sets that pesky crumb layer solid. Then, when you come back for your final, beautiful coat of frosting for your **New cake designs**, everything stays perfectly clean. No loose crumbs sneak through! It’s such a simple technique, but it makes all the difference when aiming for professional results.
Ingredient Notes and Substitutions for Your Cake
Since this is the blank canvas for your upcoming **New cake designs**, I want to talk seriously about substitutions. Most of the ingredients here are pretty forgiving, but when you rely on this sponge for height and stability in your **New cake decoration**, you have to be careful about major swaps.
For instance, while I list whole milk, you could try buttermilk in a pinch. It adds a tiny bit of acid which reacts slightly with the baking powder. Honestly, it can make the crumb a little softer, which might not be ideal if you’re aiming for super sharp corners in your **New cake designs**. Stick to whole milk if you can for the best structure.
As for vanilla? Use real vanilla extract! Imitation flavoring just doesn’t have the depth, and since this cake is so simple, the vanilla flavor has nowhere to hide. Great ingredients make for a great foundation, and a great foundation is the start of any amazing piece of **New cake decoration**.
Storage and Handling of Your Decorated Cake
Okay, your incredible **New cake designs** are finished, frosted, and looking picture-perfect! Now we have to keep it that way. If you used a stable buttercream, like my favorite Swiss Meringue, you can actually keep that cake on the counter for a day or two, covered loosely. Room temperature cake tastes much better, honestly!
But—and this is crucial for delicate **New cake decoration**—if you used cream cheese or fresh whipped cream frosting, that cake needs the fridge immediately. Just make sure you cover it well so the sponge doesn’t absorb any weird fridge smells. Try letting it sit out for about an hour before slicing, though, so the frosting softens up just a little bit!
Frequently Asked Questions About Sponge Cakes and Decorating
I know you’re itching to get started on those amazing **New cake designs**, but maybe you have a few logistic questions first! It’s smart to plan ahead, especially when you’re trying intricate **New cake decoration**. Here are some of the things I get asked most often when people are starting with this basic vanilla sponge.
Can I bake this recipe as cupcakes?
Oh gosh, yes, you absolutely can! This is a fantastic recipe for cupcakes because they bake up light and airy. If you use standard muffin tins lined with paper liners, the bake time drops significantly—usually around 18 to 20 minutes at that same 350°F. Keep an eye on them because they go fast! Cupcakes are a wonderful, smaller-scale way to practice those tricky **New cake decoration** techniques before tackling a whole tier.
What is the best frosting to use for tall New cake designs?
This is my favorite question! For tall stacks and those sharp, clean edges required for modern **New cake designs**, you need something that won’t sag under its own weight. Frankly, a simple American buttercream can be too soft if your kitchen is warm. I always, always recommend Swiss Meringue Buttercream (SMBC) for serious stacking. It’s incredibly smooth, pipes like a dream, and crusts beautifully, making those final smooth finishes for your **New cake decoration** so much easier to achieve!
How far ahead can I bake the layers?
If you are planning a big weekend project, you can get a head start! I find that these layers are best baked, cooled completely, wrapped tightly in plastic wrap (like, really tight, maybe two layers), and then frozen for up to a month. Freezing actually helps firm them up, making them even easier to handle when you go to level them for stacking. This is a lifesaver when you’re trying to fit decorating time into a busy week. You can pull them out the day before you plan to frost and they’ll thaw beautifully on the counter!
If you want to see some really innovative ideas for what you can do once the layers are baked and cooled, check out some of the unique styles people are creating over at this cake ideas roundup!
Estimating Nutritional Data for This Base Cake
Okay, now that we’ve successfully created the perfect underlying structure for your stunning **New cake designs**, I feel like we should talk just for a second about the nutrition. I always say my cakes are baked with love, but that doesn’t mean we can ignore calories entirely, right?
I want to be super clear here: this nutritional data is strictly for the vanilla sponge cake layers *only*, before we add any frosting, fillings, or elaborate **New cake decoration** elements. The second you add buttercream, ganache, or sugar syrups, these numbers are going to zoom right up! This is just a baseline estimate so you know what you’re dealing with on the foundation layer.
Based on the ingredients list for 8 servings, here’s a rough guide. Again, these are estimates, so please treat them as such!
- Calories: Approximately 280-300 per slice (just cake layer)
- Fat: Around 13-14g
- Protein: Roughly 4g
- Carbohydrates: About 38-40g
When you go full-throttle on your **New cake decoration** ideas and decide to slather on a thick layer of cream cheese frosting, expect those numbers to change significantly! But for the moist, sturdy sponge base itself, this gives you a nice idea of what you’re starting with before the fun begins.
Share Your New Cake Designs!
Well, we did it! We took this simple, reliable vanilla sponge and set you up with the perfect, sturdy canvas for all your creative visions. I’m so excited to see what you come up with for your **New cake designs**!
Seriously, the best part of sharing a foundational recipe like this is seeing how you all elevate it with your unique **New cake decoration** flair. Did you try a mirror glaze? Did you attempt those wafer paper flowers? I want to know everything!
Please don’t be shy; hop down into the comments below and give this recipe a rating—let me know how well it held up under your decorating pressure. More importantly, tell me which **New cake decoration** style you tried! If you snapped a picture, I’d love you to share it on social media and tag me so I can gush over your amazing work. Happy baking, and happy decorating!
Simple Vanilla Sponge Cake
Ingredients
Equipment
Method
- Preheat your oven to 350°F (175°C). Grease and flour two 8-inch round cake pans.
- In a medium bowl, whisk together the sifted flour, baking powder, and salt. Set this dry mixture aside.
- In a large bowl, use an electric mixer to cream the softened butter and sugar together until the mixture is light and fluffy, about 3 minutes.
- Beat in the eggs one at a time, mixing well after each addition. Stir in the vanilla extract.
- Gradually add the dry ingredients to the wet ingredients, alternating with the milk. Begin and end with the dry ingredients. Mix only until just combined; do not overmix.
- Divide the batter evenly between the prepared cake pans. Bake for 25 to 30 minutes, or until a toothpick inserted into the center comes out clean.
- Let the cakes cool in the pans for 10 minutes before inverting them onto a wire rack to cool completely before frosting or decorating.