
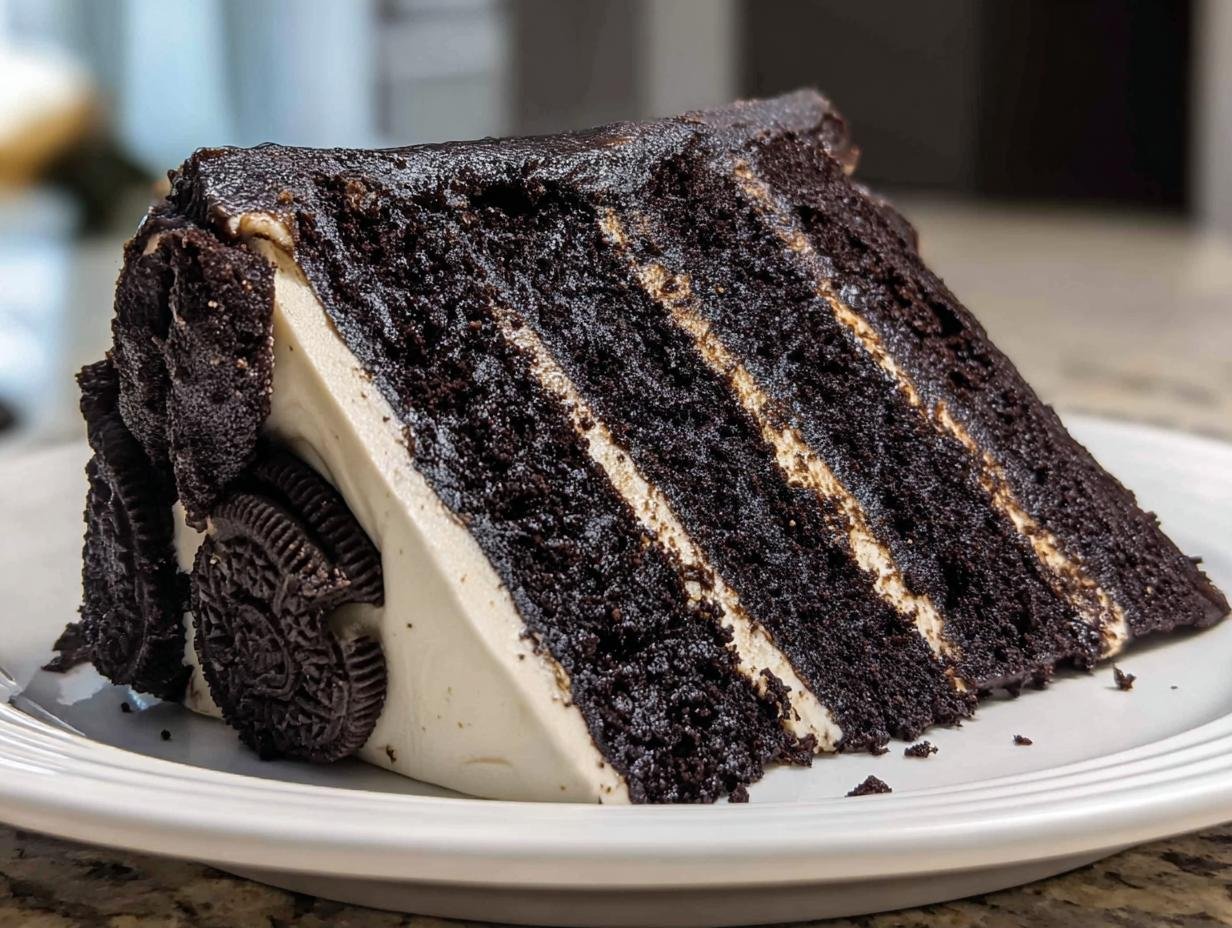
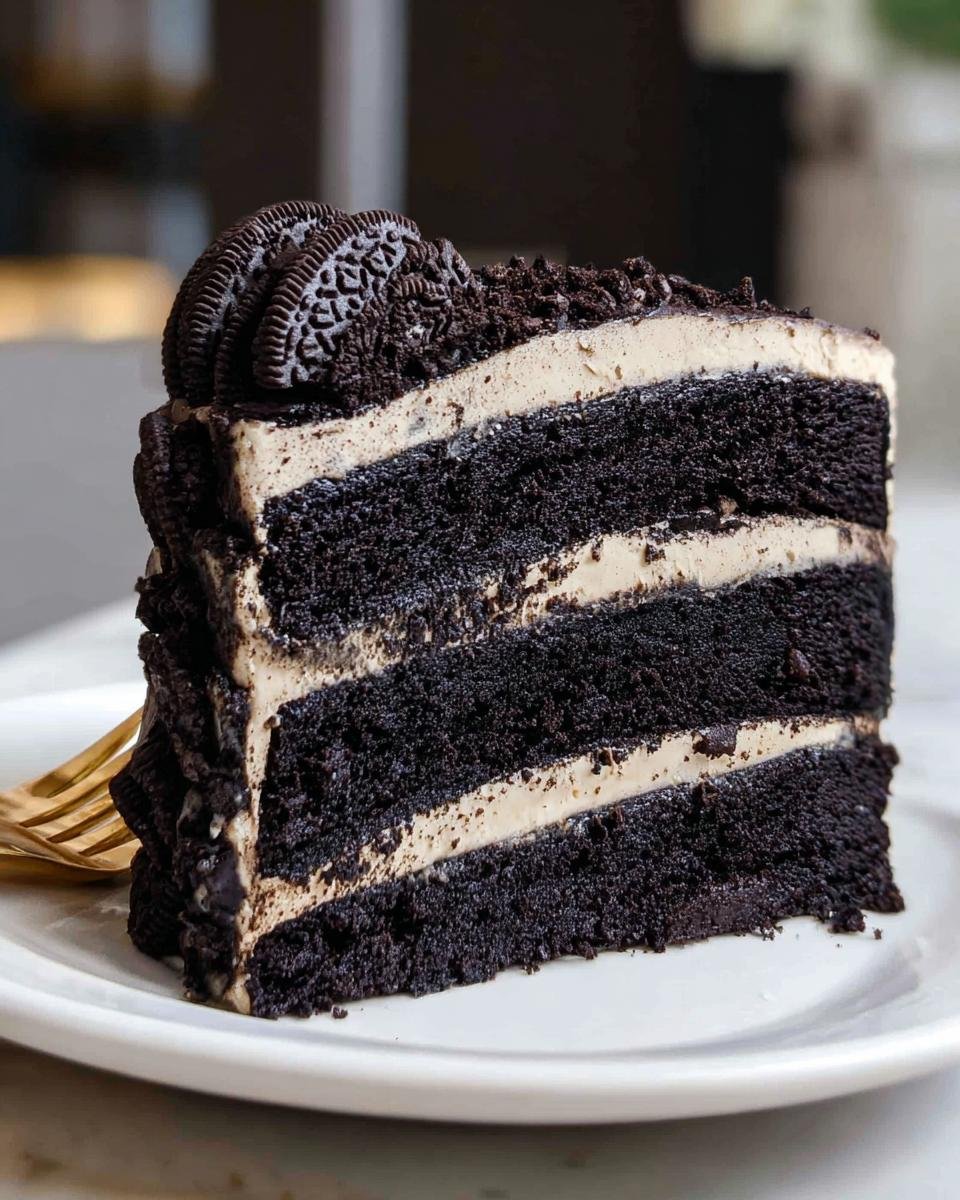
If you are anything like me, sometimes only the deepest, darkest, most decadent chocolate will do! I mean, the kind of rich flavor that makes the whole kitchen smell like a cocoa factory. That’s exactly why this black velvet oreo cake became an absolute staple around here. It’s not just chocolate; it’s that stunning, almost black color, combined with the sweet crunch of Oreos nestled right into a cloud of tangy cream cheese frosting.
I’ve made this recipe so many times—for birthdays, for Monday blues relief, for no reason at all—that I know exactly when the batter is perfect and when the layers are just set. Trust me, after a few tries, getting that signature velvety texture every single time is completely doable, and the payoff is huge!
Why This Black Velvet Oreo Cake Recipe Works (E-E-A-T Focus)
What makes this black velvet oreo cake truly stand out from a regular old chocolate cake? Honestly, it’s two main things that make me come back to this recipe again and again. First, we insist on using Dutch-processed cocoa powder. It’s a little pricier, but wow, the color difference is worth every penny; it gives you that signature, deep, velvety black look we’re aiming for! If you’re looking for other great layered ideas, this Oreo Cookies and Cream Cake is another showstopper.
Second, don’t be scared when you add that cup of hot coffee! It seems wild, but that hot liquid blooms the cocoa and creates an incredibly thin, runny batter. That thin batter is the secret behind the incredibly tender crumb. I learned the hard way that if your eggs and buttermilk are straight from the fridge, the batter won’t emulsify properly. So, my biggest pro tip: always let your wet ingredients sit on the counter for at least 30 minutes before you start mixing. It makes everything blend so much more smoothly.
Essential Equipment for Your Black Velvet Oreo Cake
You don’t need a million gadgets for this, which I love! You absolutely must have two 9-inch round cake pans ready to go. Having two pans means faster baking time, and nobody likes waiting around for cake layers to bake in batches.
You’ll also need an electric mixer—a stand mixer is heavenly, but a hand mixer gets the job done just fine when you’re whipping up that frosting later. One final non-negotiable step for me is preparing those pans perfectly. Grease them, flour them, and then cut circles of parchment paper to sit right on the bottom. If you skip that parchment step, peeling this rich cake away can be a nightmare. We want beautiful layers, not shattered chocolate ruins!
Gathering Ingredients for the Black Velvet Oreo Cake Layers
Okay, now that we’ve talked about the ‘why,’ let’s get down to the ‘what.’ Getting these measurements just right is how we lock in that deep chocolate flavor and perfect structure. Remember, baking is chemistry, so we need to be precise here, even if my regular cooking is more of a ‘sprinkle and taste’ situation!
For the cake layers themselves, you’ll need 1 and 3/4 cups of all-purpose flour and 2 full cups of granulated sugar. Don’t try to lower the sugar; that’s what keeps things moist! As I mentioned, grab that 3/4 cup of unsweetened cocoa powder, but if you can find the Dutch-processed kind, grab it—it makes the color so much richer.
We need our leavening agents balanced: 1 and 1/2 teaspoons of baking soda and 1 teaspoon of baking powder, plus 1 teaspoon of salt to kick up all that chocolatey goodness. Check out the steps for my soft, chewy double chocolate chip cookies if you’re ever looking for cookies that are just as structured!
Here’s where the room temperature rule really matters: two large eggs, 1 cup of buttermilk, 1/2 cup of vegetable oil, and 2 teaspoons of vanilla extract. If these are cold, they fight the creamy mix later! Finally, the game-changer: 1 cup of hot, strong brewed coffee. I know, coffee in cake! But it doesn’t taste like coffee, I promise. It just deepens that dark chocolate flavor!
Making the Cream Cheese Oreo Frosting for Your Black Velvet Oreo Cake
This frosting is honestly half the fun of the whole black velvet oreo cake experience. We need that tang from the cream cheese to cut through all that rich, dark chocolate, so don’t even think about skipping it! Make sure your 8 ounces of cream cheese and 1/2 cup of unsalted butter are definitely softened—I mean truly soft, not just slightly pliable. If they are cold, your frosting will end up looking curdled, and we absolutely cannot have that!
Your secret weapon against lumpy frosting is sifting! I know it takes an extra minute, but trust me, sifting those 3 cups of powdered sugar prevents those tiny, frustrating hard bits in the final product. Beat the softened dairy together until it’s light, add the sugar gradually, and then finish with 1 teaspoon of vanilla extract until everything is fluffy.
Now for the best part! This is where we fold in the Oreos. You’ll use 1 cup of crushed Oreos, plus a few extra for sprinkling on top later. Be gentle here. You want beautiful chunks of cookie in your thick frosting, not just fine dust. If you’ve ever made my brown butter chocolate chip cookies, you know folding gently after the mixer stops is key to keeping the texture intact. Fold those crumbs in and get ready to frost!
Step-by-Step Instructions to Bake the Black Velvet Oreo Cake
Alright, time to put on our aprons! We need to get organized because even though the dry ingredients can be mixed in one bowl—which I love, thank you one-bowl chocolate chip cookies for inspiring efficiency!—the process moves quickly once the liquids hit the dry stuff.
First things first, heat up that oven! Preheat it to 350°F (175°C). Before you even look for the whisk, make sure those two 9-inch round cake pans are fully prepped. Grease them well, dust them with flour, and then, like I stressed before, cut those parchment paper circles to line the bottoms. This step saves so much stress later on.
In a big bowl, you just whisk together all your dry team: the flour, the cocoa, the sugar, baking soda, baking powder, and salt. Get them well acquainted before we introduce the wet side. Then, using your electric mixer on medium speed, beat in the room-temperature eggs, buttermilk, oil, and vanilla. You need to run that mixer for a solid two minutes; this is where we build some structure!
This next part is weird, but you have to trust me! Carefully stir in that full cup of hot brewed coffee. The batter is going to look super thin—like it might not ever bake right—but I promise, this is exactly what makes the black velvet oreo cake so famous. Pour the thin liquid evenly into your two prepared pans.
Bake these babies for about 30 to 35 minutes. Keep an eye on them! You’ll know they’re done when a wooden pick inserted right near the center comes out clean, or maybe just sporting a couple of moist crumbs clinging to it. Don’t overbake, or you’ll lose that velvet quality!
Cooling and Assembly of the Black Velvet Oreo Cake
Patience is a virtue right after baking, friend! Let the layers cool down in those pans for exactly 10 minutes. If you try to flip them out earlier, they might just collapse under their own weight. After 10 minutes, invert them onto a wire rack and let them cool until they are *completely* room temperature. If you frost warm cake, you get soup, and nobody wants soup-cake!
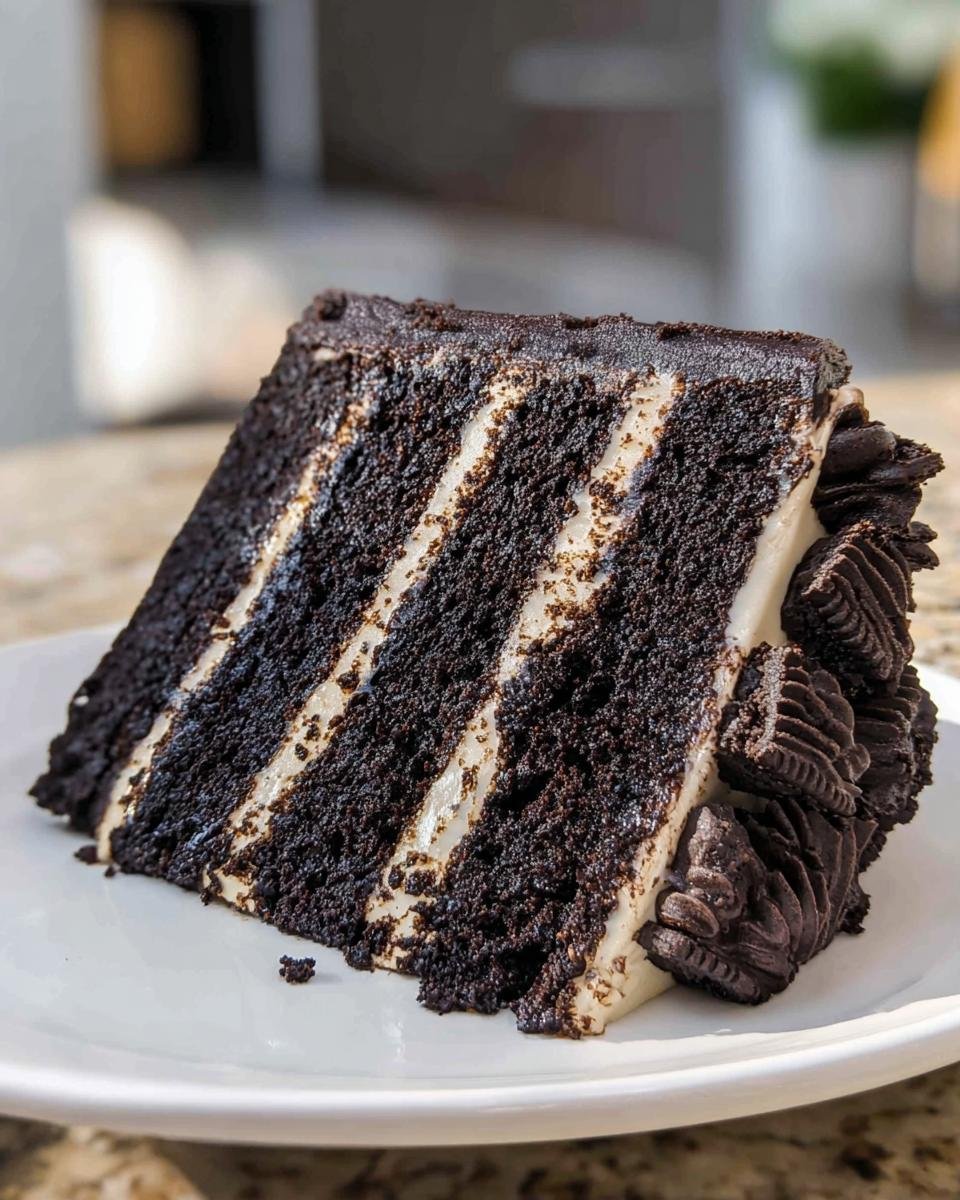
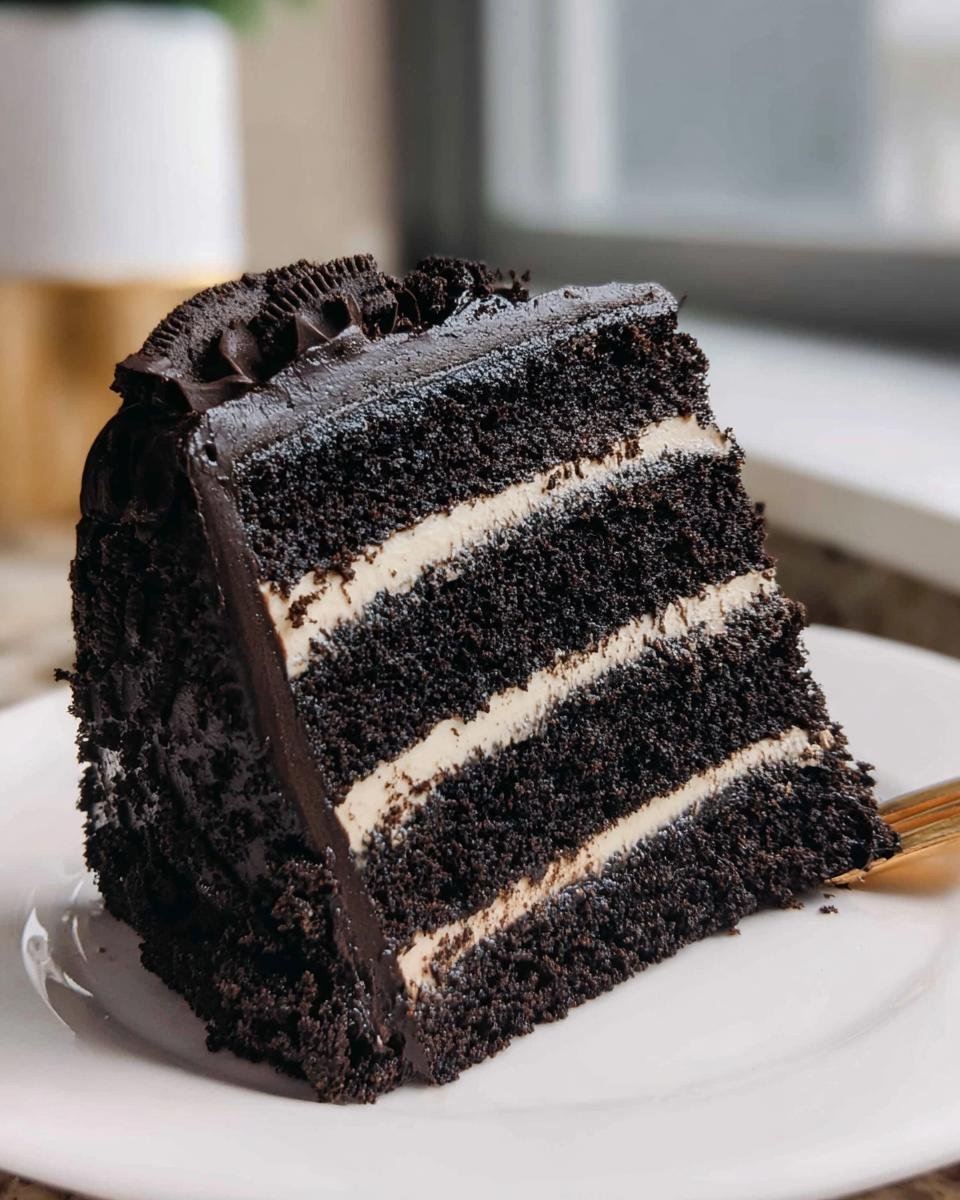
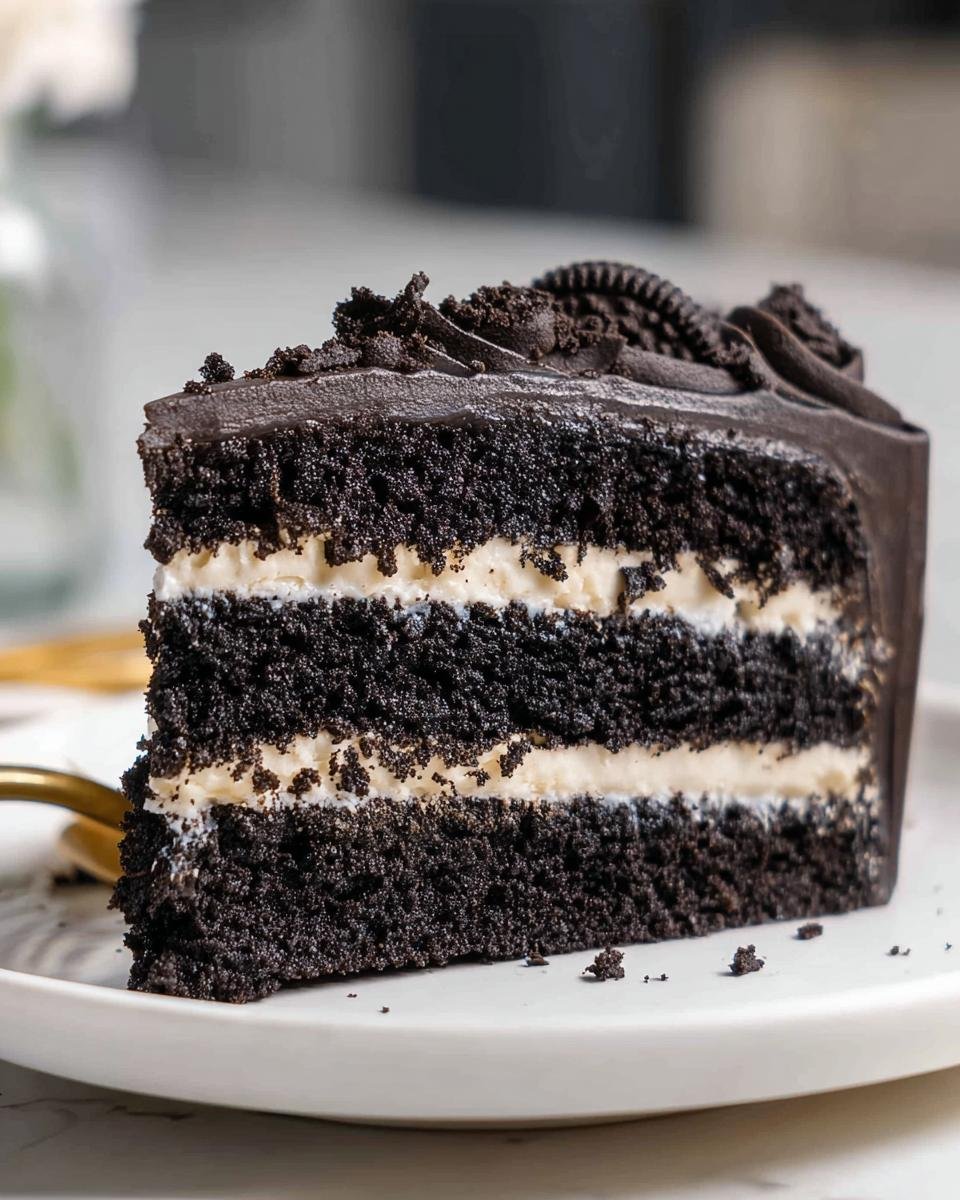
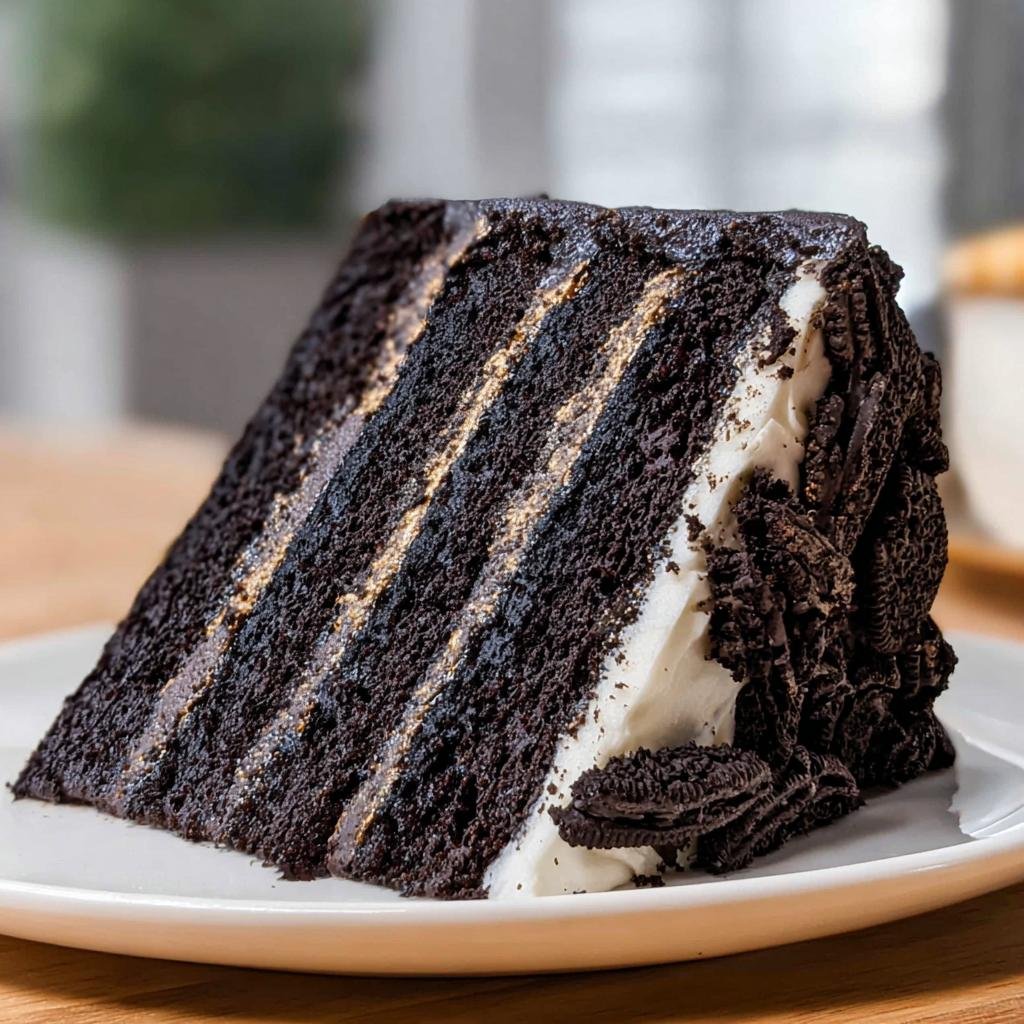
Once they are cool, it’s time to build! Take one layer and set it on your serving plate. Grab about one-third of that dreamy Oreo cream cheese frosting and spread it evenly over the top surface. Then, very carefully, place your second cake layer right on top of that frosting.
Now, finish the job! Use the rest of the frosting to cover the top and smooth the sides all over. My favorite final touch? Take an extra handful of crushed Oreos and sprinkle them generously all over the top edge, maybe even dribble some down the sides. It just screams “decadence!”
Tips for the Perfect Black Velvet Oreo Cake Finish
We’ve baked the cake, we’ve whipped the frosting—now for the little secrets that take this black velvet oreo cake from “really good” to “I need the recipe right now”! These aren’t huge changes, just small adjustments that make a big visual and textural difference.
My first tip deals with those delicious Oreos for the filling. If you throw them straight into a food processor, you get black dust, which just blends into the frosting and disappears. We want texture! I always put the cookies in a sturdy zip-top bag (the thick, sturdy ones, not the flimsy kind!) and gently use the bottom of a heavy skillet or rolling pin to smash them. You want a few different textures—some fine crumbs and some decent-sized chunky bits. It makes the filling much more interesting.
Speaking of interesting textures, if you’ve got a slightly runny frosting (maybe your butter was a *little* too soft), don’t panic! You have two options. You can carefully beat in another half-cup of sifted powdered sugar, but if it’s still too soft, you can chill the whole bowl of frosting in the fridge for about 15 minutes. Just 15! When you bring it out, it will be much firmer and easier to spread smoothly over those layers. If you like really gooey centers, check out my post on making two-chip chocolate chip cookies to see my chilling technique; it’s the same principle!
For presentation, since this cake is so dark, contrast is everything. Instead of just crushing Oreos for the garnish, try crushing just the filling wafers (the white part) separately. You can lightly dust the sides or the top with the white crumbs after you apply the main dark Oreo crumb garnish. It gives it a fun, cookies-and-cream visual pop that people immediately recognize!
Storing Your Black Velvet Oreo Cake
Because we used that gorgeous, tangy cream cheese frosting in this black velvet oreo cake, we can’t just leave it out on the counter like some dry sponge cake. Nope! Refrigeration is your friend here. Pop that beauty into an airtight container, or cover it really well with plastic wrap—you want to keep that moisture locked in and prevent that frosting from grabbing smells from the fridge.
It keeps wonderfully for about four days when properly covered in the refrigerator. I’ve honestly eaten slices that were five days old, and they were still perfectly delicious, but four days is the sweet spot for the best texture!
Now, here’s the crucial tip for serving time: don’t serve this cold, or you’ll miss out on that wonderful velvety crumb. If you slice it straight from the fridge, the cake will be dense and the frosting stiff. Take the cake out about an hour before you plan to serve it. Let it sit on the counter for about 45 minutes to an hour. Once it warms up just slightly, that dark chocolate flavor really sings, and the frosting softens up just enough to feel creamy on your tongue!
Ingredient Notes and Substitutions for this Black Velvet Oreo Cake
Even though I preach sticking to the recipe for this black velvet oreo cake—because it’s so perfectly balanced—I know sometimes you just don’t have that one specific item on hand. Don’t let that stop you from baking! We can make simple swaps.
First up, let’s talk buttermilk. If you open your fridge and realize you’re all out, panic not! This is a total home-cook lifeline. Measure out 1 cup of whole milk, and stir in 1 tablespoon of white vinegar or fresh lemon juice. Give it a quick stir and let it sit on the counter for about five minutes. It’ll start to curdle slightly, and boom—you’ve got perfectly good buttermilk ready to go! This little trick works like a charm every time.
Now, the coffee. That hot coffee is what really amps up the chocolate notes and contributes to the thin batter we love. If you absolutely cannot stand coffee—maybe you’re baking for a coffee-sensitive crowd—you can substitute it with 1 cup of hot water. However, I must warn you, the cake won’t be *quite* as dark or quite as deeply flavored. It will still be an amazing chocolate cake, but it will certainly lose a bit of that signature black velvet depth. It’s kind of like skipping the vanilla extract in cookies; it’s technically fine, but you miss that little something extra!
Finally, about that Dutch-processed cocoa powder: While it’s preferred for color saturation, regular unsweetened cocoa powder will work in a pinch. Just know your final cake won’t have that intense black hue, but the flavor will still be fantastic. Since cocoa is acidic, the baking soda will react nicely!
Frequently Asked Questions About Black Velvet Oreo Cake
Can I use regular unsweetened cocoa powder instead of Dutch-processed?
You absolutely can if that’s what you have on hand! I really push the Dutch-processed because it’s what gives this black velvet oreo cake that incredibly dark, almost black appearance we’re trying to achieve. Regular cocoa will still give you a wonderful, rich chocolate flavor, but your cake layers might come out a bit lighter brown rather than that deep velvet shade. It’ll still be super yummy, though!
Do I really need buttermilk for this recipe?
Buttermilk is important here because of how it interacts with the baking soda. The acid in the buttermilk helps tenderize the crumb and ensures a beautiful rise, balancing out that rich cocoa. If you absolutely don’t have any, use my substitution trick from the list above: add 1 tablespoon of white vinegar or lemon juice to 1 cup of regular milk and let it sit for five minutes. That acidity wakes everything up!
How would I adjust this if I only wanted to make one thick layer?
That’s a great idea if you are worried about the layers sticking or if you just prefer a simpler build! If you decide to use just one 9-inch round pan, you’ll need to adjust your baking time significantly. Since the batter is much deeper, it will take longer for the center to set. I’d start checking around 50 minutes, maybe even 60. You must insert a pick deep into the center to ensure it comes out clean before you pull it out. It’s a gorgeous cake baked as a single layer too!
Is it possible to make this cake ahead of time?
Yes, and honestly, I think it tastes even better the next day when the flavors have really gotten to know each other! You can bake the layers entirely, let them cool completely, wrap them tightly in plastic wrap, and keep them at room temperature for up to two days. If you need longer, pop them in the freezer, wrapped well, for up to a month. Just thaw them overnight before frosting. If you love making things ahead, you might want to check out my guide on quick chocolate chip cookies for fast make-ahead treats!
My frosting seems too soft to spread. What should I do?
That happens, especially if your kitchen is warm! Remember, the cream cheese and butter need to be firm enough to hold their shape once mixed with the powdered sugar. If the frosting is too soft, just scrape it back into your mixing bowl, pop it in the fridge for 15 minutes—no longer, or it gets too hard—and then give it a quick whip again. It firms right up, and you’ll be able to get those gorgeous sides smooth in no time!
Serving Suggestions for Your Rich Chocolate Dessert
You just finished making this magnificent black velvet oreo cake, and now you’re staring at it, wondering how to make serving time even better. That cake is so rich and intensely chocolatey that it really only needs a couple of friends on the plate to be perfect. Don’t feel like you need to overload it; this dessert stands tall on its own!
My absolute favorite way to serve this, especially if it’s a hot day or if you want to cut that deep sweetness just a tiny bit, is with something bright and fresh. A small pile of fresh raspberries or sliced strawberries makes the perfect counterpoint. The light tartness of the berries really pops against the dark cocoa and the tangy cream cheese frosting. It’s a classic combination for a reason, though I’m sure you could find some wild fruit pairings in my cake ideas section if you wanted to get adventurous!
If you’re serving it after a big dinner and you want maximum decadence, you can’t go wrong with a scoop of high-quality vanilla bean ice cream. The contrast between the cold, creamy ice cream melting slightly around the slice and the room-temperature cake is just heavenly. You get the richness from the cake and the cool sweetness from the ice cream—it’s the best kind of indulgence.
And if you’re just having a slice in the afternoon, forget the bells and whistles! This cake is robust enough to handle a strong beverage. Brew yourself a really strong cup of black coffee—no milk, no sugar needed—and sip that alongside your cake. The bitterness of the coffee mirrors the depth of the Dutch-processed cocoa, and it makes the vanilla notes in the frosting really shine through. It’s simple perfection!
Black Velvet Oreo Cake
Ingredients
Equipment
Method
- Preheat your oven to 350°F (175°C). Grease and flour two 9-inch round cake pans. Line the bottoms with parchment paper.
- In a large bowl, whisk together the flour, cocoa powder, sugar, baking soda, baking powder, and salt.
- Add the eggs, buttermilk, oil, and vanilla extract to the dry ingredients. Beat with an electric mixer on medium speed for two minutes.
- Carefully stir in the hot coffee until the batter is smooth. The batter will be thin.
- Pour the batter evenly into the prepared pans. Bake for 30 to 35 minutes, or until a wooden pick inserted into the center comes out clean. Let the cakes cool in the pans for 10 minutes before inverting them onto a wire rack to cool completely.
- While the cakes cool, prepare the frosting. Beat the softened cream cheese and butter together until smooth. Gradually add the powdered sugar, mixing until combined. Beat in the vanilla extract until the frosting is light and fluffy.
- Gently fold the crushed Oreo cookies into the frosting.
- Once the cakes are completely cool, place one layer on a serving plate. Spread about one-third of the Oreo frosting over the top. Place the second cake layer on top. Frost the top and sides of the entire cake with the remaining frosting. Garnish with extra crushed Oreos.