
Do you ever feel like you need a show-stopping dessert but dread spending all day in a hot oven? I totally get it! That’s why I chased down the perfect recipe that proves elegance doesn’t have to mean complication. Folks, you are about to meet your new favorite showstopper: the Indulge in Dark Chocolate Raspberry Mousse Cake: A Simple Dessert Recipe!
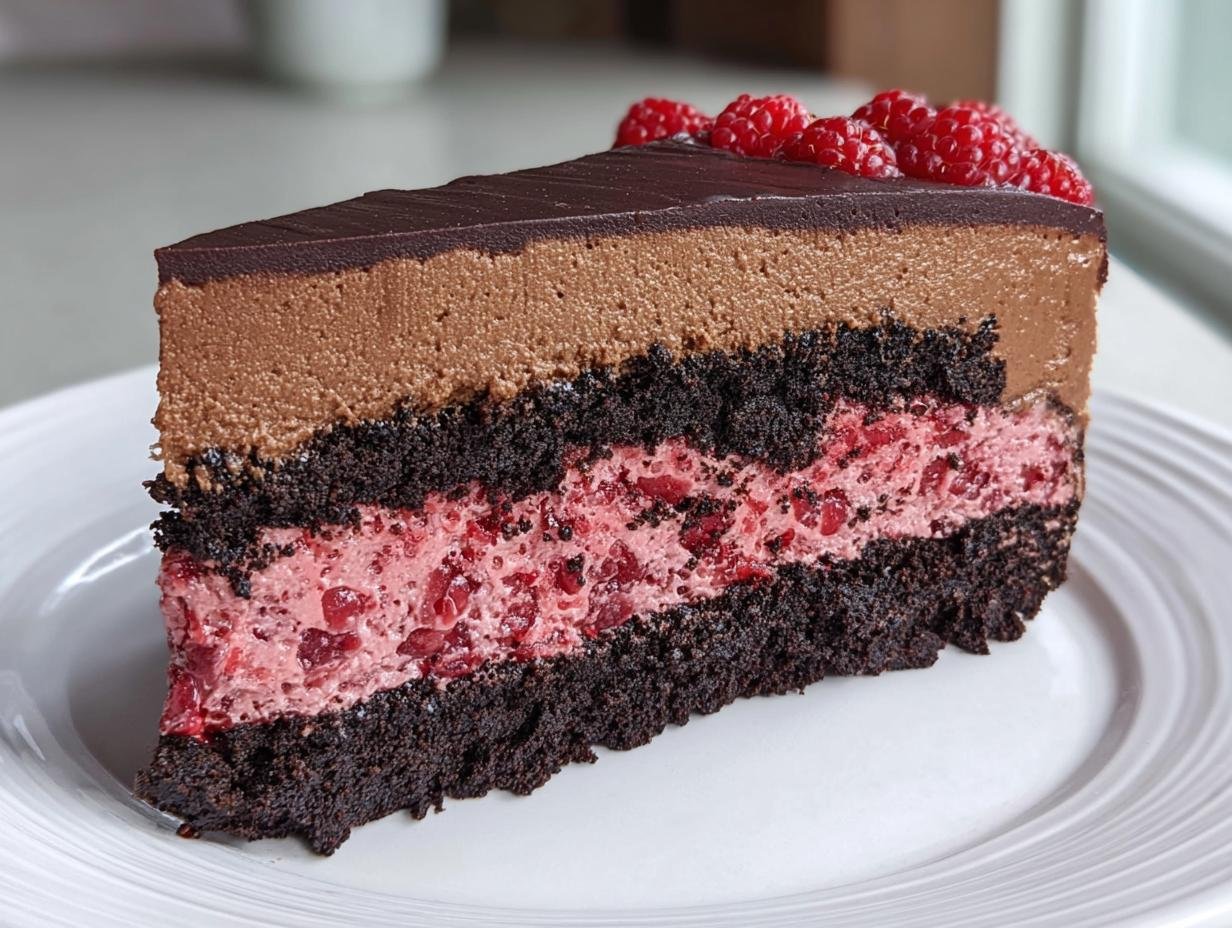
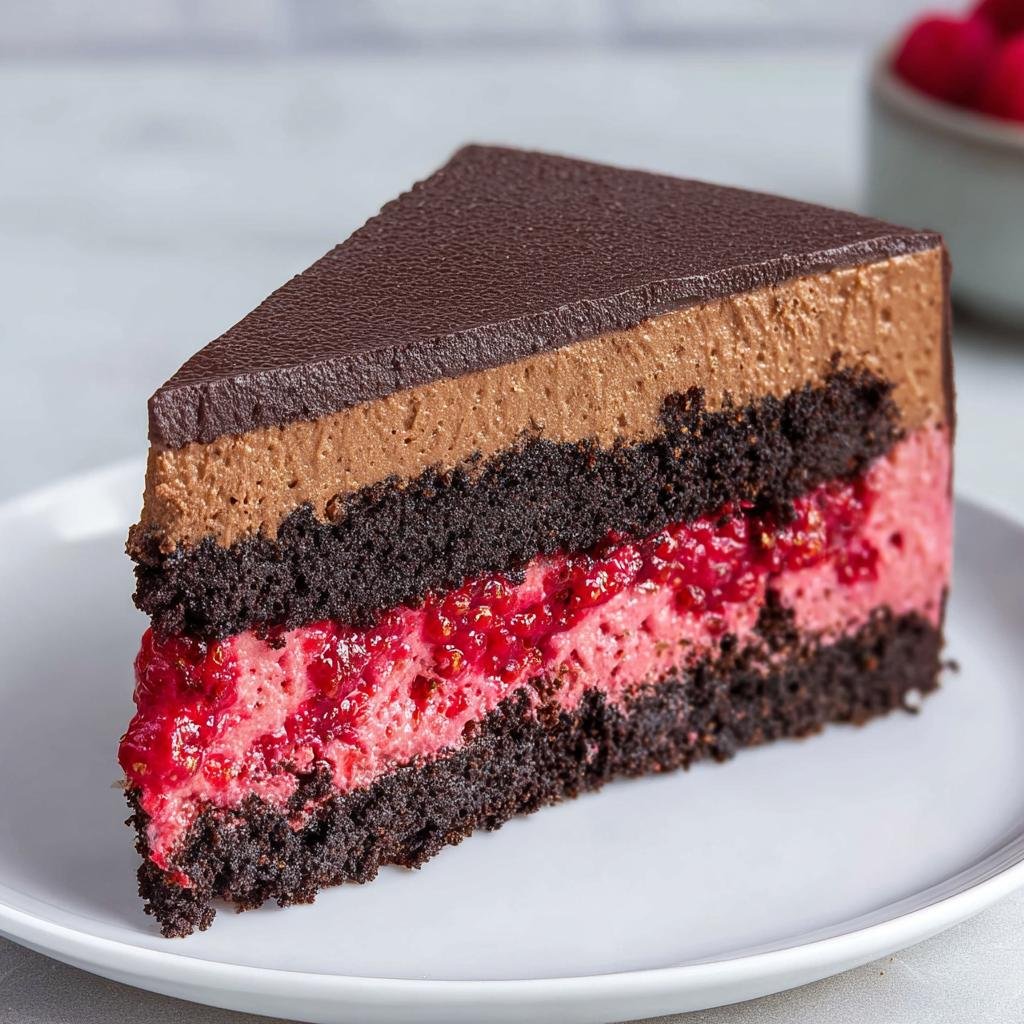
I developed this recipe after searching for a truly elegant yet straightforward no-bake option. It combines the deep, moody intensity of dark chocolate mousse with the bright, sharp tang of fresh raspberries, all sitting on a snappy little cookie crust. Trust me, people always think I pull this beauty from a fancy bakery case, but it’s all made right here in my kitchen. It’s rich, it’s creamy, and honestly, it’s so easy I almost feel guilty.
Why You Will Indulge in Dark Chocolate Raspberry Mousse Cake: A Simple Dessert Recipe!
This cake is my go-to when I need to impress someone without turning my kitchen into a construction zone. Seriously, the payoff for the small amount of effort here is huge. You get that gorgeous layered look, and the textures are just heaven.
Here’s why this recipe is going straight into your favorites folder:
- Zero Oven Time: That’s right, no baking required for the mousse layers! We just use the oven briefly for the crust, which barely counts.
- Flavor Balance is Everything: The deep bitterness of the dark chocolate cuts perfectly through the tartness of the raspberries. They are made for each other, honestly.
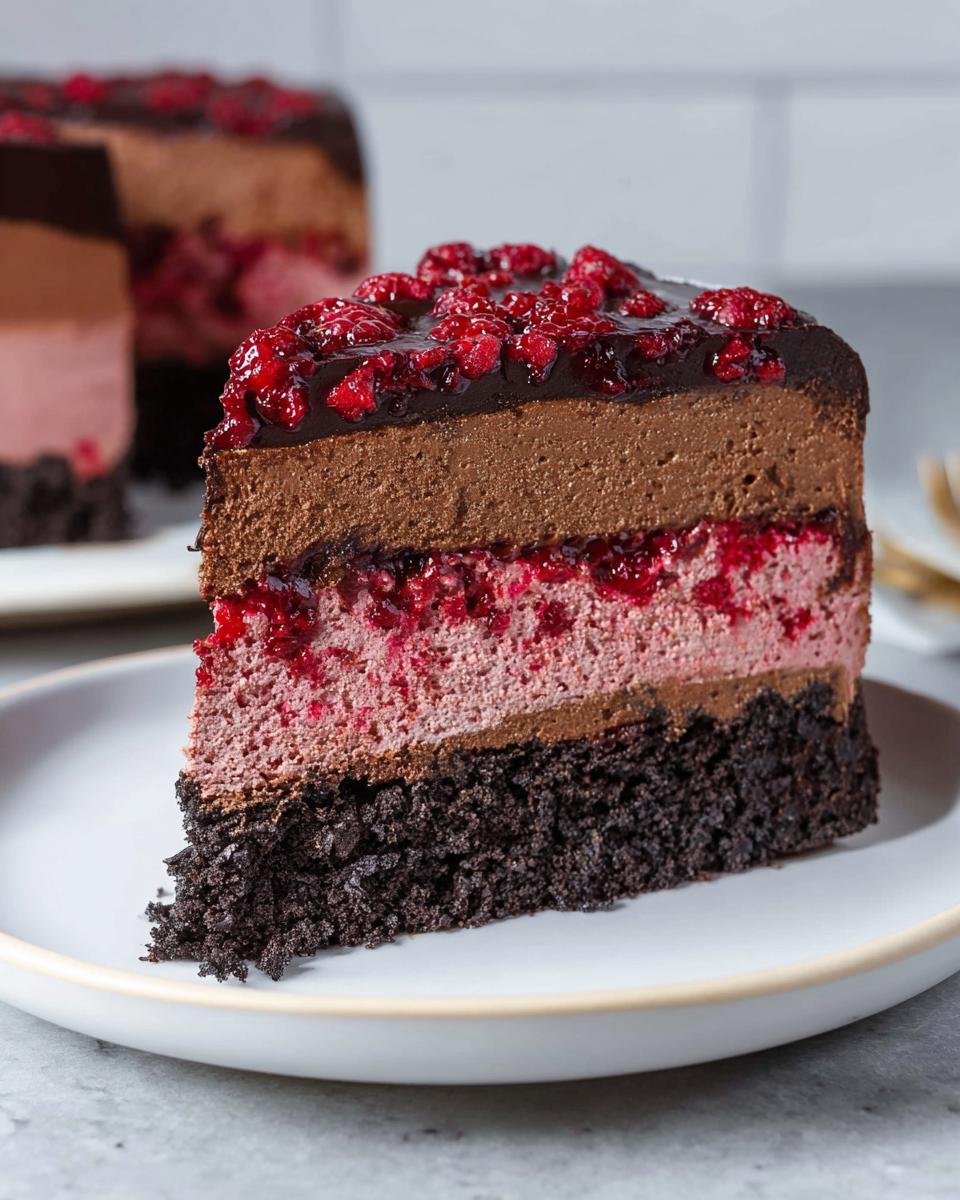
- Looks Like a Million Bucks: Because it sets up so cleanly in a ring, it looks incredibly professional. People always ask if I bought it already made!
It comes together faster than you think, even accounting for the chill time. You are going to love how straightforward this is!
Essential Equipment for Your Dark Chocolate Raspberry Mousse Cake
You don’t need a ton of specialized gear for this simple dessert recipe, which is great news! The most important piece here, without a doubt, is your 9-inch springform pan. You need that removable bottom to show off those beautiful layers when you serve it—presentation is half the fun!
Next, make sure your big kitchen helper—the electric mixer—is ready to go. When we make mousse, we are whipping heavy cream to hold that airy texture, and trying to do that by hand will just leave you with sore arms and soft peaks. A stand mixer or a sturdy hand mixer makes whipping the cream for both layers quick and effective.
Oh, and don’t forget a small saucepan for making that little burst of raspberry flavor. That’s about it for the must-haves!
Gather Ingredients for Indulge in Dark Chocolate Raspberry Mousse Cake: A Simple Dessert Recipe!
Okay, let’s talk building blocks! With a layered cake like this, organization is key. Laying out everything before you start makes the whole mixing process feel smooth, not stressful. We’re dealing with three distinct parts here, so just keep your bowls separate for the Crust, the Raspberry Layer, and the Chocolate Mousse. Always have your tools ready, especially if you’re making a quick side treat, like my quick chocolate chip cookies while the mousse sets!
For the crust, you need pulverized chocolate wafer cookie crumbs—about a cup and a half—mixed with 6 tablespoons of melted unsalted butter. Super simple base right there.
The Raspberry Layer needs one cup of raspberries (frozen is fine if you thaw them), a quarter cup of sugar, and a teaspoon of lemon juice for brightness. Crucially, you’ll bloom one envelope of gelatin in a quarter cup of cold water, and you need one cup of very cold heavy whipping cream for this layer.
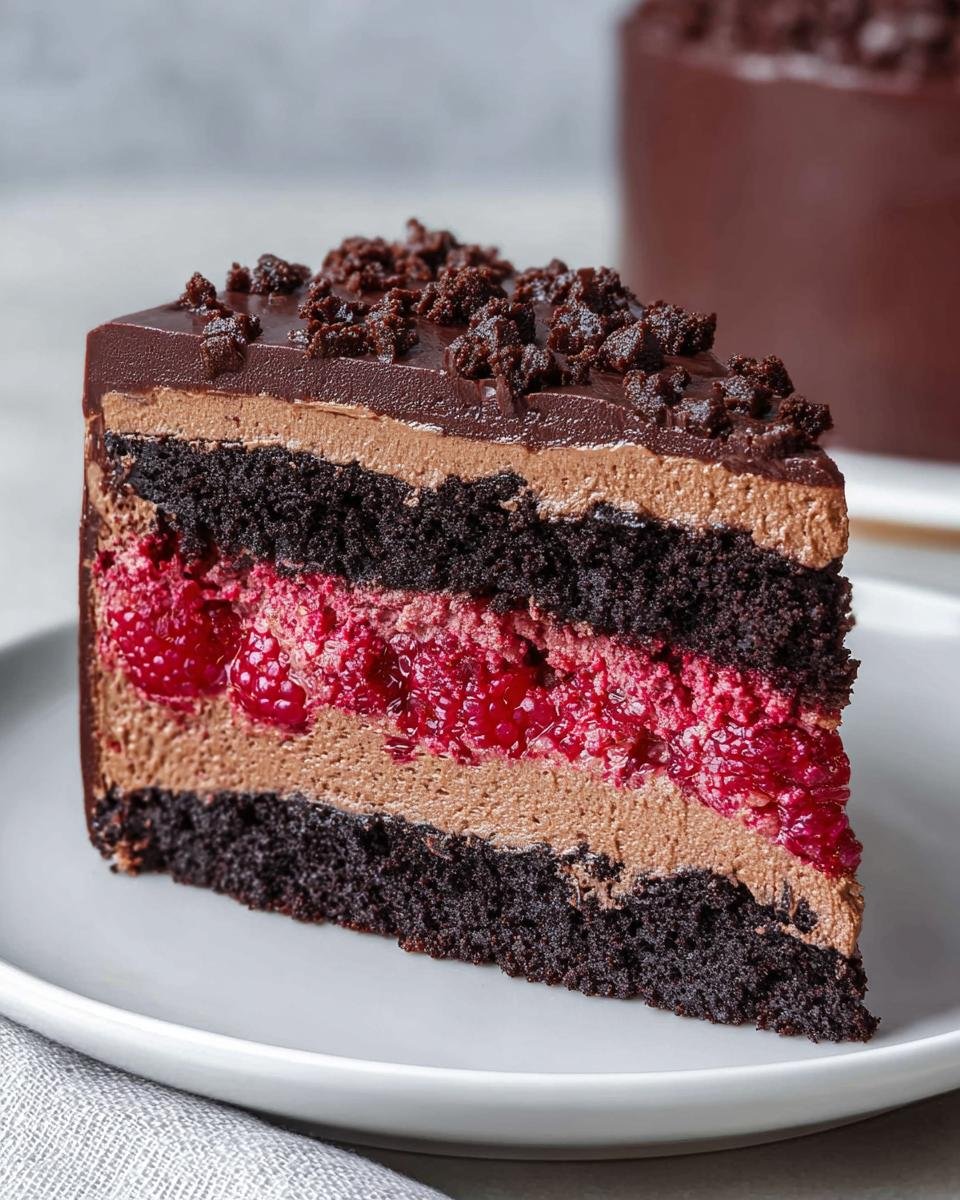
Finally, the dark chocolate mousse demands attention. You need 8 ounces of good quality dark chocolate, chopped—I love anything 60% cacao or higher for that deep flavor. Melt that with a half cup of hot water, add a teaspoon of vanilla, and then fold it into the remaining one cup of cold heavy whipping cream. See? Pretty easy ingredient list, but every piece matters!
Step-by-Step Instructions to Indulge in Dark Chocolate Raspberry Mousse Cake: A Simple Dessert Recipe!
This is where the magic happens, but remember the motto for mousse: be gentle! We are trapping air in those cream layers, so if you rush or over-mix, you lose all that beautiful fluffiness. I always suggest putting on some music for this part, especially if you’re making a quick batch of gooey two-chip chocolate chip cookies on the side!
Preparing the Cookie Crust Base
First things first, let’s get that foundation set. Mix your chocolate wafer crumbs right in the bottom of that springform pan with the melted butter until it looks like wet sand. Don’t pack it down with your fist, though! Use the bottom of a drinking glass or a measuring cup to press it firm and even against the base. We want it solid so it holds up to the mousse! Pop that pan into the fridge for about ten minutes while you move on to the fruit layer.
Creating the Tart Raspberry Layer
In your little saucepan, mash those raspberries with the sugar and lemon juice and heat it up until they break down. This is key: after it cools just slightly, you absolutely must press that mixture through a fine-mesh sieve. We want smooth mousse, not seeds! While that’s happening, sprinkle your gelatin over the cold water and let it sit until it ‘blooms’—it gets spongy. Whisk a little warm puree into the bloomed gelatin to dissolve it completely, then stir that back into the rest of your puree.
Next, whip one cup of cold heavy cream until you get soft peaks. Gently, gently fold that raspberry mixture into the whipped cream. Don’t stir it aggressively! Once it’s blended, spread this whole pink cloud over your chilled crust and put it back in the fridge for a good thirty minutes so it can set up before the chocolate goes on.
Making the Rich Dark Chocolate Mousse
Time for the star! Put your chopped dark chocolate in a bowl and pour that half cup of hot water right over the top. Let it sit for just two minutes—don’t touch it! Then stir until it’s one silky, dark pool, adding your vanilla. While that’s cooling slightly, whip your second cup of heavy cream until you get stiff peaks. This is crucial, so make sure your bowl is cold!
Here’s my secret handshake for folding: Take one-third of the stiff whipped cream and stir it firmly into the slightly cooled chocolate. This lightens the chocolate base, making it less dense to work with. Then, you fold in the remaining two-thirds super gently. I mean, use a cut-and-fold motion like you’re tucking it in for the night. That keeps all the air we just whipped in there!
Final Assembly and Setting
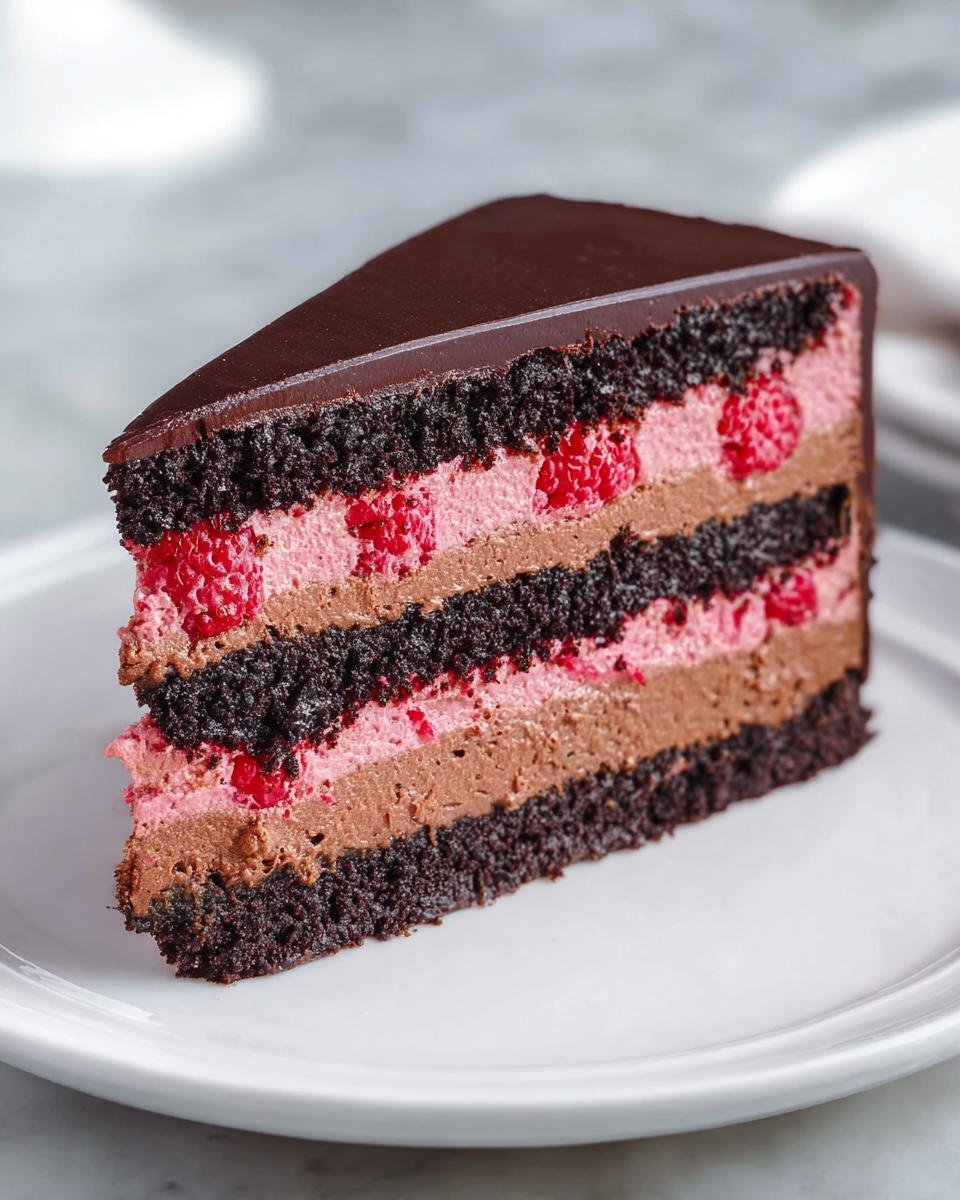
Once the raspberry layer is nice and firm—you shouldn’t see any wobble when you nudge the pan—carefully spoon that glorious chocolate mousse on top. Spread it evenly with an offset spatula. Now, this part is the hardest: waiting! The cake needs at least 3 hours, but honestly, overnight chilling works best for that perfect, sliceable texture. When you’re ready to serve, just gently run a thin knife dipped in hot water around the edge before you release that springform side. Don’t skip that knife dip—it stops sticky messes!
Ingredient Notes and Substitutions for Your Mousse Cake
When you’re making something this simple, every ingredient has to pull its weight, right? That’s especially true for the dark chocolate. I insist on using chocolate with at least 60% cacao here. Why that percentage? Milk chocolate is far too sweet and soft; it won’t give your mousse that deep, sophisticated flavor that cuts through the raspberry. You want that luxurious, slightly bitter finish that only higher cacao content gives you!

Now, about the crust. If you run out of those chocolate wafer cookies—oops!—you can absolutely swap them for graham crackers. Just know that if you use graham crackers, your crust will be lighter in color and taste more buttery than deeply chocolatey. It still works great, but it changes the vibe slightly. If you happen to be making my oatmeal chocolate chip cookies, you already know how important ingredient quality is!
Keep that heavy cream super cold, too. That’s not really a substitution, but it’s the most important note there is for the mousse texture!
Tips for Success When You Indulge in Dark Chocolate Raspberry Mousse Cake
Even though this is a simple dessert recipe, a couple of tiny details can make the difference between a great cake and a legendary one. My number one, non-negotiable tip is temperature control for the cream. You absolutely must start with heavy whipping cream that has been chilling in the coldest part of your fridge. If it’s even slightly warm, it fights you, and you end up with soup instead of stiff peaks!
Second, don’t rush the gelatin! It needs those five minutes to bloom properly in the cold water, or it won’t dissolve smoothly when you combine it with the warm puree. I learned this the hard way once when I got distracted making a batch of one-bowl chocolate chip cookies. I skipped the bloom time, and my raspberry layer had little bouncy bits in it—yuck!
Finally, when you fold the cream into the melted chocolate, remember that lightening step first. Don’t try to mix it all at once. You need to gently wake up that heavy chocolate layer with a third of the cream before you introduce the rest. Fold gently, like you’re being very careful not to wake a sleeping baby. That way, you keep all that lovely air we worked so hard to beat in there!
Storage and Reheating Instructions for Your Indulge in Dark Chocolate Raspberry Mousse Cake
Because this is a layered mousse cake, storage is all about keeping things cool and stable. You must put this beauty in the refrigerator. I know waiting is the hardest part, but you need a minimum of three hours for the layers to firm up completely. Honestly, if you can wait until the next day, it tastes even better!
Now, here is the rule: Absolutely do not try to freeze this cake. Freezing changes the texture of the whipped cream and gelatin structure to something kind of watery when it thaws. And please, never try to reheat it! This is a chilled, elegant dessert, so keep it happy in the fridge until you’re ready to slice and enjoy.
Frequently Asked Questions About This Simple Dessert Recipe
I always get questions once people see photos of this cake because they look so fancy! Don’t let that fool you; making this Indulge in Dark Chocolate Raspberry Mousse Cake is truly one of the simplest things you’ll do all week. People often ask about swapping out the dark chocolate, and while you certainly *could* use milk chocolate, I really advise against it. Milk chocolate melts much sweeter and softer, and you’ll lose that crucial depth that balances the tart raspberries. Stick to the dark stuff for the best flavor!
Also, many people ask if they can skip the gelatin. Listen, for a traditional mousse texture, you really need the gelatin to keep the whipped cream stable and hold the shape when you slice it. If you skip it, the mousse might deflate while chilling or slump when you cut into it. If you’re making my small batch chocolate chip cookies, you know precision matters! Gelatin ensures this cake stays perfect.
Can I make this Indulge in Dark Chocolate Raspberry Mousse Cake ahead of time?
Yes, you absolutely can, and I highly recommend it! Making this dessert ahead is actually what makes it so simple, especially if you’re serving guests. After you finish assembling the layers, the cake needs that long chill time anyway. Because it’s a no-bake recipe, it holds up beautifully in the fridge for up to two days. The flavors actually deepen and the layers set even better overnight!
What is the best way to get clean slices?
This is the secret to making it look bakery-shelf perfect! Once the cake is fully chilled, take a very sharp, thin knife and dip it into a tall glass of piping hot water. Let it sit for just a few seconds so the blade gets hot, then wipe the knife completely dry with a paper towel. Make your cut, then immediately repeat the whole hot water/wipe clean process before the next slice. It melts through the mousse layers cleanly without dragging or smearing the colors—trust me on this one!
Estimated Nutritional Snapshot for Indulge in Dark Chocolate Raspberry Mousse Cake
Alright, let’s talk numbers briefly! When you indulge in this dark chocolate raspberry mousse cake, you should know what you’re getting into per serving (we calculated this for 8 generous slices). You’re looking at roughly 450 calories.
It packs about 28 grams of fat and 45 grams of carbohydrates, which is standard for a decadent, rich dessert like this. Remember, these numbers are just an estimate based on what I used in my kitchen, so your actual nutrition might swing a little depending on the exact dark chocolate or cookie crumbs you grab!
Share Your Indulge in Dark Chocolate Raspberry Mousse Cake Experience
Whew! You did it! You successfully made this gorgeous, simple dessert recipe. Now I absolutely need to hear all about it!
Please hop down below and leave me a quick rating and a comment. Did the dark chocolate wow you? Was everyone shocked it was no-bake? I love seeing your creations, and those comments really help others feel confident trying out this chewy chocolate chip cookies no-chill-style easy dessert. Happy baking—or should I say, happy chilling!
Dark Chocolate Raspberry Mousse Cake
Ingredients
Equipment
Method
- Prepare the crust. Combine the cookie crumbs and melted butter in a bowl. Press the mixture firmly into the bottom of the springform pan.
- Chill the crust in the refrigerator while you prepare the raspberry layer, about 10 minutes.
- Make the raspberry puree. In a small saucepan, combine the raspberries, sugar, and lemon juice. Heat over medium heat until the raspberries break down, about 5 minutes. Press the mixture through a fine-mesh sieve to remove seeds. You should have about 1/2 cup of puree.
- Bloom the gelatin. Sprinkle the gelatin over the 1/4 cup of cold water in a small bowl. Let it sit for 5 minutes to soften.
- Dissolve the gelatin. Add 2 tablespoons of the warm raspberry puree to the bloomed gelatin and stir until the gelatin is completely dissolved. Stir this mixture back into the remaining raspberry puree.
- Whip the cream for the raspberry layer. Beat 1 cup of cold heavy cream with an electric mixer until soft peaks form. Gently fold the raspberry mixture into the whipped cream until just combined.
- Spread the raspberry mousse over the chilled crust. Return the pan to the refrigerator to set while you make the chocolate mousse, about 30 minutes.
- Melt the chocolate. Place the chopped dark chocolate in a heatproof bowl. Pour the 1/2 cup of hot water over the chocolate and let it sit for 2 minutes. Stir until smooth. Stir in the vanilla extract.
- Whip the cream for the chocolate layer. Beat the remaining 1 cup of cold heavy cream until stiff peaks form.
- Combine the chocolate and cream. Gently fold about one-third of the whipped cream into the melted chocolate mixture to lighten it. Then, fold in the remaining whipped cream until no white streaks remain.
- Assemble the cake. Carefully spoon the chocolate mousse over the set raspberry layer. Smooth the top with a spatula.
- Chill the cake for at least 3 hours, or preferably overnight, until firm. Before serving, run a thin knife around the edge of the pan before releasing the springform side.