
Birthdays, anniversaries, graduations—these milestones deserve a centerpiece that just screams ‘celebration!’ And what says celebration better than a beautiful cake? Trust me when I say that mastering the basic vanilla layer cake is the secret weapon for anyone wanting to create incredible Pretty birthday cakes.

I’ve been making this simple vanilla layer cake base for seemingly forever; birthdays, shower cakes, you name it. I’ve tweaked the flour-to-butter ratio a million times until I nailed a sturdy yet soft crumb that holds up perfectly under heavy frosting. Forget those crumbly, dry bases you sometimes end up with. This recipe is my reliable go-to, ensuring stunning Creative birthday cakes every single time you pull it out of the oven.
It’s the best canvas because it tastes fantastic on its own but is begging for whatever wild Cake designs you can dream up next. It’s ready for sprinkles, drips, or towering tiers!
The Foundation for Stunning Creative Birthday Cakes: Ingredients Deep Dive
When you’re building anything amazing, especially one of those Creative birthday cakes that stops people in their tracks, you can’t skimp on the foundation. My philosophy is simple: use good ingredients, and good things happen!
This vanilla cake is all about the balance between structure and tenderness. We need those ingredients ready to go so they mix together smoothly and give us those gorgeous, level layers we need later on.
For the Vanilla Cake Layers
Here’s the list for the actual cake. Pay close attention to those little notes because that’s where the magic happens:
- 2 1/2 cups All-purpose flour, and you absolutely MUST sift this!
- 1 1/2 cups Granulated sugar
- 1 tbsp Baking powder
- 1/2 tsp Salt
- 1 cup Unsalted butter, making sure it’s softened to touch—not melted, just soft!
- 4 Large eggs—room temperature is key here, so they blend right in!
- 1 cup Milk, and I always recommend whole milk for the richness.
- 2 tsp Vanilla extract
Room temperature eggs and milk are my non-negotiable rule for this recipe. If they are too cold, they shock the batter when added, which stops that beautiful emulsion we need for a soft cake. Just pull them out an hour before you start mixing.
For the Classic Vanilla Buttercream
This frosting is sturdy enough for piping intricate details but smooth enough to spread like silk across your layers. For making those picture-perfect Cake designs, smooth frosting is critical:
- 1 cup Unsalted butter, again, softened!
- 4 cups Powdered sugar, and yes, this needs to be sifted to avoid gritty icing.
- 1/4 cup Heavy cream
- 1 tsp Vanilla extract
Sifting the powdered sugar is something I never skip, especially when I’m aiming for professional-looking finishes. It saves you from having to hand-pick lumps out of your frosting right before you need to frost a cake for a party!
Baking Your Perfect Layers for Creative Birthday Cakes
Okay, now that we have our ingredients looking perfect—softened butter, room temperature eggs—it’s time to get mixing! When you’re building these gorgeous Creative birthday cakes, the way you combine these elements is everything. We don’t want tough cake; we want tender clouds!
Remember, we are aiming for a sturdy base here that can handle the weight of frosting and decoration, so precision matters, but rushing does not.
Preparation and Mixing Technique
First things first: get that oven set to 350°F (175°C). While it warms up, grab your two 8-inch pans. Grease them really well, and then flour them up! This simple step stops so much heartbreak later on.
In your big bowl, you’ll whisk the flour, sugar, baking powder, and salt together. Then comes the butter. Beat that softened butter into the dry mix until it looks like coarse sand—that’s the crumb stage. This takes a minute, but it coats the flour particles gently.
Now for the wet ingredients we mixed up separately—the eggs, milk, and vanilla. Add those slowly while mixing on medium speed. Here’s my big warning: as soon as it all comes together, stop the mixer! Overmixing develops gluten, and that makes a tough, chewy cake. We want soft, not tough. Trust me on this; stopping when it *just* comes together is key.
Baking Time and Cooling for Beautiful Pretty Birthday Cakes
Divide that beautiful batter evenly between your two pans. They should fill about two-thirds high. Pop them in the preheated oven and let them bake for 30 to 35 minutes. You’ll know they are done when a toothpick comes out clean. I usually test three spots just to be utterly sure!
This next part is crucial for keeping those beautiful Pretty birthday cakes intact. Don’t try to wrestle them out of the pan immediately! Let them cool right there in the pan for 10 minutes. If you pull them out too soon, they might sag or crumble. After that 10 minutes, invert them onto a wire rack. They need to be completely, utterly cool before you even think about frosting them. If they are warm, the frosting melts into a sugary puddle—I learned that the hard way!
If you want a deeper dive into getting ultimate moisture, I looked at some great tips over on moist baking techniques that really help any vanilla base shine, even days later.
Whipping Up the Best Vanilla Buttercream
Now that your layers are cooling—and trust me, you need patience here—let’s tackle the frosting. This basic vanilla buttercream is what turns a nice cake into one of those incredible Cake designs you see everywhere. It’s easy, but you have to treat the butter right!
Start with that full cup of softened butter, beating it until it’s light and creamy, almost fluffy. Don’t rush this part; you’re incorporating air, which helps keep the frosting light, not heavy.
Gradually add in the sifted powdered sugar, one cup at a time, alternating with a drizzle of heavy cream. If you dump it all in, you’ll end up wearing most of it, I promise! Beat it slow at first, then crank up the speed once it starts coming together.
Once it’s mixed, taste it! This is where you adjust for your perfect texture. If it looks stiff or seems hard to spread for those smooth finishes, add a tiny splash more heavy cream until it loosens up just a hair. If it looks way too soft—maybe your butter was a little too warm—just beat in another half cup of powdered sugar until it firms up again. A little bit of fine-tuning gets you the perfect consistency every time for decorating.
I sometimes use a dash of clear vanilla extract just to keep that white color super bright, which looks amazing under bright colors for any fun Cake designs. If you want to see how some people mix vanilla with bright colors, check out this vanilla swirl idea for inspiration!

Assembling and Finishing Your Pretty Birthday Cakes
The moment of truth! Your cake layers are cool—like, truly cool—and your buttercream is perfectly fluffy. This is where a nice, simple cake turns into truly Pretty birthday cakes. Before we stack, if your cakes domed a little in the oven, you might want to grab a long serrated knife and gently level the tops. Little imperfections vanish when you use a crumb coat, but starting flat always helps!
Grab your first layer and set it on your serving plate or cake stand. Now, take about a third of that gorgeous frosting and spread it evenly across the top. Make sure you get close to the edges, but don’t push it right over the side yet. Place your second layer right on top, gently pressing down to set it into the frosting.
Now, we enter the world of the crumb coat. This is my non-negotiable step for any cake I plan on decorating. Take a small amount of frosting—we’re talking just enough to lightly cover the entire outside of the cake, sides and top. It’s okay if you can see bits of cake poking through! Seriously, the point is just to catch all those loose crumbs so they don’t ruin your final layer.
Once that thin coat is on, stick the whole thing in the fridge for about 15 to 20 minutes. Chilling sets that crumb coat up like cement. When you pull it out, you can go straight into your final, thick layer of frosting for a flawless finish. If you’re thinking about adding something fun like a chocolate drip, check out these drip cake ideas for the best timing and technique!
Tips for Taking Your Cake Designs to the Next Level
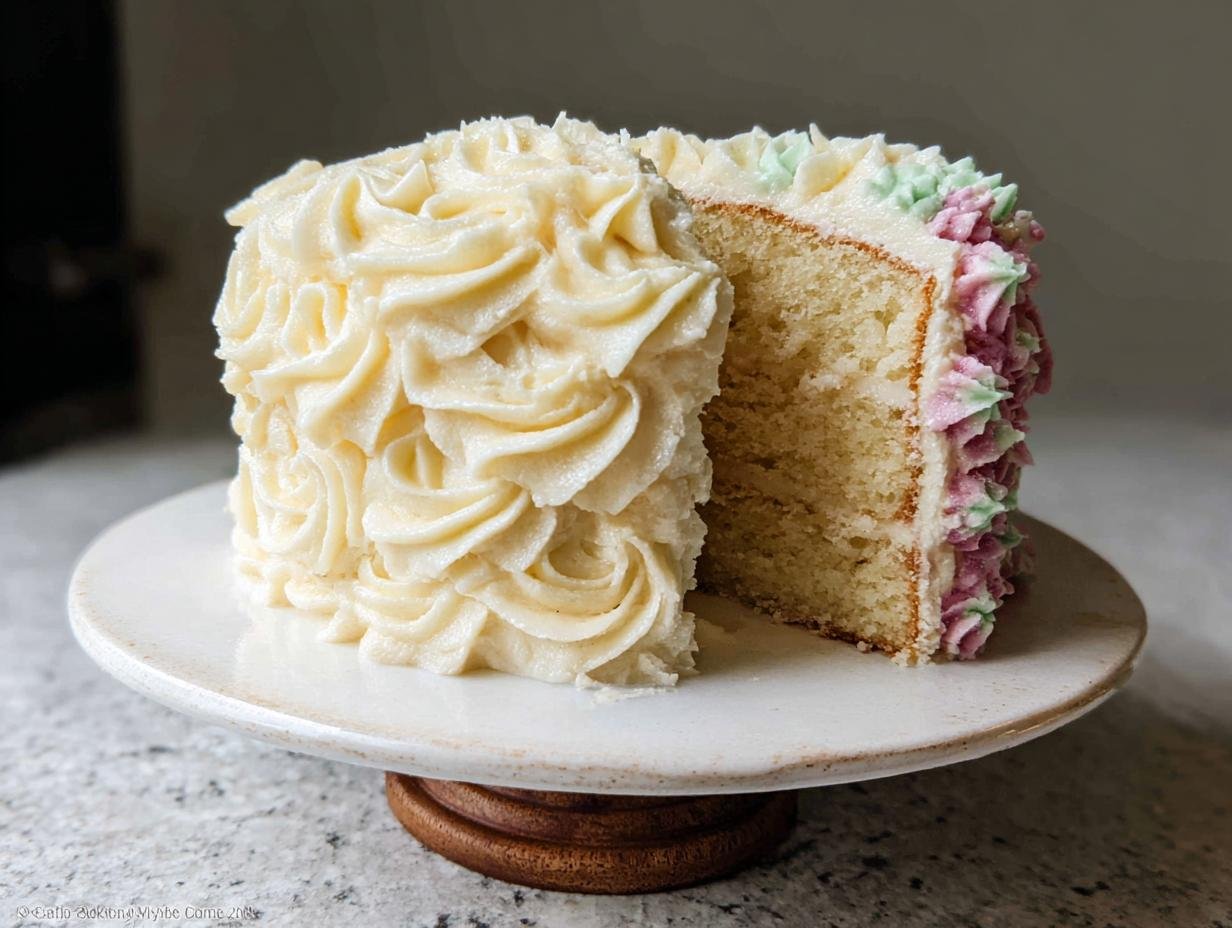
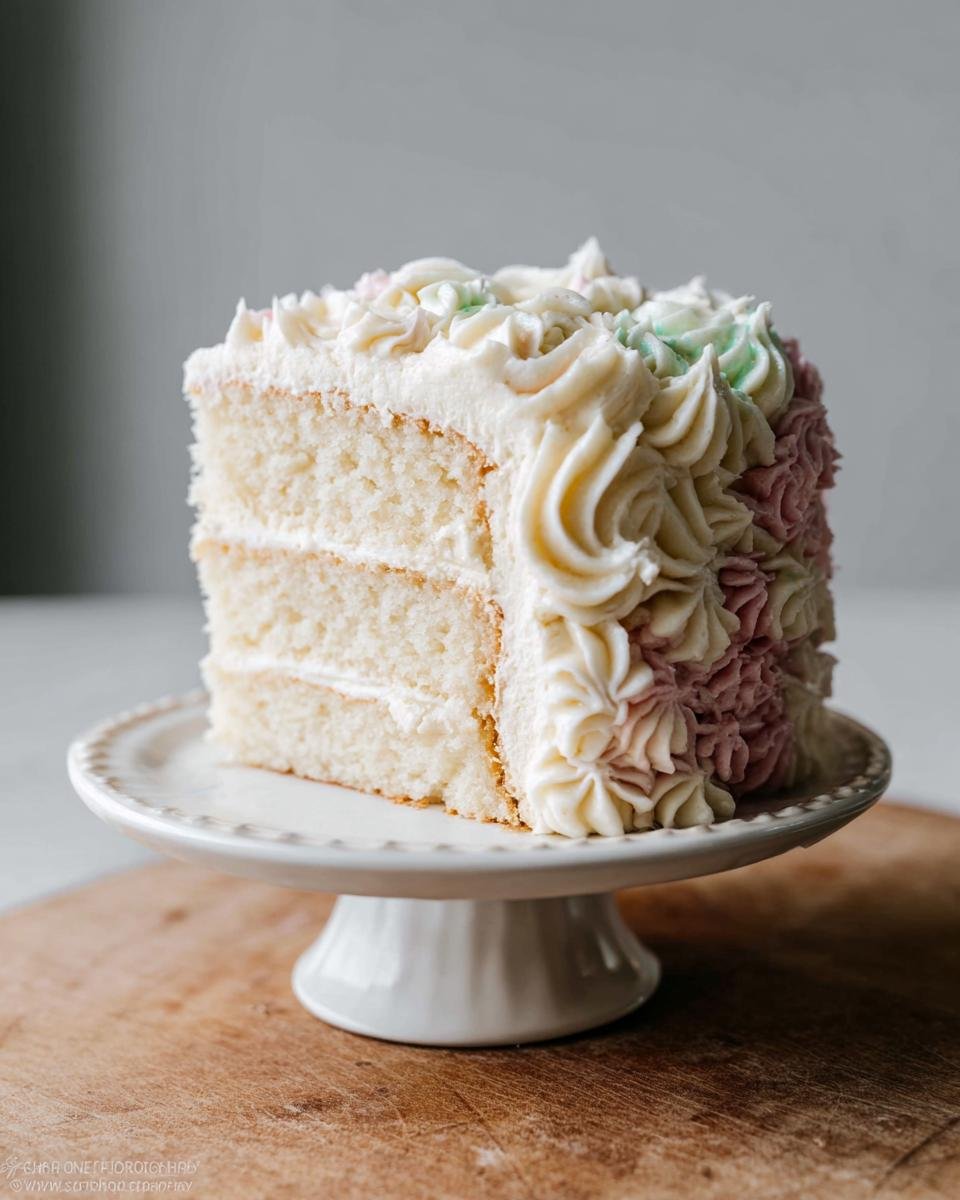
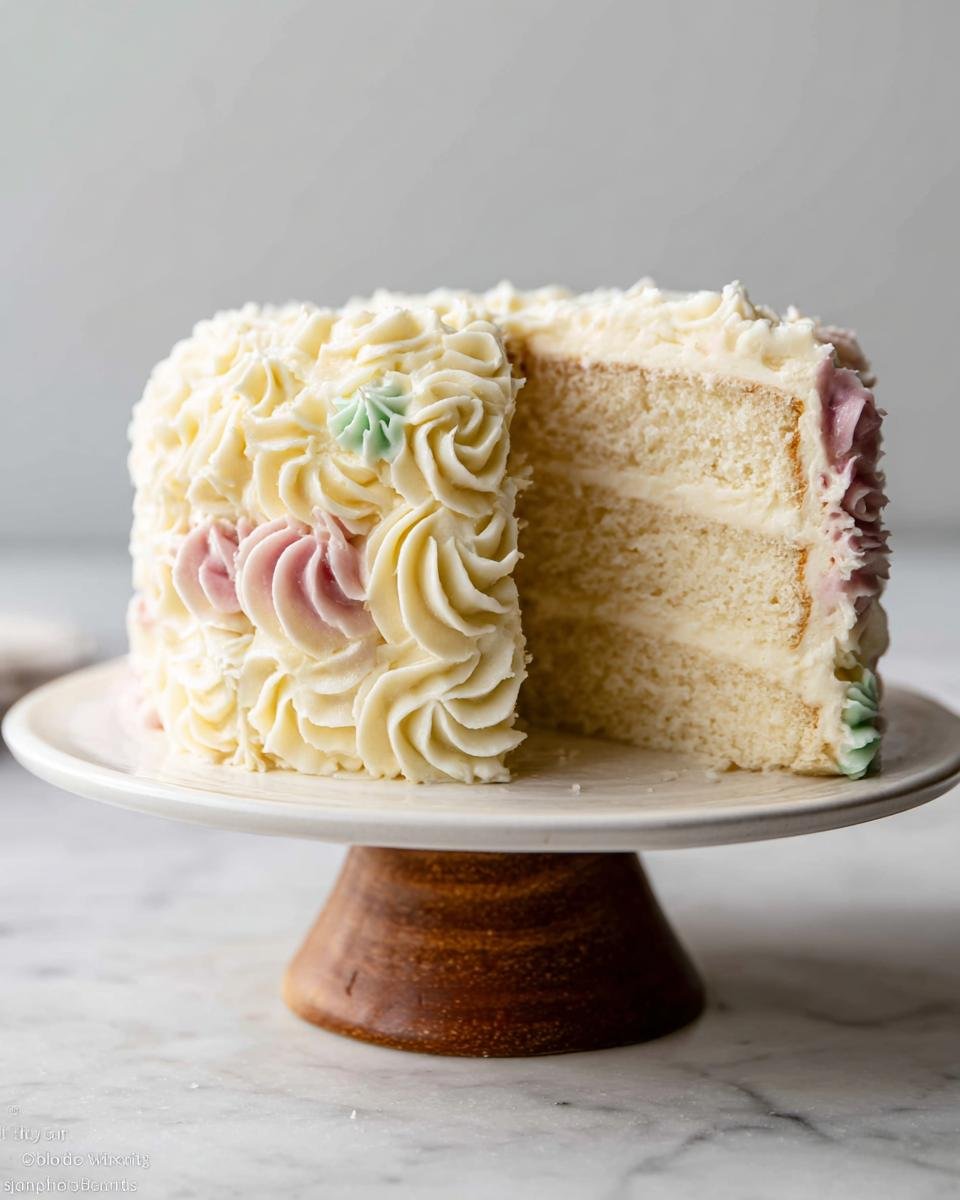
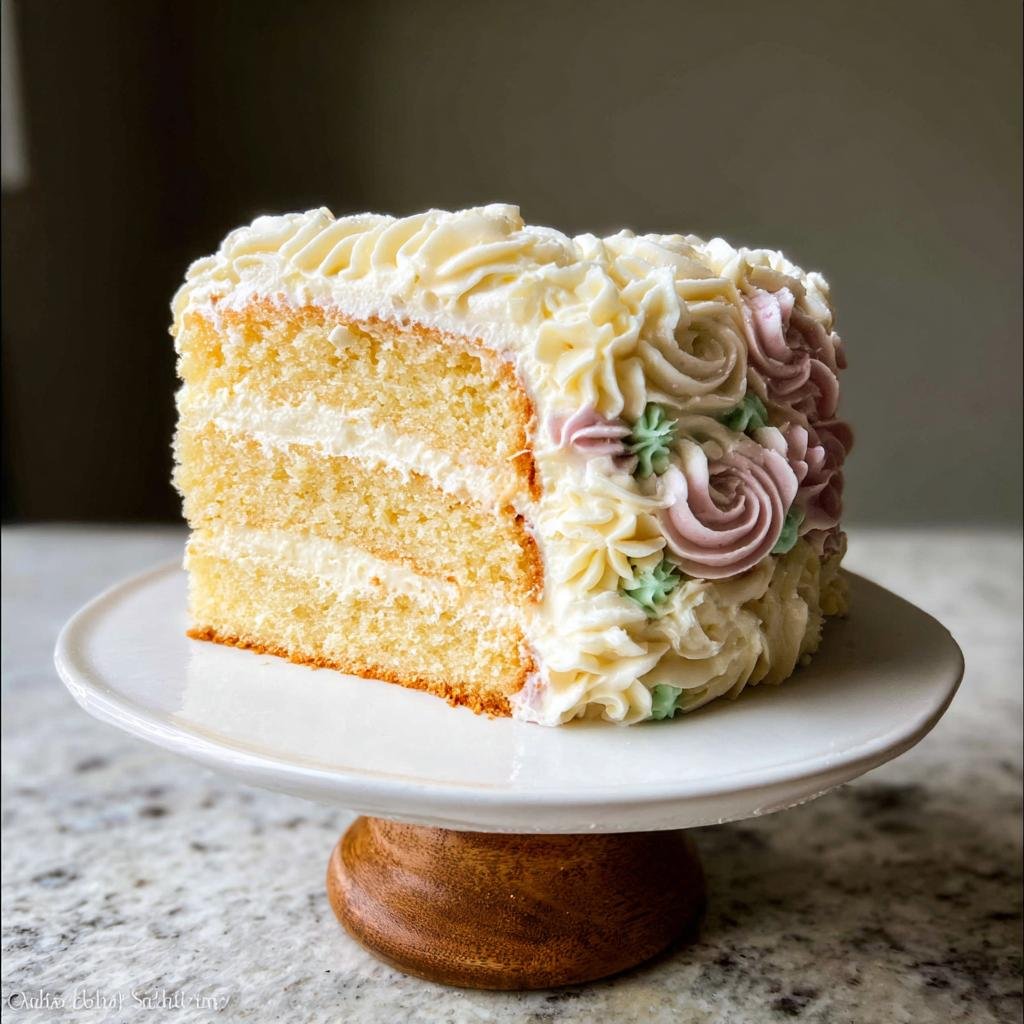
You’ve iced your cake smoothly, and now you’re staring at a perfect blank canvas. This is my favorite part because this vanilla layer cake base is absolutely ready for any of your wilder Cake designs!
If you are really aiming for those super professional, Pretty birthday cakes, levelling those layers before that crumb coat really pays off. Trust me, taking five minutes to shave off that little dome makes such a difference when stacking tall.
Once it’s crumb-coated and chilled, don’t be afraid to experiment with color! Since the base frosting is pure white, you can achieve vibrant, clear tones for any theme you’re going for. A simple top border using a star tip looks incredibly fancy without needing advanced skills.
For a really elegant look for your Creative birthday cakes, try just adding fresh flowers—make sure they are food-safe, of course! Or, keep it modern with minimalist piping and a gorgeous sprinkle mix right around the base. This simple cake truly looks amazing no matter how simple or complex you take the decorations.
Storage and Keeping Your Creative Birthday Cakes Fresh
Once you’ve poured your heart into creating those stunning Creative birthday cakes, the last thing you want is for them to go stale! Luckily, this vanilla layer cake holds up really well, which is another reason it’s my favorite for parties.
If you aren’t serving it the day you bake it, keep it covered loosely at room temperature for up to two days. The fat in the buttercream acts like a cozy blanket, keeping the cake layers moist. Don’t stick it straight into the fridge if you can avoid it!
Cold temperatures can make that lovely vanilla butter-cream stiff and dry out the cake layers faster. If you absolutely must refrigerate it—maybe your kitchen is super hot—wrap the whole thing tightly in plastic wrap first. Just remember to pull it out about an hour before serving so the frosting comes back to its creamy texture.
Ingredient Notes and Substitutions for Versatile Baking
I know not everyone keeps their pantry stocked exactly like mine, and that’s okay! Baking is about adapting, especially when you’re planning out those Creative birthday cakes.
The recipe calls for whole milk, but if you only have 2% or even low-fat milk, just go ahead and use it! The texture might be *slightly* less rich, but honestly, you probably won’t notice because the butter carries most of that richness. Don’t sweat it!
What about butter? If you only have salted butter on hand, you can use it, but you must reduce the salt called for in the dry ingredients down to just a tiny pinch—like 1/4 teaspoon. Taste your butter first; if it tastes super salty, pull back on that added salt even more.
And vanilla! If you run out of the liquid extract mid-frosting, you can swap it for vanilla paste. Paste has those lovely little black specks that look so elegant in plain white frosting, really elevating your Cake designs without changing the flavor much.
If all you have is margarine, well, I’m not going to stop you, but I won’t pretend it’s the same! Real butter gives you the structure and the flavor foundation that makes these cakes taste homemade and special.
Frequently Asked Questions About Layer Cakes
I know you bakers are thoughtful, and you probably have a few questions swirling around, especially once you get to the decorating phase for those beautiful Pretty birthday cakes. I tried to answer the ones I hear most often when I’m talking about this simple vanilla base.
Can I make the cake layers ahead of time?
Oh, yes, you absolutely can! This is a lifesaver when you’re planning big events. Once the layers are completely cool, wrap them tight—I mean *really* tight—in plastic wrap, maybe even a layer of foil too. They keep beautifully in the freezer for several weeks. When you’re ready to use them, just let them thaw overnight in the fridge, still wrapped, before you start frosting. That keeps them from drying out!
What is the best way to get smooth sides on my cake?
This is the secret sauce for those professional-looking Cake designs! You need a crumb coat, which I mentioned briefly before assembly. It’s just a very thin layer of frosting that traps all the loose crumbs. Put that thin coat on, slap it in the fridge for 15 minutes to set hard, and then you apply your final, thick, beautiful layer of frosting over a nice, firm surface. It works like magic to give you those perfectly clean sides!
If you’re looking for some fresh ideas on decorating this simple vanilla base, you might want to check out some neat inspiration over on new cake trends for your next project.
Estimated Nutritional Data for This Vanilla Cake
Okay, I feel like I need to put in a disclaimer right off the bat. I am a baker, not a nutritionist! When I’m busy making Creative birthday cakes for parties, I’m mostly focused on making sure everyone has seconds. So, these numbers are rough estimates based on the standard ingredient amounts and include a generous layer of that vanilla buttercream.
These figures are based on the recipe yielding 12 servings, so if you have a smaller crowd, maybe it’s better for you, ha! If you use less frosting on your beautiful Pretty birthday cakes, the numbers will definitely be lower for fat and calories.
Here’s what my rough calculations look like for one slice:
- Calories: Approximately 450-500 kcal
- Total Fat: Around 22g
- Protein: About 4g
- Total Carbohydrates: Roughly 65g
Please take this as a fun ballpark figure rather than gospel! Brands vary wildly in fat content, and honestly, if you’re going to all this trouble for a perfect cake, I hope you aren’t looking at the nutrition label anyway! Just enjoy making those gorgeous Cake designs and savor every bite!
Simple Vanilla Layer Cake
Ingredients
Equipment
Method
- Preheat your oven to 350°F (175°C). Grease and flour two 8-inch round cake pans.
- In a large bowl, whisk together the flour, sugar, baking powder, and salt.
- Add the softened butter to the dry ingredients. Beat with an electric mixer on low speed until the mixture resembles coarse crumbs.
- In a separate bowl, whisk the eggs, milk, and vanilla extract together.
- Gradually add the wet ingredients to the dry ingredients, mixing on medium speed until just combined. Do not overmix.
- Divide the batter evenly between the prepared pans. Bake for 30 to 35 minutes, or until a toothpick inserted into the center comes out clean.
- Let the cakes cool in the pans for 10 minutes before inverting them onto a wire rack to cool completely.
- To make the frosting, beat the butter in a large bowl until creamy. Gradually add the powdered sugar, alternating with the heavy cream, beating until smooth.
- Mix in the vanilla extract. If the frosting is too thick, add a little more cream; if too thin, add more powdered sugar.
- Once the cakes are completely cool, place one layer on a serving plate. Spread about one-third of the frosting over the top. Place the second layer on top and frost the top and sides of the entire cake.