
Listen, I know your struggle. I’ve spent years wrestling with chicken thighs only to pull them out of the oven looking pale, floppy, and frankly, sad. Soggy bottoms were the bane of my weeknight dinners until I figured out this trick. Forget what you think you know about oven-baked chicken—this method is a game-changer. I’m telling you, these are the Extra Crispy Chicken Thighs in the Oven — You’ll Wish You Tried This chicken thigh recipes Sooner! The secret starts before it even hits the heat, and the best part? Even after all that crisping magic, you get a lush, creamy pan sauce waiting for you right there in the skillet. Seriously, you need this in your life.
If you need some fast dinner ideas to pair with this incredible chicken, check out my list of quick dinner ideas for busy weeknights for inspiration!
Why You Will Love These Extra Crispy Chicken Thighs in the Oven
I never thought I’d say this, but chicken thighs baked in the oven can actually beat fried chicken! These aren’t just good; they are utterly addictive, especially when you see how effortlessly they come together. Prepare yourself for dinner perfection.

- The exterior texture is unbelievable—truly shatteringly crisp right off the pan.
- It’s a one-pan wonder! Sear, sauce, and bake all happen right in your favorite oven-safe skillet.
- The sauce is rich, creamy, and packed with savory garlic and onion flavor—you’ll want to mop up every drop!
- Even better, this recipe is fast enough for those nights when you think ordering takeout is your only option. Check out my thoughts on easy weeknight dinners that even the kids will eat for more quick inspiration!
Guaranteed Crispy Skin Every Time
The magic here really hinges on that aggressive sear we do before the chicken even sees the oven. We coat the thin-cut thighs lightly in flour and hot oil, creating a powerful, dry exterior crust early on. That initial blast of heat locks in moisture underneath while building the texture that stands up to the creamy sauce later. It’s science, but don’t worry, it’s delicious science!
Simple Ingredients for Amazing Extra Crispy Chicken Thighs in the Oven
Don’t be fooled by the complex flavor of the final dish; we aren’t using any fancy truffle oils or exotic spices here. Everything you need is probably already in your pantry. We are relying on the basics: quality broth, standard cream, butter, and fresh aromatics like garlic and onion to make the background flavor sing. It’s all about layering those simple tastes so you get maximum payoff for minimal effort.
Essential Ingredients for Extra Crispy Chicken Thighs in the Oven
Seriously, look at this list. It’s short, sweet, and proves you don’t need eighteen different items to make something spectacular for dinner. If you’re scrolling through and maybe thinking about using bone-in chicken with skin—hold up! We are specifically using thin-cut, boneless, skinless thighs here. Why? Because that thinness helps them cook fast and evenly, and since the skin is off, we get to focus on creating a crisp crust through the flour dredge before swimming them in that amazing sauce.
If you are craving more easy protein dishes, take a peek at my collection of lean protein meal ideas. Now, let’s break down what you need!
Chicken and Coating Components
You’ll need 1 pound of those thin-cut boneless, skinless chicken thighs—that usually works out to about three good ones. Remember, the thinner they are, the quicker they cook! Before they hit the hot skillet, they get a bath in 1/4 cup of all-purpose flour mixed with 1 teaspoon of salt and half a teaspoon of pepper. That dredge is what gives us that lovely golden-brown texture when we sear them in 2 tablespoons of olive oil. Don’t skip shaking off the excess flour, or you risk having a gummy crust!
Creamy Pan Sauce Base Ingredients
This is where the comfort food magic happens, right in the same skillet. We start building flavor with 1 medium yellow onion and 4 cloves of garlic, which we cook until they smell heavenly. Then comes the liquid: half a cup of low-sodium chicken broth to deglaze everything, followed by half a cup of heavy cream and a quarter cup of sour cream for that perfect tang. To balance that richness, we stir in 1 tablespoon of soy sauce, 1 teaspoon of apple cider vinegar, and just a tiny kick from the garlic powder and red pepper flakes. Oh, and don’t forget that little pat of 1 tablespoon of butter we swirl in at the very end to make the sauce perfectly glossy!
Step-by-Step Guide to Extra Crispy Chicken Thighs in the Oven
Okay, time to get cooking! This is where the magic happens. Before you even look at the chicken, make sure your oven is roaring hot at 400 degrees Fahrenheit (200 Celsius). We need that heat ready to go! Remember, we’re making Extra Crispy Chicken Thighs in the Oven, and that starts with a hot pan. If you’re looking for another fantastic skillet meal once you conquer this one, you should check out this recipe for creamy garlic parmesan chicken pasta!
Preparation and Searing for Maximum Flavor
First thing’s first: season those thin-cut thighs generously with salt and pepper. Then—this is key—dredge them lightly in that flour mixture, shaking off every speck of excess. We want flour for texture, not paste! Get your oven-safe skillet screaming hot with the olive oil. Lay those floured thighs down and don’t touch them for a solid 3 or 4 minutes per side! You are looking for deep golden brown. This searing step isn’t just for looks; it creates that protective crust that keeps the meat juicy while the oven finishes the job. Once they’re beautifully colored, pull them out and set them aside—the skillet stays on the stove!
Building the Creamy Pan Sauce
Now that the chicken has had its minute in the sun, toss in your chopped onion and minced garlic right into those chicken drippings. Cook them until things smell amazing—about 3 minutes. Then, get your spatula ready for the best part: pour in the chicken broth and scrape up every single browned, sugary bit stuck to the bottom of that pan. That brown stuff is pure flavor, trust me! After it simmers for a moment, whisk in the heavy cream, sour cream, soy sauce, vinegar, and spices. Get it just starting to bubble gently.
Oven Baking for Tender Finish and Crispy Results
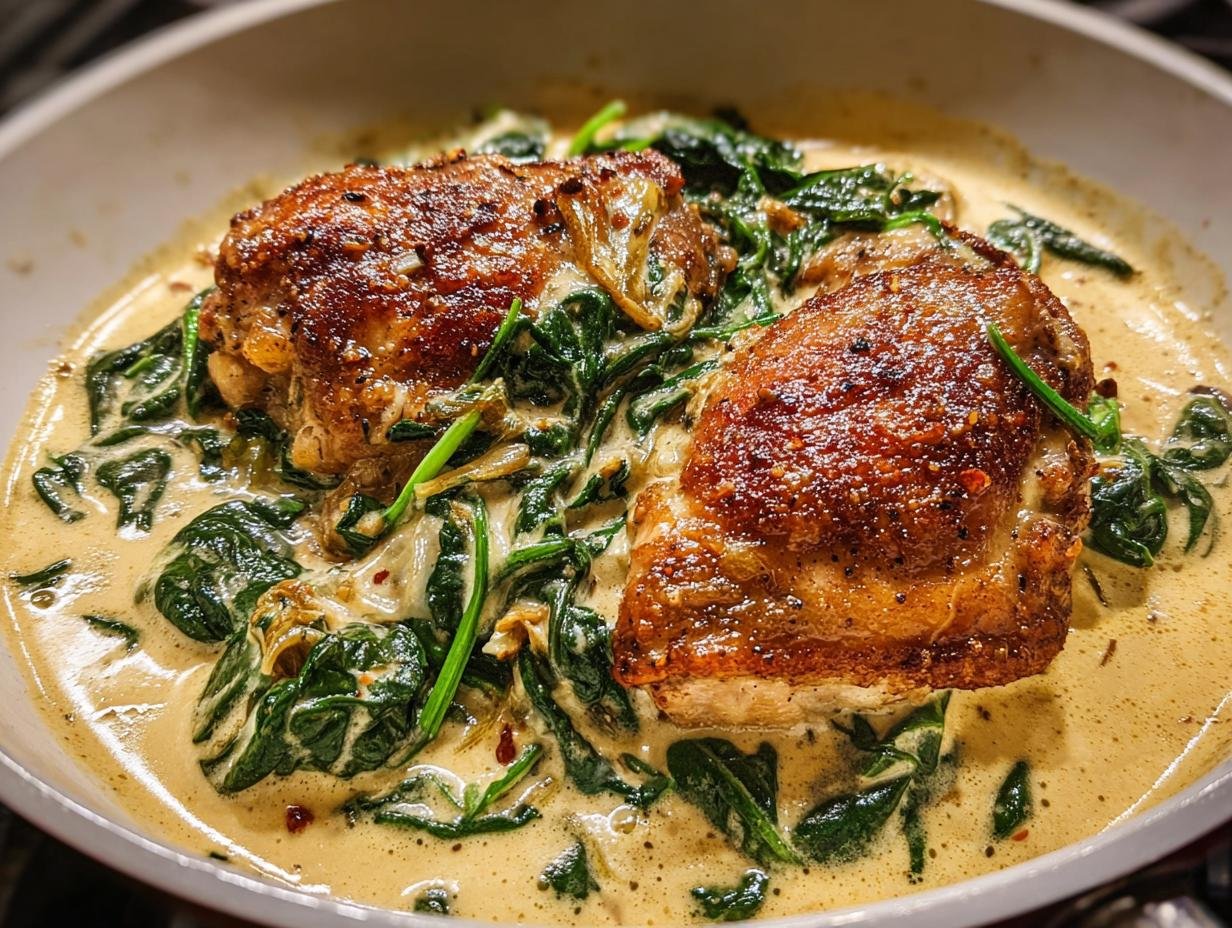
Nestle those seared chicken thighs right back down into that fragrant, creamy sauce. Carefully move the entire skillet into the preheated 400°F oven. They need about 15 to 20 minutes in there. We’re looking for the internal temperature to hit exactly 165 degrees Fahrenheit (74 Celsius). Once they’re done, pull the pan out. Stir in that final tablespoon of unsalted butter until it melts into the sauce—wow! Then, toss in your big pile of spinach and let the residual heat wilt it down in about a minute or two.

Pro Tips for Perfect Extra Crispy Chicken Thighs in the Oven
You followed the steps, your chicken is out of the oven, and it looks great, but maybe you’re thinking, “Can I push this crispiness even further?” The answer is yes, I absolutely can! This is where we move from a great recipe to legendary weeknight cooking. I always preach about not messing with the recipe too much, but these small tweaks are additions, not substitutions, and they really pay off, especially if you like your chicken skin to have a real crunch.
If you want to try another one-pan winner after you finish this, you simply must check out my recipe for garlic parmesan chicken and potatoes—it’s the easiest clean-up ever!
My absolute favorite move for that last minute of cooking involves the broiler. If your chicken looks cooked through but the flour crust seems a little soft, go ahead and turn on your oven’s broiler for about 60 to 90 seconds. You have to stand right there, though! Seriously, walk away for five seconds and you’ve gone from crispy to charcoal in the blink of an eye. Watch that top surface carefully until you see those wonderful brown bubbles forming.
Another thing I’ve learned over the years is the importance of moisture management *before* you start. After you pat your thin-cut chicken thighs dry with paper towels (which you must do!), let them sit uncovered on a wire rack in the fridge for about an hour if you have the time. This air-drying step pulls surface moisture right off the thigh, which is the enemy of crispiness. It sounds extra, but trust me, it dries the surface perfectly for that flour dredge to really adhere and crisp up beautifully when it hits the hot oil.
Finally, remember the vegetables! We toss the spinach in right at the end, but if you want to add heartier veggies, like carrots or diced potatoes, you need to roast them separately first or add them to the skillet much earlier so they are tender when the chicken is done. Trying to cook dense veggies alongside the thin chicken will either burn the chicken or leave your vegetables raw. Keep the cook times honest!
Serving Suggestions for Your Extra Crispy Chicken Thighs in the Oven
So now you have these gorgeously crisp chicken thighs swimming in that rich, savory, creamy sauce, what are you going to put underneath it all? You basically need something that can soak up every last drop of that deliciousness since we aren’t wasting a crumb of that sauce! We mentioned pasta or rice in the recipe steps, and honestly, those are classics for a reason. They are the perfect neutral background to let the chicken and sauce shine.
If you’re looking for the perfect rice side, you absolutely have to try my recipe for cilantro lime rice. It adds just the right pop of brightness to cut through all that cream!
For serving, I always think about texture contrast. Since the chicken is tender beneath that crisp coating and the sauce is smooth and rich, you need a side that offers a little bite or freshness. Here are a few ways I like to serve this meal up:
- Pasta Power: Nothing beats wide egg noodles or even some sturdy penne to catch all the heavy cream sauce. Just toss the cooked pasta right into the skillet with the sauce and spinach right before serving!
- Steamed Grains: If you don’t want something too heavy, plain steamed white rice or even cauliflower rice works perfectly as a base.
- Something Green and Cheesy: If you want to get a little fancy but keep the comfort level high, pair it with a side of greens. A lovely cheesy cauliflower gratin baked alongside everything else makes this a truly impressive, filling dinner.
- Just Bread! Don’t laugh! Seriously, grab a crusty loaf of sourdough or French bread. You are going to use those slices to swipe the skillet sides clean. It’s totally non-negotiable in my house.
No matter what you choose, make sure you serve the entire family straight out of that oven-safe skillet. It just tastes better that way, hotter and homier!
Storing and Reheating Leftovers
Look, I hope there are leftovers, because getting a second meal out of this dish is fantastic, but we have to be smart about it. The main enemy when saving saucy, rich meals like this is moisture migration. The longer those beautiful crispy bits sit in the creamy sauce, the softer they get. But don’t despair! We can definitely bring them back to life,
If you’re hoping to save some of this culinary genius for later, make sure you check out my tips on making the most of those extras in my post about best leftover prime rib recipe ideas—the storage mentality is the same!
When you put them away, try to separate the components if you can manage it. When I put them in the fridge, I try to scoop the chicken thighs out of the bulk of the sauce and put them in a single layer in an airtight container. If everything is swimming, you’re just speeding up the sogginess process. It will keep well for about three days in the refrigerator!
The Best Way to Reheat for Texture
Here is the hard truth: the microwave is your enemy when you want crispiness. When you microwave this dish, you are essentially steaming the chicken again, defeating the entire purpose of our scorching hot sear! Trust me, avoid the microwave unless you absolutely have no other choice.
If you want to save that texture, you absolutely must use dry heat. If you have an air fryer, put the pieces in there at about 350 degrees for five to seven minutes. It gives the crust a second chance to crisp up beautifully. If you don’t have a fryer, the oven is your next best friend. Pop the pieces onto a small baking sheet—maybe even on top of a wire rack inside the sheet—and reheat at 350 degrees until they are warmed through. This lets the air circulate and keeps the bottom from getting steamy.
Handling Extra Sauce When Reheating
When you reheat the sauce separately (which I recommend doing gently on the stovetop until warm), you might notice it looks a little thicker than it did fresh out of the oven. That’s normal; the starches and dairy solids tighten up once cooled!
To loosen it back up, just add a splash of chicken broth or a tiny bit of milk while you are warming it gently on the stove. Never let the sauce boil vigorously when reheating the sour cream and heavy cream, or it might split on you. Keep the heat low and slow, swirl it until it’s silky again, and then serve your reheated, satisfyingly crisp chicken right over the top.
Troubleshooting Common Issues with Oven-Baked Chicken
Even I mess up sometimes! We all follow recipes perfectly, and yet, sometimes the oven has other plans, right? Don’t panic if your chicken isn’t as golden as you hoped or if that beautiful sauce looks a little… strange. When you’re dealing with dairy like heavy cream and sour cream in a hot oven, things can sometimes go sideways, but they are almost always fixable. If you run into any hiccups, here are the simple fixes I’ve picked up over the years.
If you’ve got some sauce drama, take a look at my recipe for creamy smothered chicken and rice; the sauce building method there is similar, and you might find a tip that helps!
My Sauce Split or Looks Grainy After Baking
This is usually the most common dairy disaster! Sauce splitting—where the fat separates from the other liquids—usually happens because the cream or sour cream got too hot too fast, or maybe we mixed it too aggressively after taking it off the initial heat. It’s jarring to see, but it’s not ruined!
If the sauce has split, you need to lower the overall heat immediately. Take the skillet off the burner if it’s still on low. Then, grab a whisk and start whisking vigorously off the heat. Sometimes, just removing it momentarily from the heat and incorporating a tiny bit of *cold* liquid—maybe a splash of cold broth or even just a small ice cube right into the whisking area—can shock the emulsion back together. If that doesn’t work, stir in that final tablespoon of butter at a very low temperature right at the end; the extra fat content often helps bind it again.
My Chicken Didn’t Crisp Up Like I Expected
We want that beautiful sear, and if you missed it, the skin will be chewy instead of delightfully crisp. Rarely does this happen if you follow the initial steps correctly, but here are the usual suspects:
- Wet Chicken: Did you pat the chicken slices seriously dry before flouring? Any surface moisture turns straight into steam, preventing crisping.
- Pan Not Hot Enough: If you put the floured chicken into lukewarm oil, it just slowly soaks up fat rather than searing instantly. You need that oil shimmering and almost smoking lightly before the chicken goes in.
- Overcrowding: If you crowd too many thighs into the pan, the temperature immediately drops. Cook in batches if necessary! Better to sear two batches perfectly than one batch poorly coated in steam.
If you’ve already baked it and it’s just not crisping while underneath the sauce, remember that broiler trick I mentioned earlier? Pull it out and give it 60 seconds under the broiler to toast up that flour coating before you serve it. Just watch it like a hawk!
The Aromatics Burned Before the Chicken Was Done
Since this recipe uses skinless, thin-cut chicken, the cook time is pretty short, especially once it hits the oven. If your onions and garlic burned before the chicken finished cooking, it means your initial sauté was too aggressive or you cooked them too long before adding the broth.
When you cook onions and garlic in the pan drippings, they cook incredibly fast because they are sitting in residual fat. If you see them darkening past translucent gold and moving towards brown, immediately pour in your chicken broth to deglaze and stop the cooking process right there. This releases the heat and scrapes up the fond, ensuring those flavors are deep and sweet, not bitter and acrid, when the chicken finishes baking.
Frequently Asked Questions About Extra Crispy Chicken Thighs in the Oven
You are doing great! Finishing a recipe like this usually brings out a few little details people want to nail down. It’s totally normal to have questions, especially when you’re trying a new technique for getting that perfect texture. We covered a lot of ground, especially about getting that crackly exterior on our oven baked chicken thighs, but let’s run through a few common things I always get asked when folks try this for the first time.
Once you master this, you’ll have a base for so many different meals! If you’re ever looking for a totally different flavor direction after you’ve eaten these for three nights straight, you need to check out my fantastic chicken tacos with lime slaw recipe. It’s bright and zesty!
Can I use bone-in, skin-on thighs for this recipe?
Oh, that’s a tough one! Bone-in, skin-on thighs are delicious, but they throw a wrench into this specific recipe because we designed this method around thin, skinless pieces that sear fast. If you use bone-in skin-on thighs, the thin flour coating won’t crisp the same way, and the cooking time will be drastically different. You actually need to render that thick layer of fat under the skin before you can crisp it up, which takes much longer.
If you absolutely must use them, you’ll need to skip the flour dredge here and start by searing them skin-side down in a slightly cooler pan for a good 10 to 12 minutes just to render out a ton of fat. Then, you’d move them to the oven, maybe without the sauce initially, to make sure they are cooked through before you try to build that creamy sauce around them later. It’s a whole different process, honestly, so stick to the thin-cut ones for this recipe for guaranteed success!
What is the best way to get crispy skin in the oven?
Even though this recipe uses skinless thighs, I know everybody reading this is really curious about that glorious crunch! The absolute best way—and the core technique we use here even on the flour crust—is combining lots of surface dryness with high initial heat. It all comes down to two major things for real crispy chicken skin:
- Dry, Dry, Dry: Before doing *anything* else, pat the skin bone-dry with paper towels. Seriously, press hard. If you skip this, the natural moisture turns to steam, and steam equals soft skin.
- High Heat Searing: You need that hot fat right away! Searing the chicken (or just the flour dredge, in our case) aggressively on the stovetop first introduces maximum heat where it matters most, setting up that texture before the moist environment of the oven takes over. If you were using skin-on, you’d sear it skin-side down until a lot of the fat melts out and the skin snaps when tapped.
If you do those two things, even when you introduce the liquid sauce element later, the initial structure you built will hold up much better, guaranteeing a better texture overall!
Why did my sauce seem thinner than expected after baking?
That’s a great catch! If you have ever tried to thicken a dairy-based sauce in the oven, you know it can be tricky. When we use both heavy cream and sour cream, they are designed to thicken as the water content evaporates while baking. However, if your oven wasn’t quite hot enough, or perhaps you cooked them a little shorter than 15 minutes, the sauce might just be a bit looser than anticipated.
Remember the finishing step? We add cold butter right at the end. That’s designed to give a beautiful sheen, but it also adds body to the sauce. If it still looks too runny, the solution is usually simple: bring the skillet back to the stovetop on low heat, and whisk in a teaspoon of cornstarch mixed with a tiny bit of cold water (that’s called a slurry). Let it simmer for just one minute, and watch it thicken right up! Don’t worry about over-thickening, because you can always thin it out with a splash of broth if you go too far.
Nutritional Estimates for Extra Crispy Chicken Thighs in the Oven
Now, listen up, because while I cook from the heart and taste buds first, I know a few of you are counting macros or just trying to keep track of what’s going into your body. Since this recipe is so rich with that creamy sauce, it definitely leans toward comfort food territory, but we are using thin-cut thighs and plenty of fresh spinach to balance things out!
If you love keeping an eye on your intake while enjoying delicious meals, you need to browse my calorie-smart recipe collection—it has some surprising gems!
These estimates are based on the recipe yielding 3 generous servings, with the chicken thighs absorbing some of the sauce ingredients. Since we use specific brands of chicken broth or sour cream, your numbers might vary a little bit, but this should give you a good ballpark idea for what you’re looking at per plate:
- Approximate Calories: 550–650 per serving
- Total Fat: 35g – 40g (This is where the cream and oil come from, so it’s rich!)
- Protein: 35g – 40g (Chicken is a powerhouse here, naturally!)
- Net Carbs: 15g – 20g (Mostly coming from the flour dredge and the dairy/veg in the sauce.)
I always recommend using the lower sodium broth and watching your added salt if you’re tracking sodium specifically. If you are worried about the fat content, you can always use half-and-half instead of heavy cream mixed with sour cream, though I promise you lose a little bit of that deep, comforting mouthfeel! Eat well, enjoy the crispiness, and don’t sweat the numbers too much when the food tastes this spectacular!
Extra Crispy Chicken Thighs in the Oven
Ingredients
Equipment
Method
- Preheat your oven to 400 degrees Fahrenheit (200 degrees Celsius). Season the chicken thighs on both sides with kosher salt and black pepper.
- Place the flour in a shallow dish. Dredge each chicken thigh in the flour, shaking off any excess.
- Heat the olive oil in an oven-safe skillet over medium-high heat. Sear the chicken thighs for 3 to 4 minutes per side until golden brown. Remove the chicken from the skillet and set it aside.
- Add the chopped onion and minced garlic to the same skillet. Cook for 3 minutes until the onion softens. If the pan is dry, add a small amount of oil or butter.
- Pour in the chicken broth, scraping up any browned bits from the bottom of the skillet. Let the broth simmer for 2 minutes.
- Stir in the heavy cream, sour cream, soy sauce, apple cider vinegar, garlic powder, and red pepper flakes. Bring the sauce to a gentle simmer.
- Return the seared chicken thighs to the skillet, nestling them into the sauce. Place the skillet in the preheated oven and bake for 15 to 20 minutes, or until the chicken reaches an internal temperature of 165 degrees Fahrenheit (74 degrees Celsius) and the skin is crispy.
- Remove the skillet from the oven. Stir in the butter until it melts into the sauce. Add the spinach and cook for 1 to 2 minutes until wilted.
- Serve the chicken thighs and sauce over cooked pasta or steamed rice.