

Finding that show-stopping side dish that feels light enough for a Tuesday night but special enough for a holiday table used to stress me out. But not anymore! I finally nailed the method for achieving absolutely perfect, fluffy Herbed Quinoa Pilaf Fluffy, and honestly, it changes everything. This recipe is pure elegance mixed with supreme ease.
I still remember the first time I photographed a quinoa dish for Keto Violet. I had just finished fine-tuning the site’s layout that morning, and by afternoon I was styling bowls of warm quinoa under soft natural light. What struck me wasn’t only the aroma of fresh herbs, but how the grains looked—delicate, airy, almost shimmering. Capturing that balance of nutrition and beauty reminded me why I love combining digital coordination with visual storytelling. It felt like a perfect blend of order, creativity, and flavor. You’re going to see that shimmer right in your own kitchen! If you want to know more about my photography journey, you can always check out my thoughts over on the About Me page.
Don’t worry—this isn’t complicated, it just needs a little focus on two key steps. You’ll be amazed how quickly this comes together!
Why You Will Make This Herbed Quinoa Pilaf Fluffy Recipe Again
This is the kind of simple side dish that earns a permanent spot in your weekly rotation. It truly is foolproof once you know the secret grain-to-liquid ratio. Here’s why I think you’ll love making this again and again:
- Truly Fluffy Texture: We focus heavily on the toasting and resting steps, ensuring you get airy, separate grains every time—never clumpy or gummy quinoa.
- Incredibly Quick Prep: From pantry to pot, this is such a fast recipe. It’s perfect for a last-minute addition to any meal when you need Side Dishes easy on the fly.
- Bright, Fresh Flavor: Forget bland grains! The combination of fresh parsley, thyme, and bright lemon zest gives this pilaf a vibrant taste that lifts any main course.
- Great for Meal Prep: This tastes just as good (if not better!) the next day. It’s an easy way to prep work lunches or healthy additions for the rest of the week. You can check out some of my other quick lunches here.
- Minimal Hands-On Time: Once it simmers, the work is done! It’s a quick prep recipe that works itself while you focus on your main protein.
- Versatile for Any Occasion: It dresses up beautifully for a holiday table but remains simple enough for a quiet weeknight dinner.
Equipment Needed for Herbed Quinoa Pilaf Fluffy
The beauty of this pilaf is how little you actually need! You definitely don’t need specialized gadgets or fancy cookware for beautifully fluffy quinoa. Seriously, this is one of the easiest side dishes to pull together.
You really only need one essential piece for the cooking part:
- A medium-sized saucepan. That’s it! Make sure it’s one that comes with a tight-fitting lid because that’s crucial for the steaming and resting process later on.
- A good whisk or wooden spoon for stirring and fluffing.
- Your trusty cutting board and sharp knife for prepping those pretty herbs and onions.
That’s the whole list! If you don’t have the right saucepan size, don’t stress too much, just choose the closest thing you have. It won’t ruin the recipe.
Ingredients for the Perfect Herbed Quinoa Pilaf Fluffy
The ingredient list here is short, which means the quality of what you use really shines through! Since we aren’t relying on heavy fats or starches, those lovely fresh herbs and the cumin have to do the heavy lifting for flavor, and trust me, they do! This recipe proves that amazing Side Dishes don’t need to be complicated.
Here is exactly what you need for four generous servings:
- 1 tablespoon vegetable oil. Just a little bit to get things started.
- 1 small onion or 2 small shallots, thinly sliced (this should give you about ¾ cup chopped). Shallots are milder, but either works great!
- ½ teaspoon ground cumin. This is the backbone of our warm, savory note.
- 1 clove garlic, minced. Be generous here, but a single clove is enough so it doesn’t overpower the herbs.
- 1 ½ cups raw quinoa, rinsed very well and then drained. Please, please rinse this! It gets rid of that natural bitterness.
- 3 cups water. This seems like a lot, but it’s what helps us get that beautiful, fluffy separation.
- ½ teaspoon kosher salt. We add this now, but remember we taste-test later!
- ¼ teaspoon ground black pepper. Freshly ground is always best here.
- 1 whole lemon zest. You only want the bright yellow part, nothing of the bitter white pith underneath.
- 3 tablespoons lemon juice. I note ¾ cup water/juice if you like it extra tart, but 3 tablespoons is the perfect starting spot.
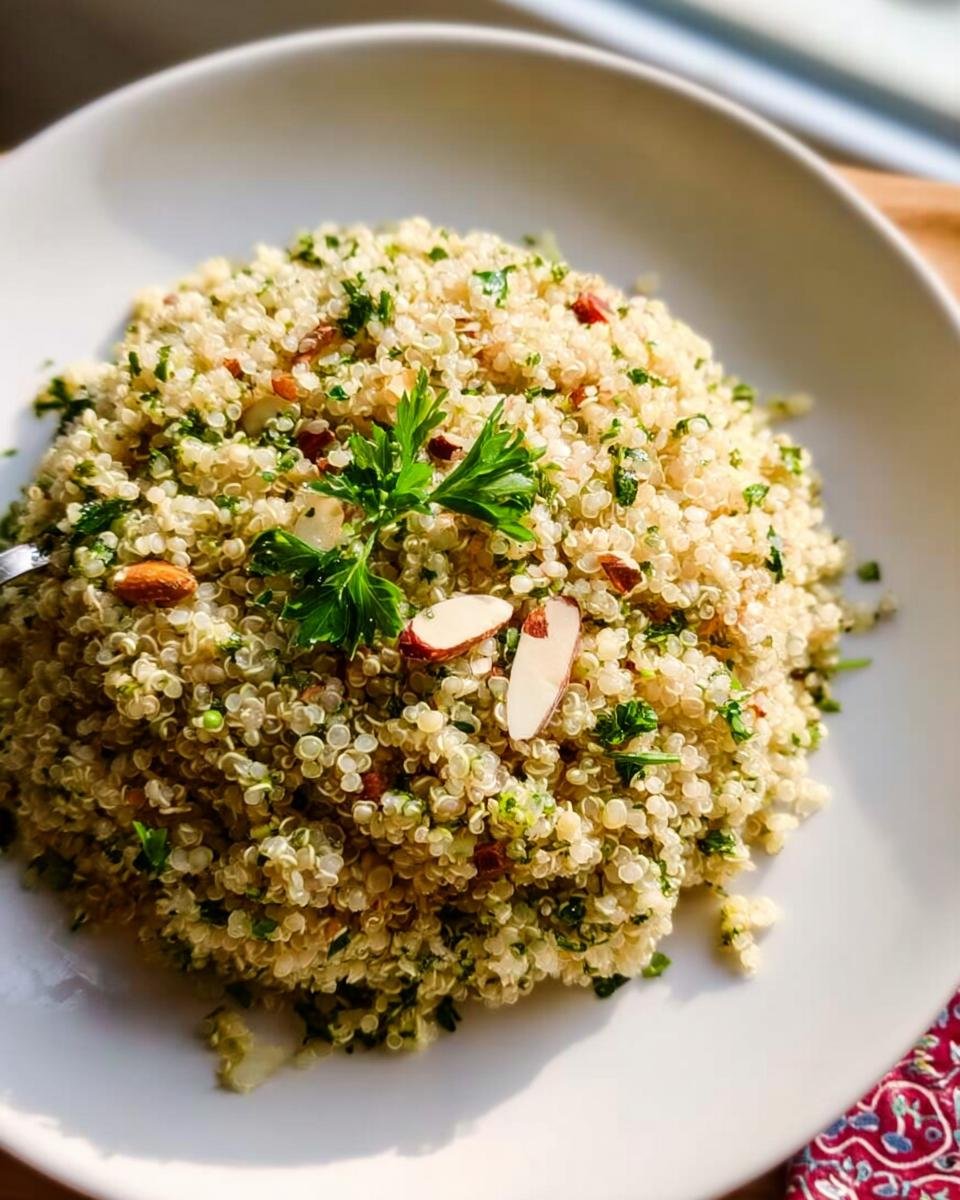
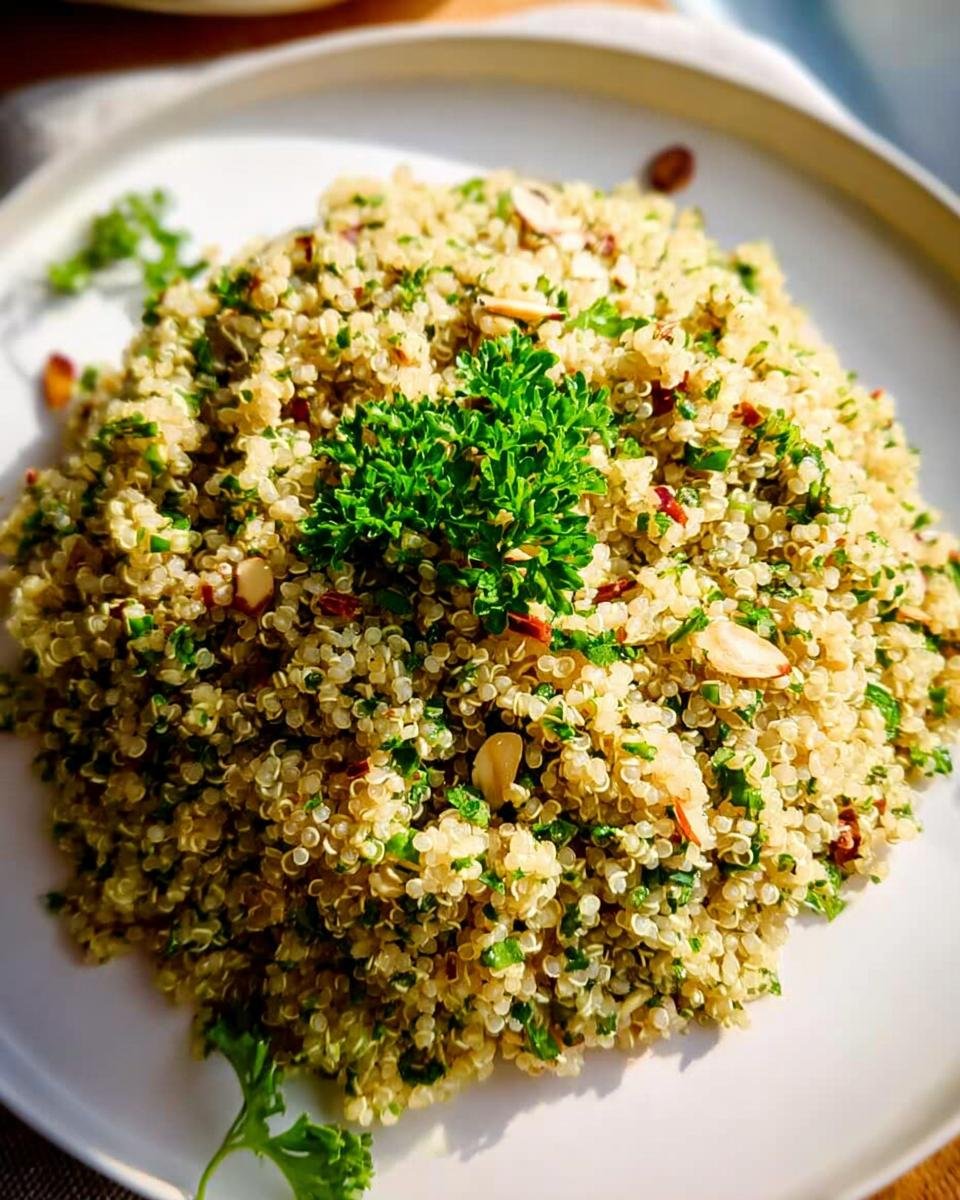
- 1 cup fresh Italian parsley, chopped. Plus extra for garnish—don’t skimp on the fresh parsley garnish!
- 2 tablespoons fresh or dried thyme, chopped. Thyme and quinoa are like best friends.
- ¼ cup sliced almonds, lightly toasted. Toasting these makes a massive difference in overall flavor.
- 2 small sliced radishes. These are totally optional, but those little pops of crunch and color are fantastic if you have them ready.
Step-by-Step Instructions to Achieve Herbed Quinoa Pilaf Fluffy
Okay, this is where the magic happens. We aren’t just boiling quinoa here; we are building layers of flavor starting with a little sauté, which is key to making this amazing clean eating recipe work so well. Follow these steps closely, especially the timing, and you will get that glorious texture every single time!
Sautéing Aromatics and Toasting Quinoa
First things first, get your vegetable oil heating up nicely in that medium saucepan over medium heat. Toss in your thinly sliced shallots (or onion, whatever you chose!). You want them to get soft and translucent, which takes about 5 to 6 minutes if you’re using shallots. Keep stirring them so they don’t stick or burn.
As soon as they look happy and softened, throw in your minced garlic and that ground cumin right along with them. Garlic burns fast, so you only need to sauté this mixture for about 30 seconds until you can really smell that amazing, earthy cumin scent floating up!
Simmering and Absorbing Liquid for Herbed Quinoa Pilaf Fluffy
Time for the quinoa! Dump in your rinsed and drained quinoa—remember we rinsed it to get rid of any bitterness, right? Stir everything together and toast the grain for just one minute; this seals in the flavor a bit. Now, add your 3 cups of water, the salt, and the black pepper. Give it a good stir to make sure nothing is stuck to the bottom.
Get the heat up until it comes rolling to a boil. Once it’s boiling, immediately turn the heat DOWN super low—you want a gentle simmer. Pop the lid on tight and let it cook for exactly 15 minutes. You’ll know it’s close when you start seeing tiny little holes popping up across the surface of the quinoa.
Resting and Finishing the Fluffy Quinoa
This next part is non-negotiable if you want this to be the Herbed Quinoa Pilaf Fluffy recipe you rave about! Turn the heat completely OFF, but DO NOT lift the lid! Let that saucepan sit there, totally undisturbed, for a full 10 minutes. This steam resting period is what separates the grains perfectly.
When the 10 minutes are up, take the lid off. Now, grab a fork—not a spoon, a fork!—and gently fluff all that perfectly cooked quinoa. Once it’s loose and airy, toss in your lemon zest, the lemon juice, all that beautiful chopped parsley, your thyme, those toasted sliced almonds, and those optional radishes.

Just gently mix it all together until the herbs are evenly distributed. Serve it up immediately while it’s still warm. If you want some other great ways to use fresh grains, you have to see my recipe for Cinnamon Apple Breakfast Quinoa!
Tips for Success Making Herbed Quinoa Pilaf Fluffy
I want you to succeed wildly with this side, so let me share a couple of small things that make a huge difference when you’re aiming for that light, airy texture. Trust me, ignoring these little details is what leads to that slightly gummy texture some people incorrectly think quinoa always has! If you follow these few tips, you’ll be making the best quick, easy keto recipes around.
The first big tip is all about rinsing. Seriously, don’t skip it! Quinoa has a natural coating called saponin, and it tastes bitter, almost soapy, if you don’t rinse it away well. I run mine under cool water in a fine-mesh sieve until the water runs clear. It takes about a minute, but it’s the first guarantee you have for clean flavor.
The toasting step is also vital for that Herbed Quinoa Pilaf Fluffy outcome. Sautéing the dry quinoa in the oil, along with the warming spices like cumin, actually helps to lock in the structure of the grain before it hits the water. It gives it a slightly nutty depth you just can’t get from boiling alone.
Once your quinoa is cooked and rested, taste before you commit to serving! This is my golden rule for anything seasoned with citrus. Lemon juice can sometimes taste sharper right off the cutting board than it does once it cools slightly. Add your herbs, toss it gently, and then taste a small spoonful. Does it need a tiny pinch more salt? Maybe just a few drops more lemon juice for brightness? Adjust it slowly until it tastes exactly like what you want!
Finally, those almonds! Toasting them separately transforms them from chewy nuggets into crunchy flavor boosters. Just toss them in a dry skillet over medium heat for 2 to 3 minutes, watching them like a hawk because they go from perfect to burnt in seconds. That little bit of extra effort really elevates this simple side dish.
Make-Ahead and Storage for this Side Dishes easy Recipe
I absolutely love cooking ahead, especially when I know I need Side Dishes easy throughout the week. This herbed quinoa is fantastic for prepping on Sunday so you’re set for lunch toppers or quick dinner additions right up until Thursday!
The great news is that the cooked quinoa itself holds up beautifully after cooking. You can follow the recipe right up until Step 6, so you saute the onion, toast the quinoa, and simmer it in the water until everything is absorbed. Turn the heat off and let it stand for the 10 minutes, then fluff it with a fork.
Once it’s cooked and fluffed, let it cool down completely to room temperature. Transfer the plain, cooked quinoa to an airtight container. It stays perfectly fresh in the fridge for up to four days. I often make a giant batch just for this purpose!
Now, here is the absolute most important rule for keeping this recipe tasting like it was just made: Do not add the fresh ingredients yet! The lemon zest, fresh herbs like parsley and thyme, and the sliced almonds should all remain separate.
When you are ready to serve or eat, gently warm up the plain quinoa either in a saucepan over low heat—just stirring until it’s warmed through—or use short bursts in the microwave. Once it’s warm, then you toss in your lemon zest, fresh juice, herbs, and almonds. This keeps the herbs bright green and prevents the lemon zest from tasting dull or cooked down. It’s such an easy trick that makes all the difference!
If you’re interested in more great recipes designed to streamline your week, check out my collection of fresh, weekly meal prep ideas. Having this herbed pilaf ready to go makes grabbing a healthy side so simple!
Serving Suggestions for Your Herbed Quinoa Pilaf Fluffy
This Herbed Quinoa Pilaf Fluffy is so versatile, which is why I highly recommend making a big batch! It’s light enough that it never feels heavy, but the toasted almonds and cumin give it enough substance to stand up to almost anything you put next to it. It truly is the perfect accompaniment for a weeknight meal when you need something quick.
For simpler dinners, this pilaf pairs beautifully with roasted chicken breast or baked salmon. The bright lemon really cuts through the richness of the fish. I often just serve it up alongside some steamed green beans and call it a complete, perfect dinner. That’s a quick prep win right there!
When the holiday season rolls around, this becomes my go-to replacement for heavier starches like mashed potatoes or plain rice pilaf. It’s elegant enough to sit next to your main protein without weighing down the whole plate. Think slow-roasted pork tenderloin or a beautiful herb-crusted rack of lamb—the quinoa soaks up those delicious pan juices marvelously.
If you’re looking for vegetarian options, it’s substantial enough to be a main dish in itself! My favorite way to bulk it up is by adding some roasted vegetables right into the pilaf during the final toss. Things like roasted sweet potatoes (if you’re counting carbs loosely) or, even better for a cleaner profile, roasted cubed butternut squash or Brussels sprouts work wonders.
It also tosses incredibly well with chickpeas that have been tossed with a little paprika and baked until crispy. That gives you plant-based protein and a great chewiness alongside the fluffiness of the grains.
For more ideas on light dishes that make your holiday celebrations even better, take a peek at my collection of light holiday recipes. You might find your next favorite pairing!
Nutritional Estimates for Herbed Quinoa Pilaf Fluffy
I always get questions about how light this side dish really is, especially since it’s packed with herbs and nuts, but thankfully, it stays wonderfully balanced! Because we are using whole food ingredients and focusing on clean preparation, this quinoa pilaf is actually quite friendly for calorie-conscious cooks.
Keep in mind that these numbers are just estimates, like most recipes you find online do! The exact brand of oil you use, how much salt you sprinkle in at the end, or even the size of your lemon can make these figures shift a bit. But generally speaking, this recipe lands perfectly in the moderate range for a really satisfying Side Dishes easy option.
Here is a safe general breakdown per serving (assuming 4 servings total):
- Calories: Approximately 297
- Carbohydrates: Roughly 39 grams
- Protein: About 11 grams
- Fat: Around 12 grams
See? It’s a great base for any meal! The protein and fiber from the quinoa itself help keep you feeling full, which is why I love integrating dishes from my calorie-smart recipes collection into my weekly meal plans. It feels hearty without being heavy on the macronutrients that slow you down midday.
You can also see some of the other benefits listed if you track minerals, like decent levels of Iron, Potassium, and Vitamin C from all those fresh herbs we packed in there. Every bite tastes good *and* does you good!
Share Your Herbed Quinoa Pilaf Fluffy Experience
Now that you have the secrets—especially that crucial 10-minute rest!—I really want to know how it turned out for you. Cooking is always more fun when we share the results, isn’t it?
Did you manage to get those gloriously separate, fluffy grains? Tell me! I live for the feedback, especially when it comes to texture. If you followed the steps and achieved that perfect, airy consistency, please leave a star rating below. It helps other cooks trying to figure out which wellness recipes are truly worth their time.
If you made a little twist—maybe you added dried cranberries or used walnuts instead of almonds? I love hearing about those little experiments!

Snap a picture of your finished plate! Tag me on social media when you share your beautiful side dish. Seeing your perfectly fluffed Herbed Quinoa Pilaf Fluffy come to life in your kitchen brings me so much joy. Let’s inspire someone else to stop eating sticky quinoa forever!

Herbed Quinoa Pilaf
Ingredients
Equipment
Method
- Heat oil in a medium-sized saucepan. Add the shallots (or onion) and ground cumin. Saute, mixing constantly, until shallots are translucent or softened, about 5 to 6 minutes.
- Add the minced garlic and saute for 30 seconds.
- Stir in the quinoa and toast, stirring constantly, for one minute. Add the water, salt, and black pepper. Stir the mixture. Put the lid on. Bring it to a boil and let it simmer for 15 minutes or until all the liquid is absorbed and tiny holes appear on the surface of the quinoa.
- Turn the heat off and let it rest for 10 minutes with the lid on.
- Fluff the cooked quinoa with a fork.
- Add the lemon zest, lemon juice, parsley, thyme, sliced almonds, and sliced radishes if you are using them.
- Gently toss the ingredients and serve while the pilaf is still warm.