
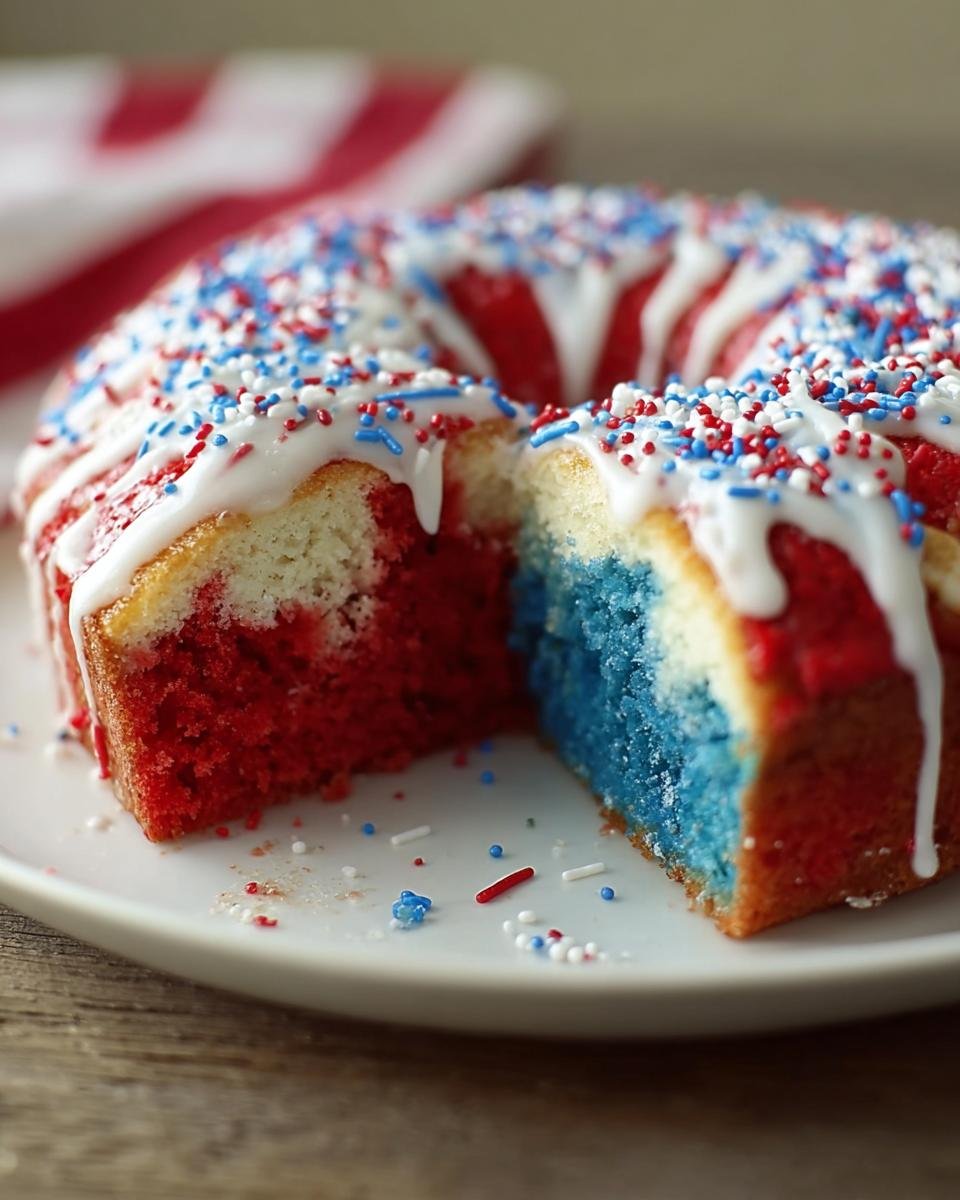
Fourth of July cookouts, Memorial Day gatherings, or just when you need a burst of patriotic fun—sometimes only a vibrant cake will do! I absolutely love sharing this recipe for a stunning Red White and Blue Sheet Cake because it looks like you slaved all day, but honestly, it’s based on a cake mix! That layered effect? Pure magic with just a bit of careful pouring.
I remember the first time I tested a patriotic cake for our team—Chef Violet asked for something bold, bright, and guaranteed to impress a crowd. I spent an entire afternoon adjusting the texture, tweaking the colors, and making sure the decorative pattern stayed clean after baking. When the team gathered around for the tasting, the way everyone smiled after the first bite made every test worth it. Since then, this style of cake has become one of my favorite celebration recipes to perfect. It proves that impressive dessert party centerpiece doesn’t need to be complicated!
Why This Red White and Blue Sheet Cake is Your New Go-To Dessert
When you need patriotic desserts that truly pop but don’t have hours to spend in the kitchen, this is the recipe you reach for. It hits every mark: it’s bold, colorful, and uses ingredients you probably already have on hand.
- It’s incredibly vibrant—perfect for any flag-waving celebration!
- The cleanup is minimal since it cooks in one pan.
- It delivers fantastic flavor straight from a box mix, which I love for quick hosting.
Quick Prep for Any Dessert Party
Seriously, you only need about 15 minutes of active work time to get this ready for the oven. If you suddenly find out you’re hosting a last-minute dessert party, don’t panic! This cake comes together so fast. It delivers maximum visual impact for minimum effort, which is my favorite kind of baking victory.
Beginner Friendly Layer Cake Technique
Don’t let the word ‘layer’ scare you off; this isn’t stacking heavy pans! This is an incredibly beginner friendly technique. We use the tube pan to help keep our colors slightly separated as they bake. You pour them in order, and *poof*—you have a beautiful, marbled effect without needing any fancy leveling or stacking skills.
Essential Ingredients for Your Red White and Blue Sheet Cake
The beauty of this recipe is that we start with fantastic, reliable basics! Because we use a trusted cake mix, things stay simple. But the way we handle the coloring for those distinct patriotic layers makes all the difference in the final look of our cake ideas.
For the Layered Cake Batter
You’ll need that standard box of Betty Crocker Super Moist White Cake Mix, plus the water, oil, and eggs listed on the back of that box. For the colors, don’t skimp! You absolutely must use 1.25 teaspoons each of red gel food color and blue gel food color. Gel colors are crucial; they give you that deep, vibrant red and true blue without thinning out your precious batter.
For the Drizzle Frosting and Topping
We aren’t doing a thick layer of frosting here; we want a drizzle! Grab about 1/2 cup of Betty Crocker Rich & Creamy Vanilla Frosting from one tub. You’ll thin this down to get that perfect, flowing texture. And for the finale? If you can find them, 2 teaspoons of Betty Crocker Red, White & Blue Sprinkles really bring the party to the top of this sheet cake.
Step-by-Step Instructions for the Red White and Blue Sheet Cake
Okay, here’s where we turn ingredients into magic! While this is a Red White and Blue Sheet Cake recipe, we are using a tube pan, which helps keep those layers from totally mixing into purple mush, which is what we want. Don’t worry if they blend a tiny bit; that just adds to the charm of these patriotic desserts.
Preparing the Pan and Mixing the Base Batter
First things first: heat that oven up to 350°F! You must spray your 12-cup fluted tube cake pan generously with baking spray that has flour in it—trust me on this one to prevent sticking. Next, beat the entire cake mix, water, oil, and eggs in your large bowl with the electric mixer on medium speed for a solid two minutes. Make sure you scrape down the sides halfway through so everything is perfectly smooth and creamy.
Creating the Red, White, and Blue Layers
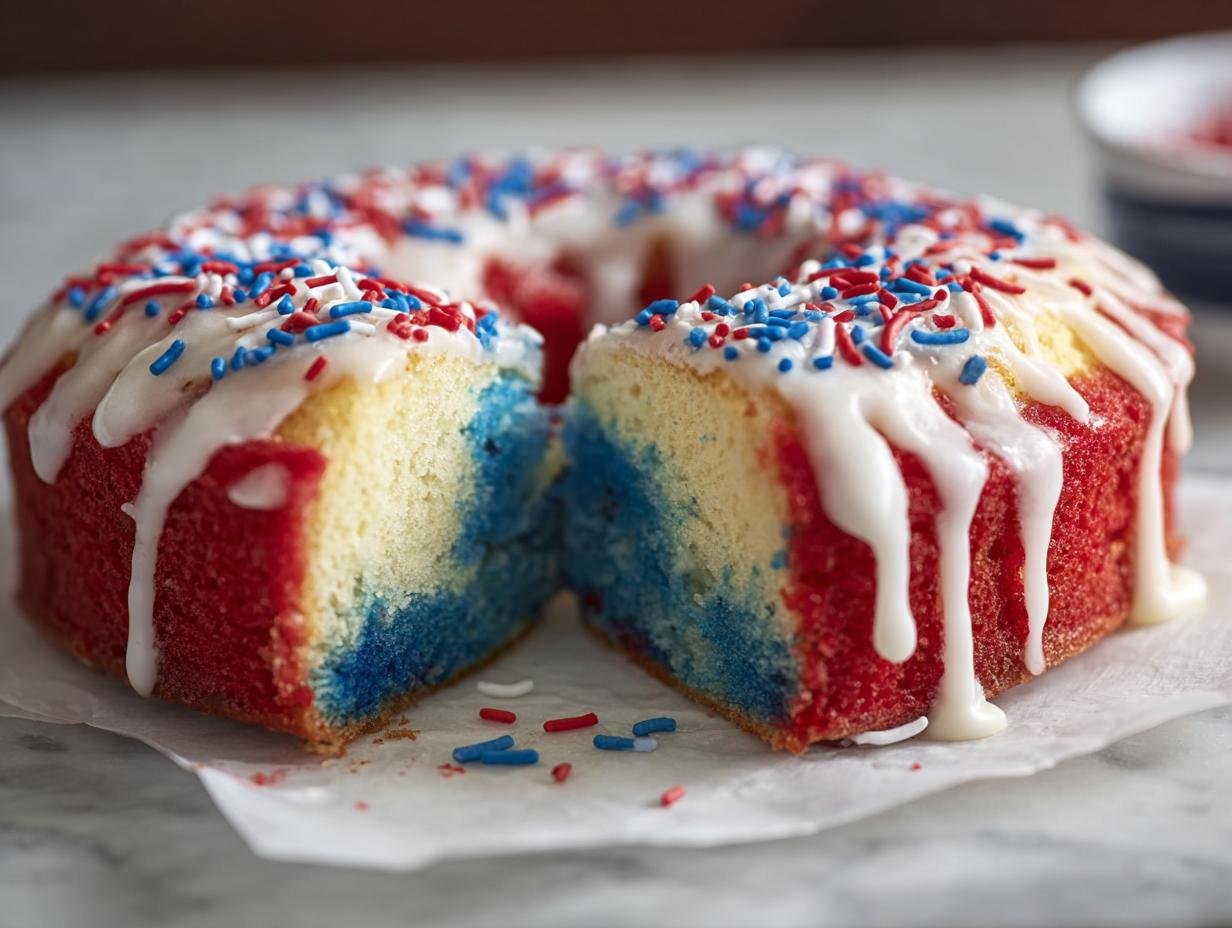
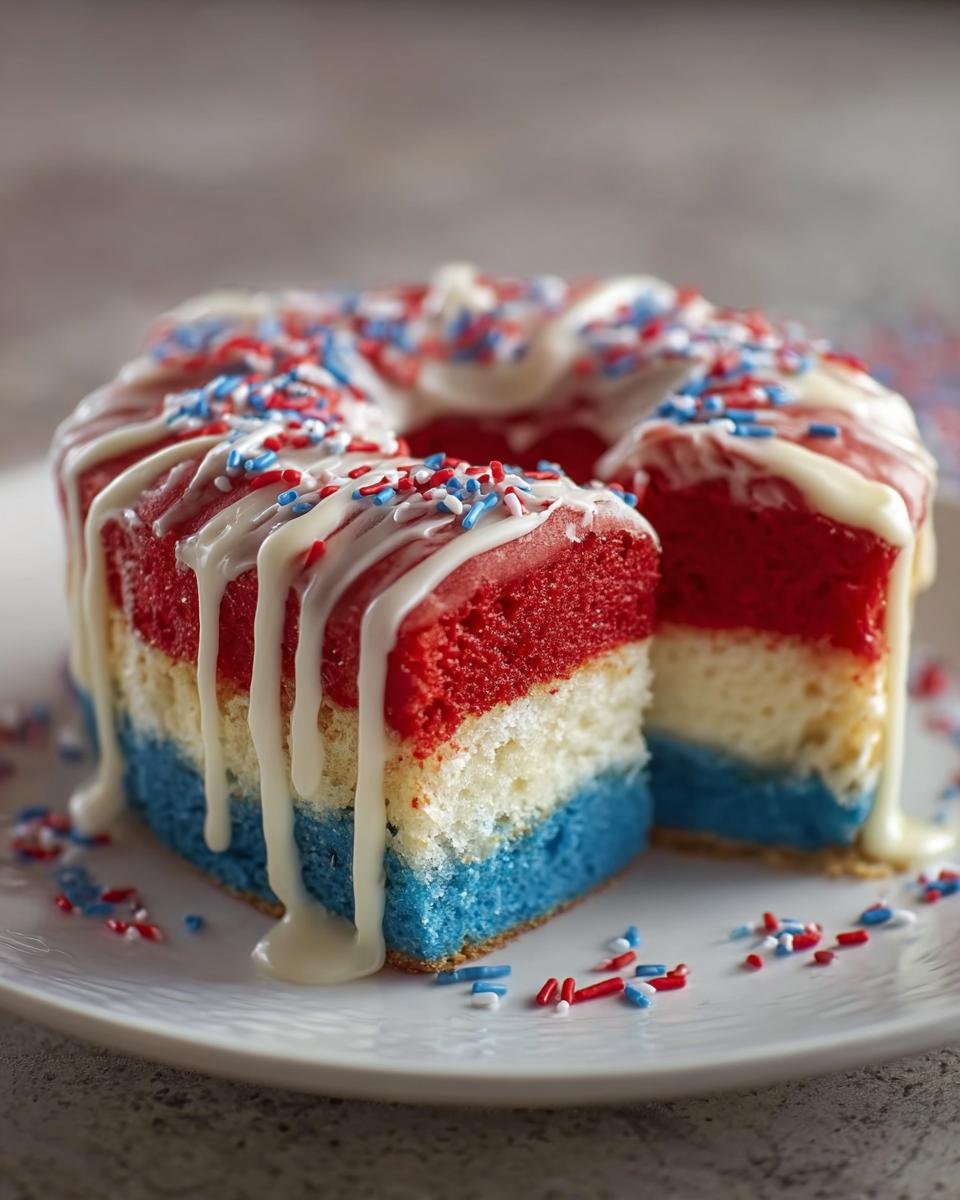
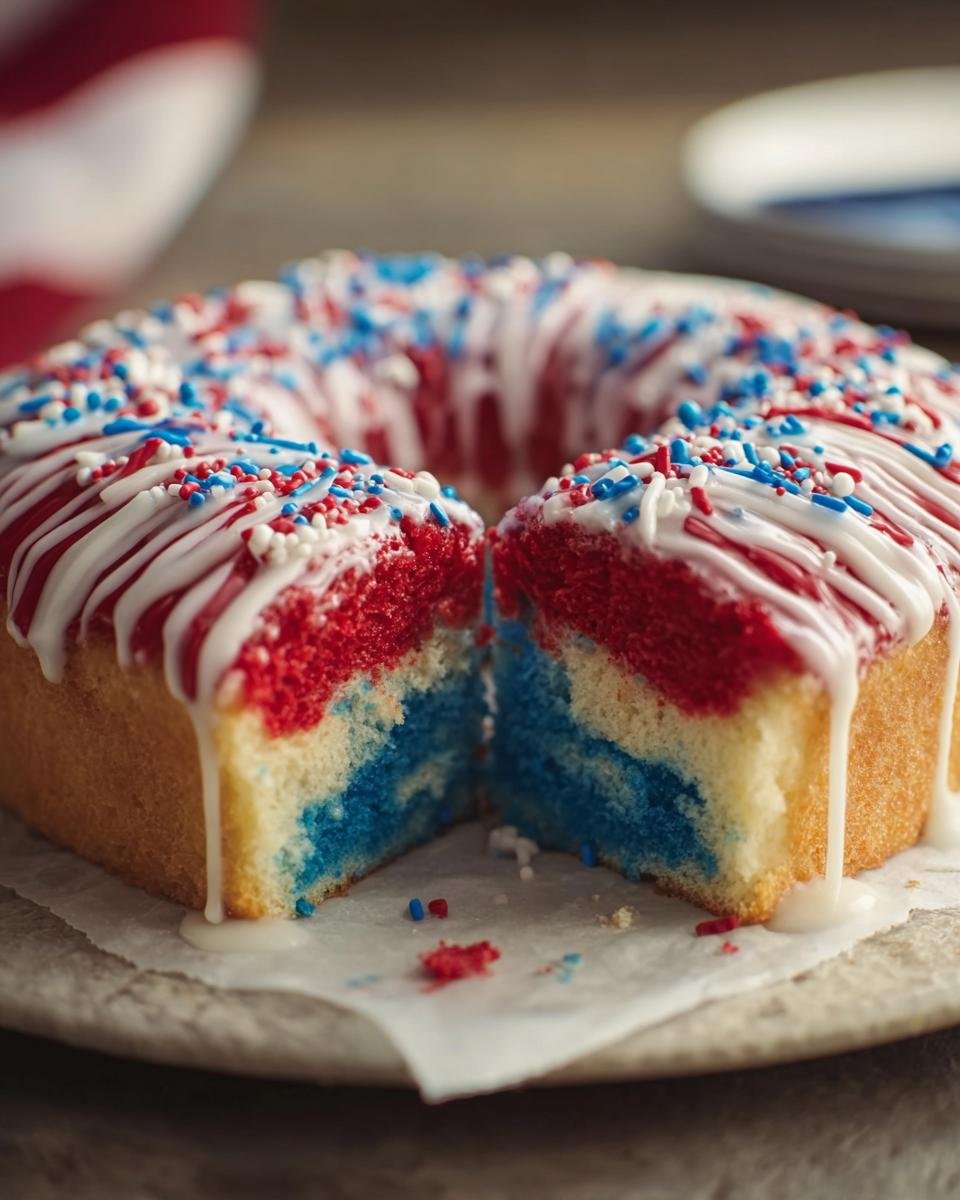
Divide and conquer! Scoop exactly one cup of plain batter into a small bowl and mix in your teaspoon of red food color until it’s uniform. Do the exact same thing with another cup of batter and the blue food color. Now for the trick: pour the red batter directly into the bottom of your prepared pan. Then, you gently spoon the remaining white batter right on top of that red layer. Finally, pour the blue batter right into the center of the white layer, letting it form a sort of colorful ring. It looks messy, but it comes out perfectly structured!
Baking and Cooling the Cake
Slide that pan into the oven! It should take about 39 to 44 minutes until a toothpick inserted right into the center comes out clean. Once it’s done, let it sit in the pan on the cooling rack for exactly 10 minutes. No more, no less! Then, carefully invert it onto the rack to cool completely; you’ll need about an hour here before we touch the frosting.
Drizzling the Frosting for a Patriotic Finish
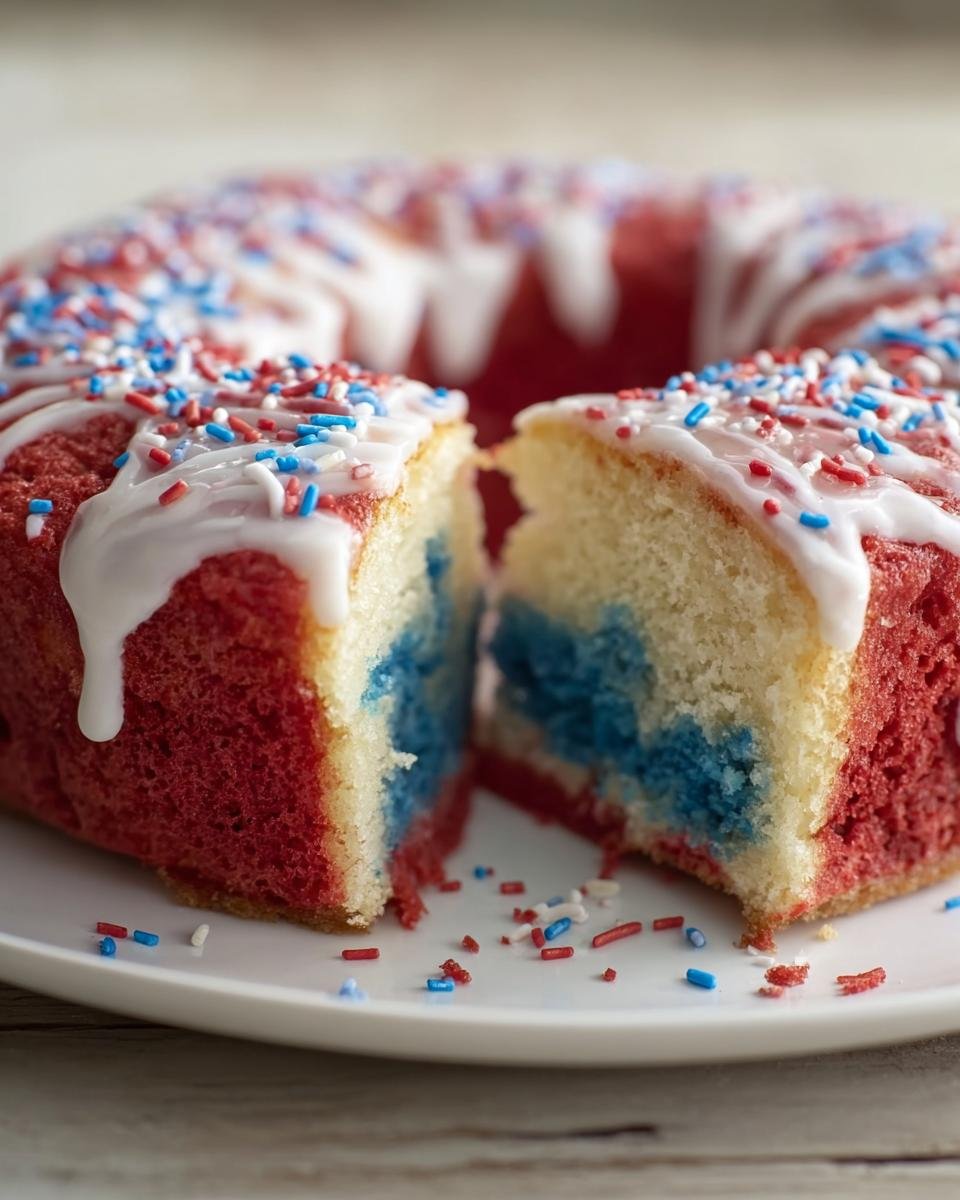
This is the fun part that truly makes it a layer cake effect on the outside! Put about 1/4 cup of your vanilla frosting in a little microwavable bowl and warm it until it’s thin enough to drizzle easily—usually 10 to 15 seconds. Drizzle this white frosting back and forth over the cooled cake. Next, take the rest of that frosting, divide it, color one batch red and one blue with just a touch more color, microwave each tiny bowl for 5-10 seconds, and drizzle them in alternating stripes over the white. Make sure you sprinkle those candies on top before it sets! You need to let it stand for 30 minutes so that beautiful drizzle hardens up.
Expert Tips for the Perfect Red White and Blue Sheet Cake
Listen, I love making things easy, but when it comes to color saturation on this patriotic dessert, we need to be a little bossy. You want those colors to shine through after the heat of the oven, right? A few little tricks I learned while testing this recipe for the team ensures you get that amazing, bright look every single time.
Achieving Bright, True Colors
I mentioned it before, but I need to stress: please, please use gel food coloring, not the liquid drops you squeeze from a plastic bottle. Liquid coloring adds extra water to the batter, which messes up the texture we worked so hard to get right. Gel colors are concentrated pigments. My only warning is that sometimes the blue can look a little dark before baking, but it should lighten up beautifully once it’s totally cool. If you want to check out some other great techniques for vibrant food coloring, I learned a thing or two watching Chef Violet’s methods!
Handling the Tube Pan Pour
This is key for that unique internal structure. When you are layering the batters—especially the blue over the white—you have to go slow. Don’t just dump the cup of blue batter in one spot! Use the back of a spoon or pour it very gently down the side of the spoon to diffuse the impact. This careful pouring minimizes immediate blending. We are going for distinct layers that have a soft, lovely marble where they meet, not just a big purple blob in the middle!
Equipment Needed for This Red White and Blue Sheet Cake
Getting set up beforehand is half the battle, especially when you’re dealing with pouring multiple batters! You don’t need a ton of fancy gadgets for this simple recipe, but having the right pans ready makes the mixing phase so much smoother. Here’s the must-have list so you can gather everything before you turn on that oven.
- A 12-cup fluted tube cake pan is non-negotiable for the shape and the layering effect!
- You’ll definitely need an electric mixer for getting that base batter perfectly smooth.
- Grab a large bowl for the main mix, and make sure you have a couple of smaller bowls ready for coloring the sections.
- We use small microwavable bowls specifically for thinning down the frosting for drizzling.
- Don’t forget your cooling rack—it has to be ready to hold that tube pan!
Ingredient Notes and Substitutions
Since we are relying on a box mix for speed, most of the ingredient questions revolve around what you can swap out without ruining the patriotic look. For the most vibrant result in this Red White and Blue Sheet Cake, the gel colors truly can’t be beaten!
Coloring Alternatives
If you absolutely cannot get your hands on gel food colors, you can try natural food dyes, but be warned: the red might come out a bit pale pink, and the blue can sometimes look more teal than true patriotic blue. You might need way more natural dye to get the same pop of color! If you’re aiming for the intensity I showed in my test photos, stick to the gel unless you’re okay with a slightly softer overall look. For more reliable color tips, you can check out some of Chef Violet’s notes on vibrant baking.
Storing Your Red White and Blue Sheet Cake
The best part about this cake is how easy it is to store, especially since we aren’t using a heavy layer of traditional buttercream frosting. The recipe note says to store it loosely covered at room temperature, and that’s exactly what I do! Because the drizzle frosting sets up nicely, you don’t have to worry about refrigeration, which is a huge bonus if you’re taking this to a picnic or a big dessert party.
I usually just place a paper towel loosely over the serving platter and then put a large overturned bowl over the whole thing. It stays perfectly fresh for two days! If you somehow have leftovers after the holiday, you can check out my tips for saving baked goods like these caramel apple cheesecake bars for longer storage down the line.
Frequently Asked Questions About This Patriotic Desserts Recipe
Baking something as visually specific as a Red White and Blue Sheet Cake can bring up a few questions, especially when you’re new to working with poured layers! I made sure to answer the most common things people ask about the colors, the frosting, and how to adapt the final look.
Can I make this a traditional layer cake instead of a sheet cake?
That’s a great question, and honestly, it gets tricky! The beauty of this specific color effect relies heavily on the tube pan. Because the batter is poured in layers into that deep, narrow pan, the colors separate naturally as the batter settles before baking. If you try to use standard round pans, the sheer volume of white batter poured over the red will just mix things up immediately, losing that distinct visual layering.
How can I make the frosting look more like stars or stripes?
If you want something bolder than the drizzle, this is still a very beginner friendly approach! After you’ve done your initial white drizzle, wait until the red and blue drizzled frosting is slightly set, like firm gel. Then, take a clean toothpick or the tip of a thin knife and gently drag it through the colors in straight lines, alternating directions for a true stripe effect. It’s quick, easy, and adds incredible detail!
What if I don’t have a tube pan for this cake ideas dessert?
If you absolutely don’t have that fluted tube pan, you can try using a standard 9×13 inch pan, but be aware that the layered effect will be much harder to control. You’ll still divide the batter into three parts—red, white, and blue—but you’ll need to pour them in concentric circles instead of stacking them vertically. Don’t let the blue touch the edges as much. It will bake faster, so keep an eye on that toothpick!
Estimated Nutritional Information for This Red White and Blue Sheet Cake
Now, I know when we’re celebrating with a delicious Red White and Blue Sheet Cake, we aren’t exactly counting macros. But just so you know what you’re diving into, here are the estimates based on the cake mix and frosting we used. This information is based on 12 generous servings.
- Calories: 280 per serving
- Fat: 13g
- Carbohydrates: 38g
- Sugar: 21g
- Protein: 3g
A quick note: Since we are using a commercial cake mix and frosting straight from the tub, these numbers are pretty accurate, but they are truly just an estimate! If you switch to a lower-sugar frosting, those numbers will change fast.

Red White and Blue Sheet Cake
Ingredients
Equipment
Method
- Heat oven to 350°F. Spray 12-cup fluted tube cake pan generously with baking spray with flour.
- Beat cake mix, water, oil, and whole eggs with an electric mixer on medium speed for 2 minutes, scraping the bowl occasionally. Place 1 cup of the batter in a small bowl and stir in 1 teaspoon of the red food color until blended. Place 1 cup of the batter in another small bowl and stir in 1 teaspoon of the blue food color until blended.
- Pour the red cake batter into the bottom of the pan. Carefully pour the remaining white batter over the red batter. Carefully pour the blue batter over the white batter. The blue batter does not need to cover the white batter completely; it looks better if it forms a ring in the center of the white batter.
- Bake for 39 to 44 minutes or until a toothpick inserted in the center comes out clean. Remove the cake from the oven. Let it stand for 10 minutes, then remove it from the pan to a cooling rack. Cool completely, about 1 hour.
- Place the cake on a cooling rack over waxed paper or cooking parchment paper. Place 1/4 cup of the frosting in a small microwavable bowl. Microwave uncovered on High for 10 to 15 seconds or until thin enough to drizzle over the cake. Use a spoon to drizzle the warmed frosting back and forth over the cake in a striping pattern. Divide the remaining frosting between 2 small microwavable bowls. Stir 1/4 teaspoon red food color into one bowl until well blended. Microwave uncovered on High for 5 to 10 seconds or until thin enough to drizzle. Drizzle over the cake. Repeat with the remaining bowl of frosting and 1/4 teaspoon blue food color. Sprinkle candy sprinkles on top. Let stand about 30 minutes or until the frosting is set. Store loosely covered at room temperature.