

There is just nothing like pulling a fresh batch of bakery-style pretzels out of your own oven, I swear! Forget those sad, dry versions you find at the store. We’re going straight for that amazing, slightly salty, rich flavor and, most importantly, that gorgeous, deep brown shine that signals a perfect Pretzel Rolls Chewy Crust.
The first time I tested pretzel rolls for the team, I remember standing over the pot of simmering baking soda water, watching each dough ball puff up and deepen in color. I thought, “This is the moment real magic happens.” When the first batch came out of the oven—glossy, golden, and perfectly chewy—I called everyone into the kitchen to taste them. Seeing the smiles and hearing the crunch of that first bite reminded me exactly why I love recipe testing: those small transformations that turn simple ingredients into something unforgettable. You can trust me; these rolls are easier than you think. If you want to know more about my baking adventures, check out my thoughts here.
Why You Will Achieve the Perfect Pretzel Rolls Chewy Crust
Listen, I get it. Pretzel rolls sound intimidating, like you need three days and a culinary degree. Nope! My goal with this recipe was simplicity, but without compromising that unbelievably satisfying, chewy texture—that signature crust we all chase.
- You get that deep, authentic pretzel flavor from a quick dip, not from hours of fermentation.
- The dough is forgiving! It doesn’t need fussy handling to come out soft and buttery inside.
- These are legitimately faster than waiting for a delivery order.
Quick Steps for Rolls Recipes easy no knead from scratch
We kept the rising time manageable, clocking in at only an hour, which I think is reasonable for something this delicious. You don’t need to stand over the mixer kneading for twenty minutes. Seriously, just let the machine do the work for the five minutes I call for. It makes these Rolls Recipes easy no knead from scratch, perfect for weeknight dinner duty!
Essential Equipment for Your Pretzel Rolls Chewy Crust
You don’t need a huge arsenal of special gear for these at all, which is part of why I love them so much for a weeknight side dish. Having the right tools just makes the process smoother, especially when dealing with sticky dough!
Make sure you have these basics ready before you even think about mixing that water and yeast:
- A stand mixer with a dough hook is helpful, but honestly, a large bowl and a sturdy wooden spoon will work just fine if you don’t mind a little arm workout.
- You definitely need a large pot designated for boiling the water. It needs to be big enough for the rolls to float happily for a moment.
- A standard baking sheet or a 9×13 baking pan works for getting that final golden finish. I actually prefer the 9×13 when I’m making a big batch!
- A slotted spatula is your best friend for safely transferring the dough from the boiling bath onto the sheet without accidentally squeezing out all that lovely air we just built up.
Gathering Ingredients for Buttery Pretzel Rolls Chewy Crust
Okay, let’s talk about what you need to gather for these truly buttery rolls. Having everything measured out means we can move quickly once we get to that quick-dip stage, which is crucial for that perfect texture. Don’t worry about the flour amount; I always tell people to start with what I list because flour can really vary depending on how humid it is!
Dough Ingredients
First up, the dough itself. You’ll need 1.5 cups of warm water—and I mean lukewarm, around 100\u00b0F (38\u00b0C) is exactly what the yeast likes! Then, 2.25 teaspoons of instant or active dry yeast—that’s just one standard packet, easy peasy. For the butter, grab 4 Tablespoons of unsalted butter, and you need to melt 1 Tablespoon for the dough and remember to reserve the rest for brushing at the end. Don’t forget 1 teaspoon of salt and 1 Tablespoon of brown sugar to feed that yeast. For the bulk, use 3.75 cups of all-purpose flour, making sure you spoon & level it, and keep in mind you might add up to 4 cups total as needed for texture.
Baking Soda Bath Components
This is where the magic happens! For the actual crust, you need a big pot, and you’re going to dissolve 0.5 cup (about 120g) of baking soda into 9 cups of water (that’s roughly 2,160ml). It sounds like a lot of water, but the rolls need room to swim when they take their short dip!
Step-by-Step Guide to Make Pretzel Rolls Chewy Crust
Alright, this is the fun part where things really start smelling like a delicious German beer garden in your kitchen! Getting these rolls right is all about how you handle the dough at three key moments: mixing, rising, and that famous dunk. Remember, the goal here is that deep, beautiful color and that signature Chewy Crust.
Mixing and Kneading the Dough
First things first, whisk your yeast into the warm water—just a minute to let it wake up! Melt 1 Tablespoon of butter and whisk that in with your salt and brown sugar. Now, gradually add the flour, about one cup at a time. Don’t dump it all! Once it’s thick, keep adding flour until it’s just barely sticky. If you’re using a mixer, beat that dough for 5 full minutes; that’s your ‘no knead’ shortcut right there. If you are kneading by hand, go for 5 solid minutes too.
Here’s a little trick I learned to make sure we developed enough gluten for great structure: perform the windowpane test! Tear off a tiny bit of dough and stretch it out gently. If light can peek through without the dough immediately ripping, you’re golden. If you want to read more about bread structure and testing, I keep my notes here.
Rising and Shaping Your Rolls
Toss your perfectly kneaded dough into a greased bowl, cover it tight, and let it have its one-hour rest—that’s your 60-minute rise time, or until it’s nearly doubled. If your kitchen is cold, try my trick: preheat your oven to 200\u00b0F (93\u00b0C), turn it off immediately, and let the dough warm up inside the closed door. Once it’s risen, gently punch out the air—no aggressive smashing! Divide that dough into 12 equal balls, about 1/3-cup each. Roll them gently into smooth shapes. Don’t overwork them now; we want a soft interior!
The Boiling Bath for Pretzel Rolls Chewy Crust
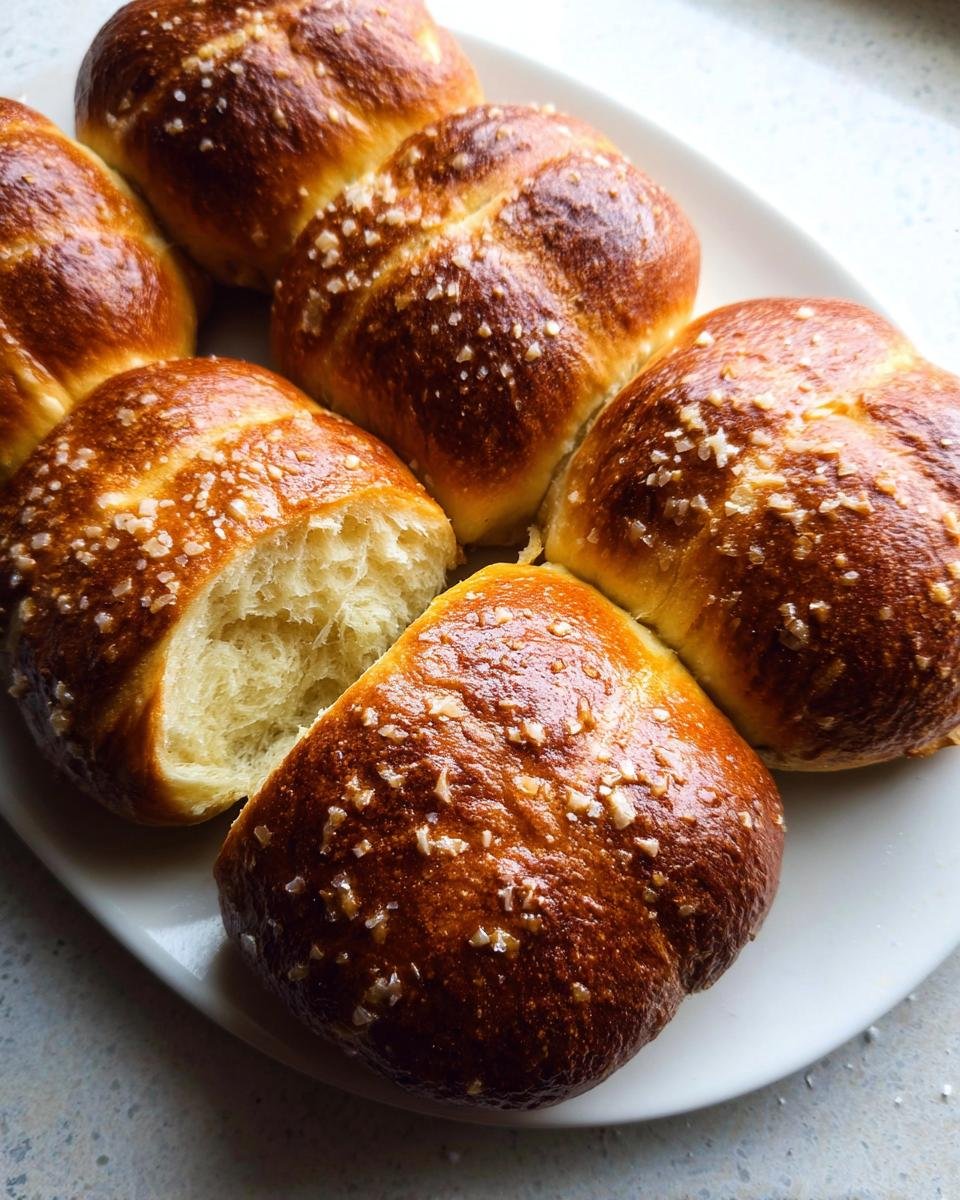
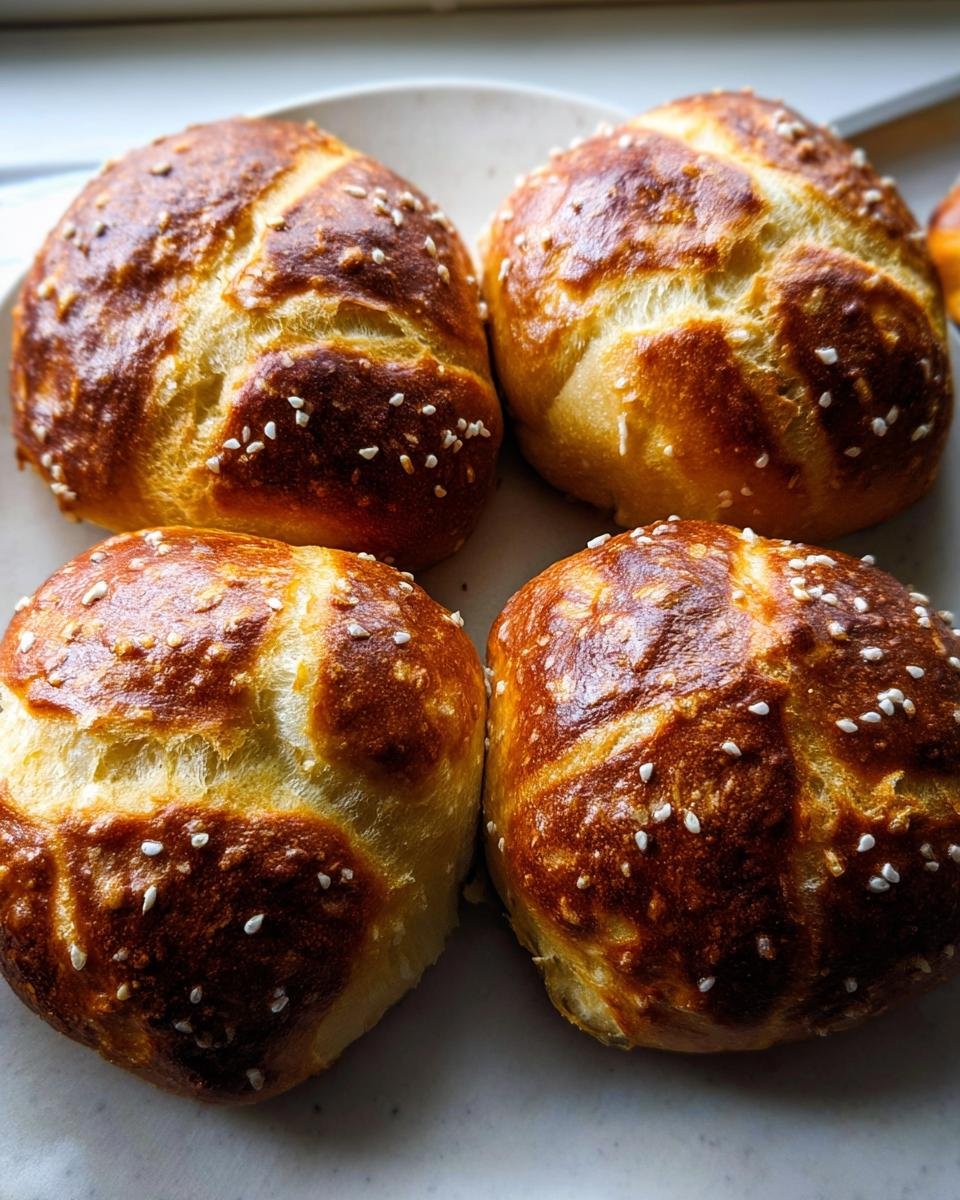
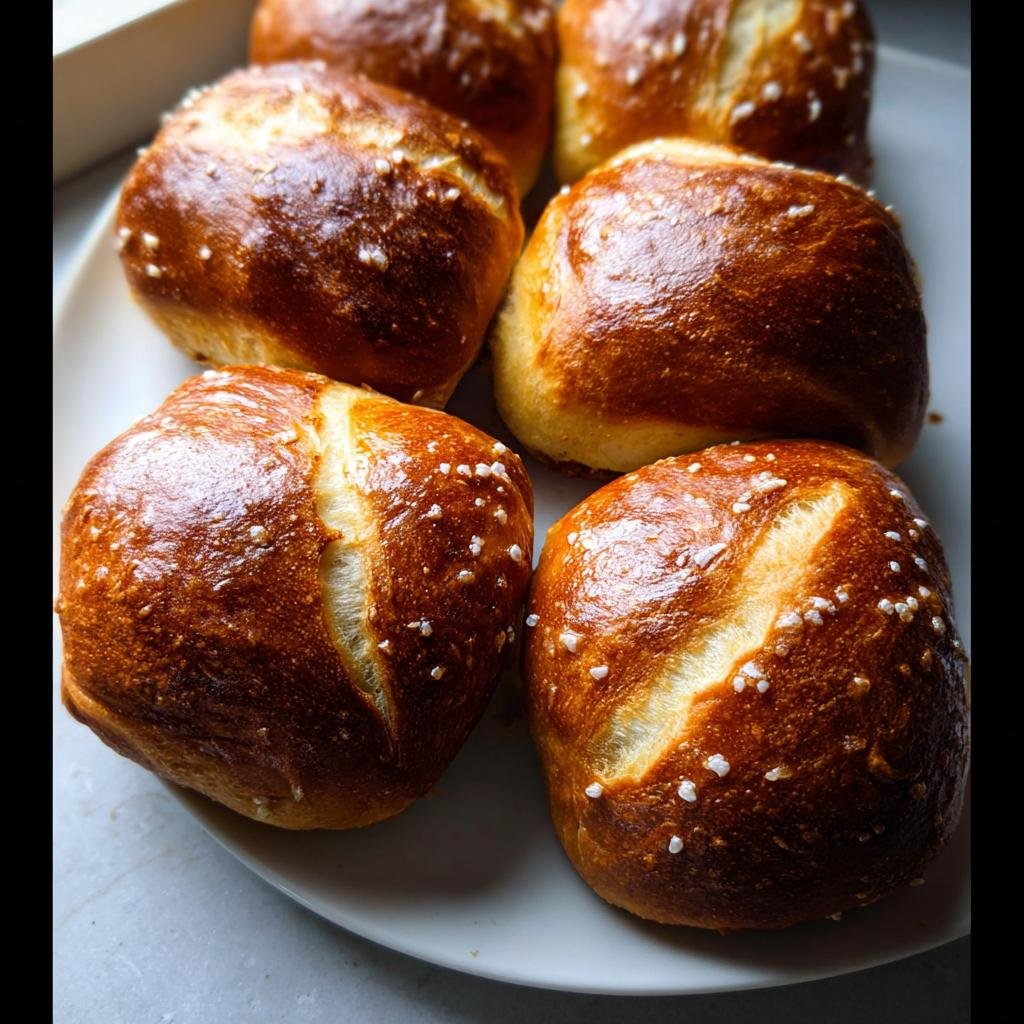
While the rolls are resting, make your bath: bring 9 cups of water and 0.5 cup of baking soda to a rolling boil. This is the non-negotiable step for the pretzel flavor! Drop 1 or 2 rolls in at a time for only 20 to 30 seconds—and I mean *only*! If you boil them longer, trust me, they start tasting metallic, and that’s a tragedy. Use that slotted spatula to lift them out, let the water drip completely, and set them on your prepared baking sheet. Score a couple of slits across the top of each roll before it goes in the oven.
Baking and Finishing Touches
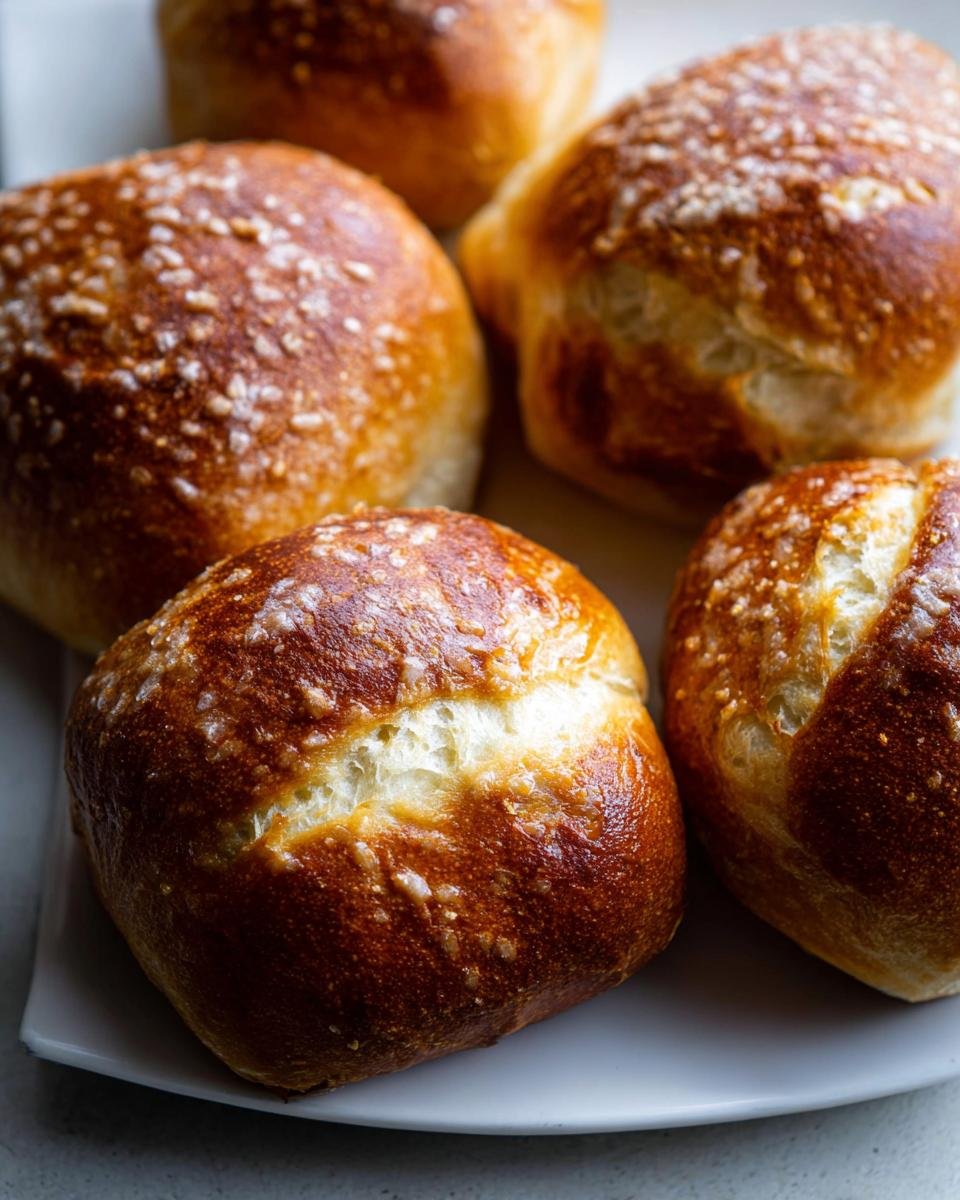
Melt that remaining unsalted butter and brush it generously over every single boiled roll. Don’t be shy! Then, grab your coarse sea salt and sprinkle it on top before sliding them into that 400\u00b0F (204\u00b0C) oven. They need about 22 to 26 minutes of baking time. You’re looking for a deep, beautiful golden brown color all over. Once they hit that perfect hue, pull them out and serve them warm immediately for the best experience!
Tips for Success with Pretzel Rolls Chewy Crust
Even when following a great recipe like this one, baking always throws a little curveball now and then, right? Don’t sweat it! Most problems are totally fixable. My biggest advice is to really pay attention to two things: the dough’s stickiness level and the temperature of that boiling bath. These two steps make or break the whole experience.
When you mix up the dough, it is supposed to be a little soft, but it shouldn’t look like wet glue. If your dough feels overly messy and is just sticking everywhere after you’ve added the full 4 cups of flour, you might need a tiny bit more—a tablespoon at a time—just until it starts pulling away from the sides of the mixer bowl smoothly. Remember, we want soft, not stiff!
Troubleshooting Your Pretzel Rolls Chewy Crust Texture
If your rolls come out pale instead of that beautiful mahogany brown, it usually means your boiling time was too short, or the baking soda wasn’t quite strong enough. For guaranteed color, make sure that bath water is at a solid, active boil before anything touches it. Also, don’t skip brushing that reserved butter on right before they go in the oven—that fat helps achieve that deep, shiny color everyone loves.
If you’re worried about the interior being too dense, that’s often a kneading issue or temperature issue during the first rise. Make sure that warm water for the yeast is right around 100°F—too hot and you kill the yeast, leaving you with dense muffins instead of great Pretzel Rolls Chewy Crust!
Make-Ahead and Storage for Your Pretzel Rolls
One of the best parts about these rolls is how fantastic they are for planning ahead! Whether you’re gearing up for a big game day or just meal prepping for easy dinners, knowing you can make these rolls ahead of time is a huge win. Remember, they are delicious warm, but they are perfectly fine cooled down too!
For storage, keep things simple. Once the rolls are completely cool—and I mean totally cool, otherwise you trap steam—you need an airtight container or even just a good zip-top bag. Stored on the counter at room temperature, they stay fresh and wonderfully soft for about 3 days. I’ve tried freezing them, and honestly, I prefer the texture when they are eaten within that 72-hour window.
If you want to bake them the day before a party, just make sure they cool completely before sealing them up. If you’re planning on freezing them, I’d say freeze them the same day you bake them for the best results later on. If you’re interested in another amazing make-ahead recipe that uses that same chewy texture idea but in a sweet form, you have to check out my Blackberry Pretzel Salad!
When it’s time to eat, reheating is super quick. You want to bring that buttery inside back to life! Pop them directly onto a baking sheet in a moderate oven—say, 350\u00b0F (175\u00b0C)—for about 5 to 8 minutes. This warms them through and just slightly refreshes that outer crust. Microwaving works in a pinch, but it tends to soften that great chew you worked so hard for, so I always suggest the oven method if you have the time!
Serving Suggestions for These Rolls Recipes easy
These perfect buttery rolls don’t just sit pretty next to a plate; they are practically begging to be dipped! Since they have that lovely salty punch, they scream for something rich and creamy on the side. Forget boring dinner rolls; these are a star player!
Honestly, my favorite way to enjoy them is just tearing them open while they’re still warm and slathering them with salted butter. But if you’re taking them to a party, you absolutely need a good dip game going.
- You cannot go wrong with a sharp, creamy beer cheese dip. The saltiness of the roll just cuts through the richness perfectly.
- Mustard is a classic for a reason! Try using a strong whole-grain Dijon; it gives a nice bite to balance the dough.
- If you are serving these with dinner, they are amazing for soaking up the last bits of sauce. They work especially well with heartier meals. I love pairing them alongside something brothy like my Creamy Chicken Enchilada Soup—hello, the ultimate comfort food combo!

They hold up so well that they’d even be great sliced in half and used as mini sandwich buns for pulled pork or ham sliders. These Rolls Recipes easy mean whatever you serve them with is going to taste a little bit better!
Frequently Asked Questions About Pretzel Rolls Chewy Crust
It’s totally normal to have questions when you’re trying something new, especially when it involves that boiling bath step! I gathered up the ones I get asked most often about making these Rolls Recipes easy. Don’t hesitate to drop your own questions in the comments if I missed anything!
Can I skip the baking soda bath for these rolls recipes?
Oh, you technically *can*, but if you skip that bath, you’re just going to end up with really lovely, soft, buttery dinner rolls—not pretzel rolls! The baking soda (or lye, if you’re feeling extra brave) is what reacts with the dough’s starch to create that distinct, shiny, salty, chewy crust flavor people expect. It’s the essential step for pretzel magic, so please don’t skip it for this batch!
How do I make these rolls buttery if I use salted butter?
That’s a great practical question! The recipe calls for unsalted butter specifically so we can control the salinity, especially with the finishing coarse salt we sprinkle on top. If you only have salted butter on hand, just cut back on the 1 teaspoon of salt you add to the dough mixture. I’d start by putting in just half a teaspoon, mix it, and then taste the raw dough (yes, I test raw dough!) before adding any more. You want flavor, but not a salt lick!
Is this recipe truly no knead for making pretzel rolls from scratch?
It’s as close to no-knead as you can get when making genuine pretzel rolls from scratch! If you use your stand mixer with the dough hook, the 5 minutes of mixing does almost all the work establishing gluten structure. If you’re kneading by hand, you need those 5 minutes of steady work, but that’s still way less effort than traditional bread recipes that require 15 or 20 minutes of hard kneading. It’s super manageable for beginners, trust me!
Sharing Your Pretzel Rolls Chewy Crust Creations
Now that you’ve conquered the boiling bath and achieved that glorious mahogany color, I absolutely *need* to see what you made! Seriously, nothing makes my day more than seeing your beautiful, glossy pretzel rolls pop up online. Tag me in your photos when you post them!
Did they turn out perfectly glossy? Were they the star side dish at your family dinner? Did you dip them immediately into a giant vat of cheese sauce? Tell me everything in the comments below. Knowing how this recipe worked for you—whether you kept them simple or added your own twist—helps me keep testing and perfecting these cherished family recipes.
If you loved how easy these were, you should definitely check out the story behind our whole recipe collection and say hello to the team over at About Us! Happy rolling, everyone!
Chewy Crust Pretzel Rolls
Ingredients
Equipment
Method
- Whisk yeast and warm water together. Let this sit for 1 minute. Meanwhile, melt 1 Tablespoon of butter, reserving the rest. Whisk the salt, brown sugar, and melted butter into the yeast mixture.
- Slowly add 3 cups of flour, adding 1 cup at a time. Mix with a wooden spoon or dough hook until the dough is thick. Add 3/4 cup more flour until the dough is no longer sticky. If the dough is still sticky, add another 1/4 to 1/2 cup, as needed. Poke the dough with your finger; if it bounces back, it is ready to knead.
- Knead the dough. If using a mixer, beat for 5 full minutes. If kneading by hand, knead on a lightly floured surface for 5 full minutes. If the dough becomes too sticky during kneading, sprinkle 1 teaspoon of flour at a time onto the dough or work surface. The final dough should feel a little soft and slowly bounce back when poked. If you perform the windowpane test and light passes through the stretched dough without tearing, the dough is ready to rise.
- Place the dough in a large greased bowl, cover it tightly with plastic wrap, and let it rise in a warm place for 1 hour, or until nearly doubled in size. To create a warm environment, you can preheat your oven to 200°F (93°C), turn it off, place the dough inside, and shut the oven door.
- Once risen, punch down the dough to release air bubbles. Turn the dough out onto a lightly floured surface. Use a sharp knife or pizza cutter to divide the dough into 1/3-cup (about 75g) sections, yielding about 12 pieces. Shape these sections into balls.
- Preheat your oven to 400°F (204°C). Line a baking sheet with parchment paper or a silicone baking mat, or line a 9×13 baking pan with parchment paper.
- Bring the baking soda and 9 cups of water to a boil in a large pot. Drop 1 to 2 pretzel rolls into the boiling water for 20 to 30 seconds. Do not boil them longer than 30 seconds or they may taste metallic. Use a slotted spatula to lift the rolls out of the water, letting excess water drip off. Place the rolls onto your prepared baking sheet or close together in the baking pan. Use a sharp knife to score a couple of slits into the top of each roll.
- Melt the remaining butter. Lightly brush each roll with the melted butter and sprinkle with coarse sea salt.
- Bake for 22 to 26 minutes, or until the rolls are deep golden brown on all sides.
- Remove the rolls from the oven and serve them warm. You can store leftover pretzel rolls in an airtight container or zip-top bag for up to 3 days.