
There’s just nothing that says sweet nostalgia quite like a perfect little pocket of warm, buttery pastry filled with fruit. You know? They transport you right back to simpler times. That’s exactly what these are designed to do! We are talking about achieving those elusive Cherry Hand Pies Flaky and Juicy results, and guess what? You can totally do it from scratch without needing a culinary degree.
I still remember the first time I made hand pies on a rainy afternoon, using leftover cherries from a photoshoot. The kitchen smelled like comfort—warm fruit, buttery pastry, and that subtle sweetness that pulls you right back into childhood. Those little pies disappeared faster than I could cool them, and ever since, I’ve loved recreating that same cozy joy for others through simple recipes like this one. They’re so incredibly easy to master, whether they end up on your holiday table or just as a Tuesday night treat!
Why You Will Make These Cherry Hand Pies Flaky and Juicy
Seriously, you won’t want to skip this recipe because it hits all the right notes without any fuss. My goal here was perfection with minimal effort, and I think I nailed it.
- They are incredibly easy to throw together, especially since we’re starting them from scratch but keeping the process straightforward.
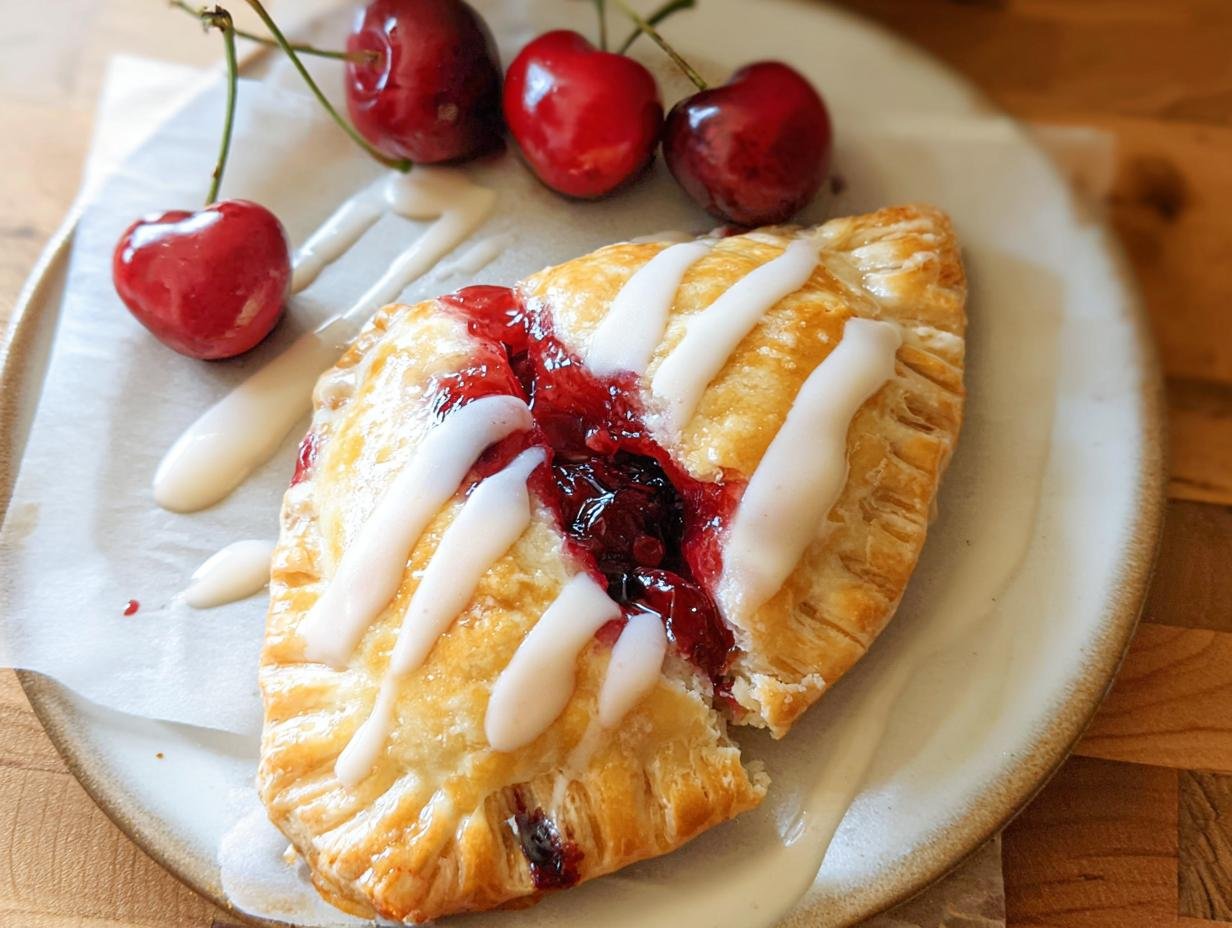
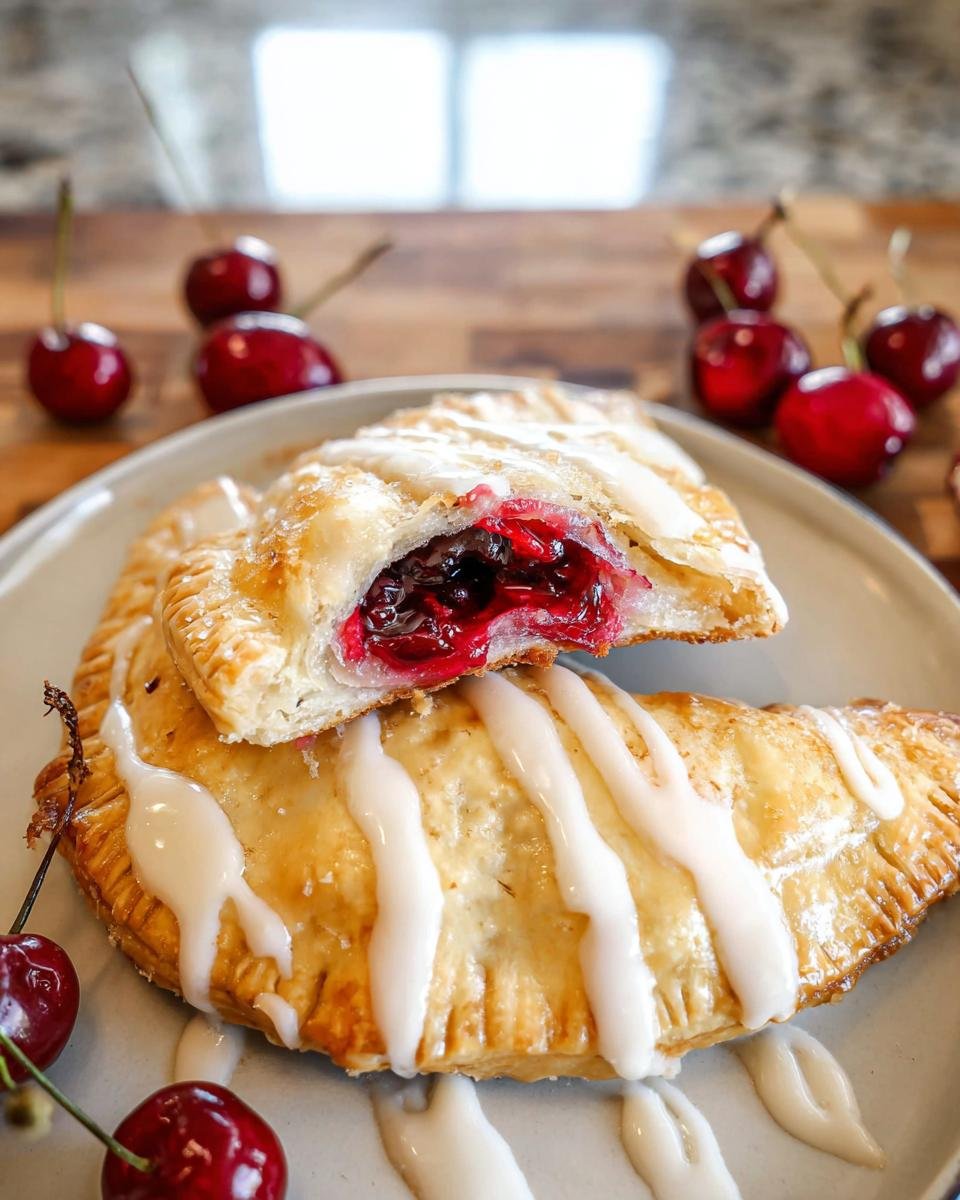
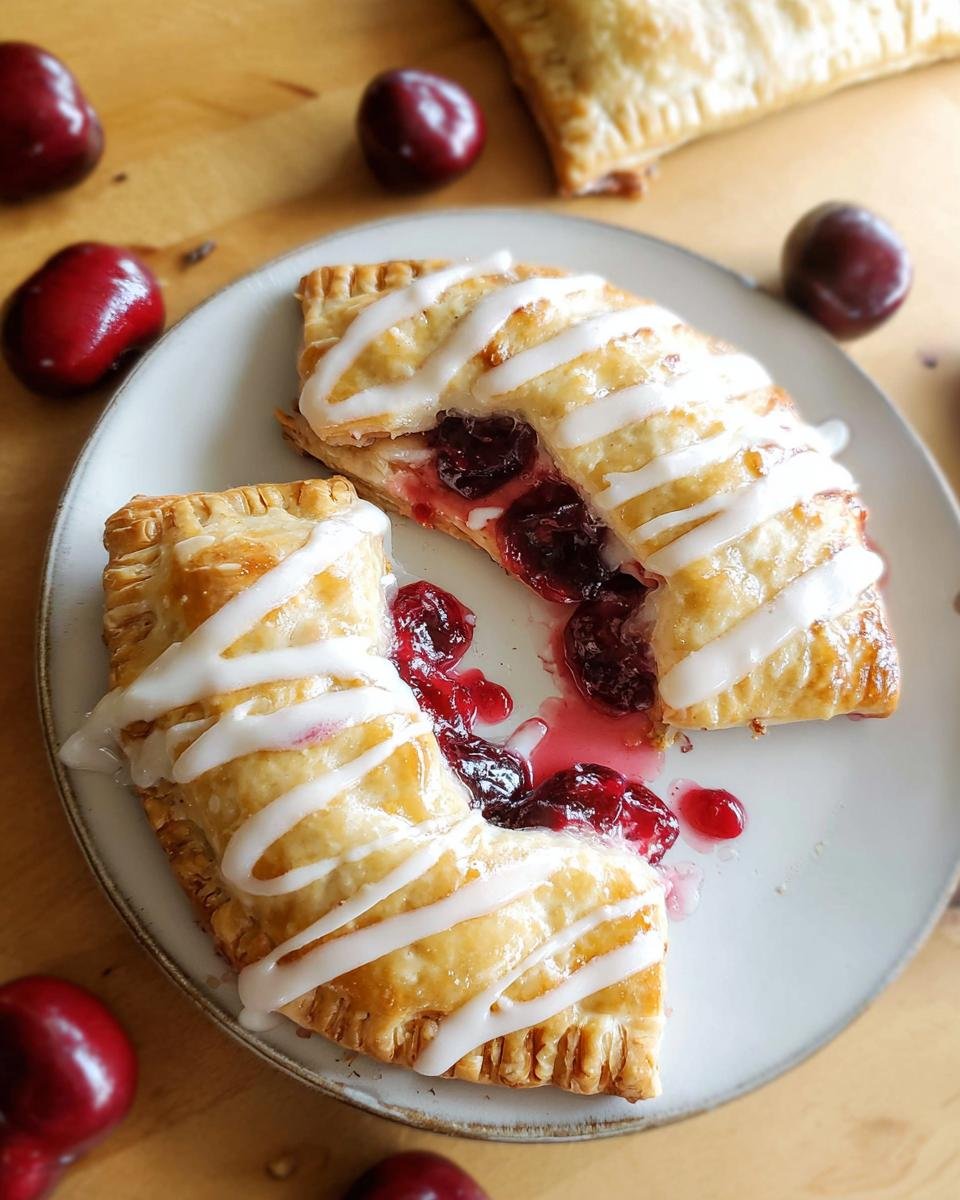
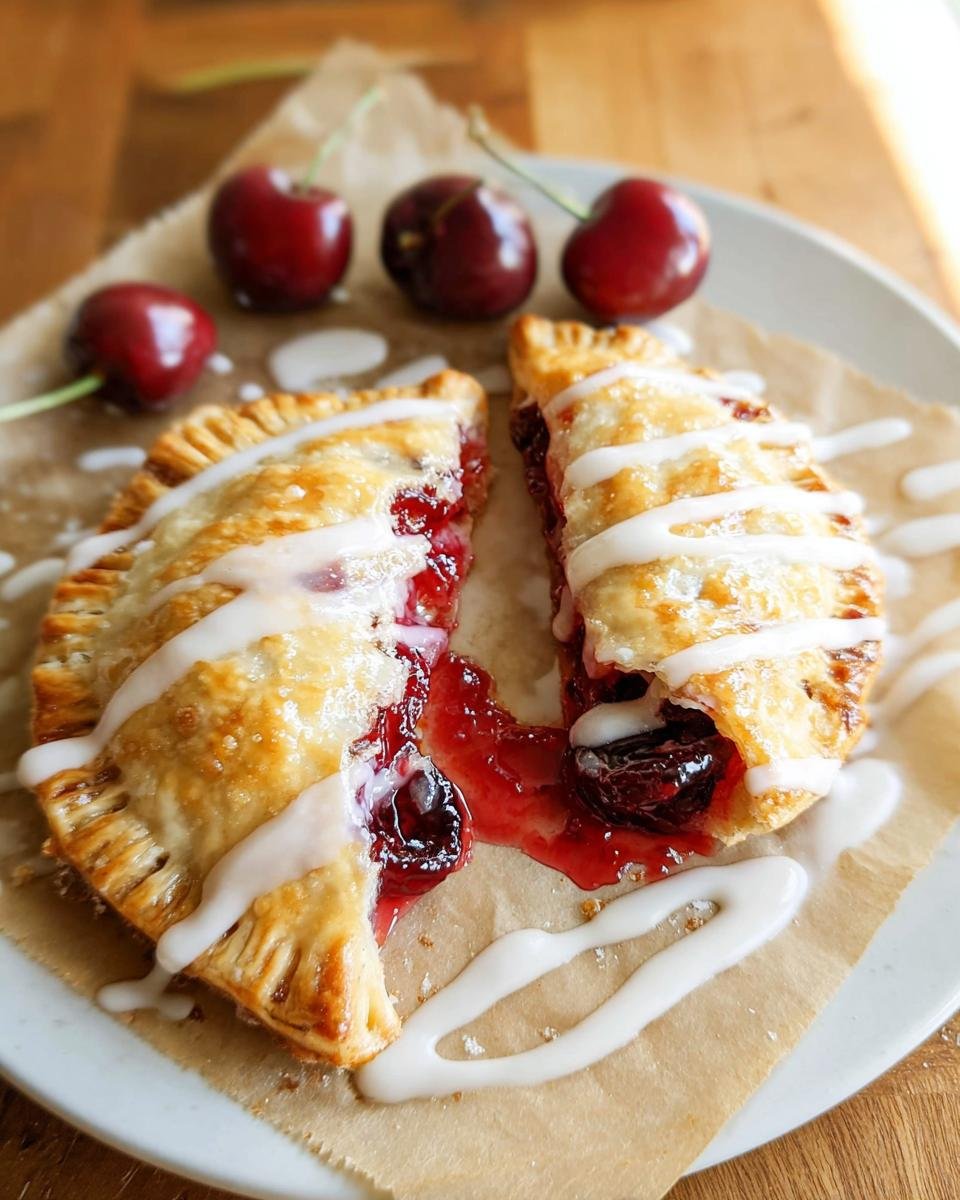
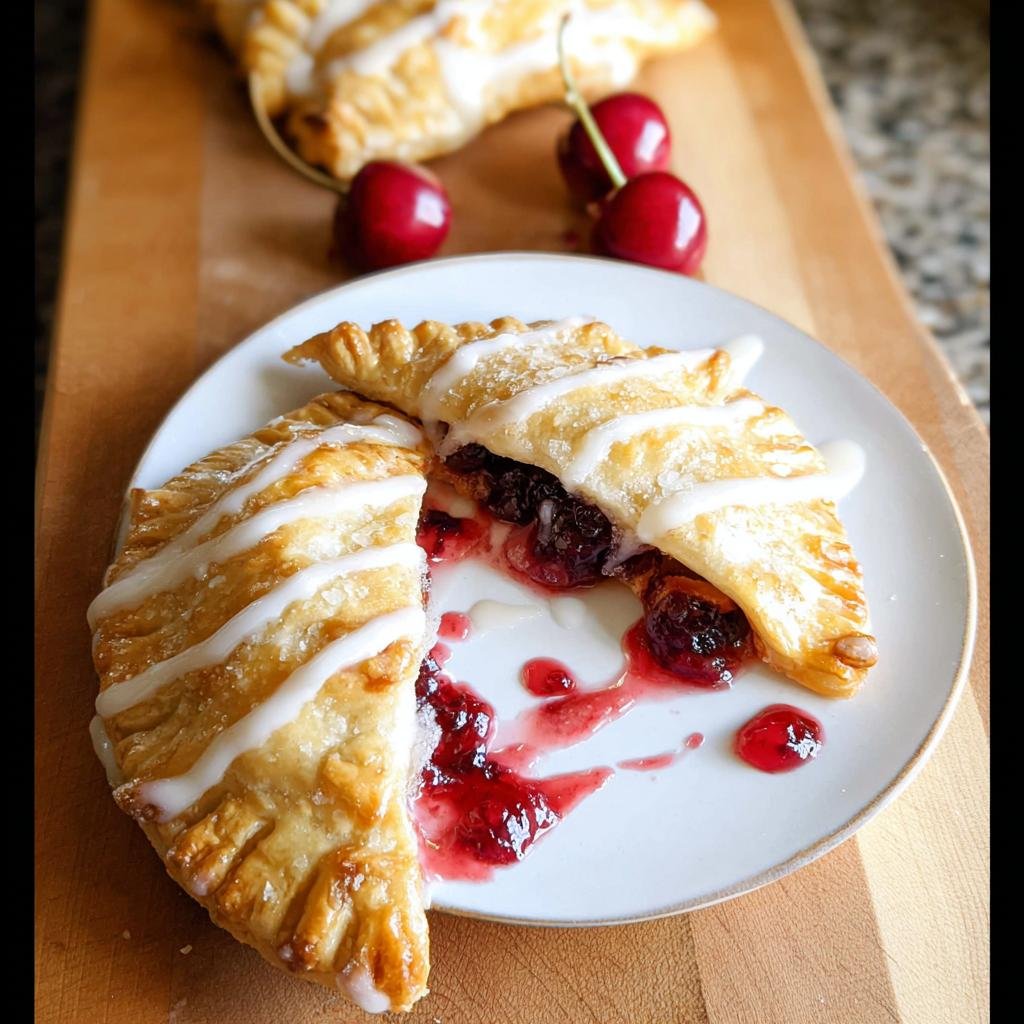
- The contrast is divine: a shatteringly **flaky** crust meets a wonderfully juicy, sweet-tart cherry center.
- They are perfectly family friendly—who doesn’t love a dessert you can eat without a fork?
- This recipe is fantastic for any holiday gathering because they look much harder to make than they actually are. If you love fruit desserts, these should be next on your list!

Essential Equipment for Perfect Cherry Hand Pies Flaky and Juicy
Listen, you don’t need fancy gadgets for this—thank goodness! We’re keeping this real, which means using tools you probably already have hanging out in your drawers. But, having the right things makes the difference between a good pie and that truly flaky and juicy masterpiece we are aiming for.
Here is what you absolutely need on your counter before you even think about mixing that dough:
- Mixing bowls: You’ll need at least two—one for mixing up that gorgeous cherry filling and another for assembling your dough components.
- Baking sheets: Two sturdy baking sheets are best because you’ll be baking these in batches, or you’ll want space between the pies so they brown evenly. Line them with parchment paper; trust me on this one for easy cleanup!
- A saucepan: Necessary for cooking down those cherries just right so the filling thickens up perfectly and doesn’t make your crust soggy.
- A round cutter (or saucer): Nothing is more frustrating than trying to cut circles freehand! A 4-inch or 5-inch cutter works fantastic for consistent sizing.
- A fork: This might seem basic, but the fork is your MVP here! You use it to crimp those edges shut. If you don’t seal them tight, that juicy filling is just going to escape all over your oven. Don’t skip the crimping—it’s essential for keeping the flavor locked in!
Ingredients for the Flaky Crust and Juicy Cherry Hand Pies Flaky and Juicy Filling
Okay, now we get to the good stuff! Having everything measured out perfectly before you start cooking is the secret to keeping this recipe smooth and truly easy. If you’ve baked before, you know that tiny measurement mistakes really throw off the filling texture. Remember what I said about that **juicy** center? It all comes down to these ratios!
We’ve split this up so you can prep the filling first while you get your crust ready. Feel free to look up your favorite ultimate pie crust recipe, but here are the components you’ll need for 16 perfect hand pies!
For the Cherry Filling
You need these items cooked down together until they get thick—no watery filling allowed in these beauties!
- 4 cups fresh cherries, absolutely must be pitted and quartered (if you use frozen, just toss them in straight from the freezer!).
- ⅔ cup granulated sugar.
- 2 tablespoons cornstarch—this is the magic thickener!
- 1 tablespoon lemon juice for a little brightness.
- 1 teaspoon almond extract—don’t skip this; it really elevates the cherry flavor!
- 1 teaspoon ground cinnamon to keep things cozy.
- ¼ cup water.
For Assembly and Vanilla Glaze
This is what brings the whole package together and gives you that final, glossy sheen.
- 1 recipe Hand Pie Dough, enough for 16 pies (see my notes in the post for my favorite crust recipe alternative).
- 1 egg, mixed with 1 tablespoon water to create the egg wash—this gives us that beautiful golden-brown color.
- 1½ cups confectioners sugar for the sweet glaze.
- 3 to 5 tablespoons milk—you’ll decide how thin you want that drizzle!
- ½ teaspoon pure vanilla extract for flavor in the glaze.
Baking Tips for Achieving Flaky Crusts
If you want those absolutely perfect, shatteringly flaky and juicy results, the secret isn’t just in the cherry mixture—it’s all about how you treat your dough. Handling pastry is where most people accidentally turn flaky heaven into tough cardboard, so pay attention here!
First rule, and I mean this with all my heart: keep everything cold! Your butter, your water, even your bowl if you can manage it. Cold fat hitting a hot oven is what creates those little pockets of steam that puff up the dough walls, giving you those beautiful flaky layers. If you notice your dough getting warm or sticky while you’re cutting out the shapes, just pop the whole sheet back into the fridge for 10 minutes. It’s worth the pause, trust me.
Second, don’t overwork it. As soon as you add your liquid to the dry dough ingredients, you stop mixing the second it *just* comes together. Any kneading after that point develops gluten, and gluten makes things tough. We want tender, delicate layers, not bread! When folding the dough over the filling, seal it gently but firmly—a gentle crimp with a fork is usually enough. If you want more great tips on handling pastry, check out my favorite pie techniques here. Keep it cool, keep it gentle, and you’ll get that amazing crust!
Step-by-Step Instructions to Make Cherry Hand Pies Flaky and Juicy
Alright, here’s where we bring it all together! I broke this down into three stages so you can manage your time perfectly. Remember, patience with that filling cooling time is what separates a messy bite from one of those truly Cherry Hand Pies Flaky and Juicy beauties. It’s honestly so straightforward once you see it laid out.
Making the Juicy Cherry Filling
First thing’s first, we need that filling cooked down so it’s nice and thick. Grab a saucepan and toss in your pitted cherries, sugar, cornstarch, lemon juice, almond extract, cinnamon, and water. Set that over medium heat. You need to stir it often—don’t walk away! We are looking for it to bubble up and thicken, which usually takes about 5 to 8 minutes. Once it coats the back of a spoon, pull it right off the heat. This is super important: you must let this filling cool completely—at least 30 minutes—before moving on. If you fill warm dough, you’ll lose all that flakiness!
Assembling and Sealing Your Cherry Hand Pies
Okay, now that the filling is cool, let’s roll out that glorious dough. Cut out your circles or squares—keep them consistent so they bake evenly. Take your cooled cherry mixture and spoon a dollop onto one half of your dough piece. Now, take your egg wash (that egg mixed with water), and brush it all around the edges—this is your glue! Fold the dough over to make that classic half-moon, or seal up your squares. Use a fork and press firmly all around the edge. Really work it! This strong crimp seals in all that juicy goodness. Don’t forget to cut a few tiny slits on top of each pie; that’s how the steam escapes so the pies puff up nicely.
Baking and Glazing Your Pies
Get your oven preheated. We want it hot! Bake your assembled hand pies on those parchment-lined baking sheets at 400°F (200°C) for about 20 to 25 minutes. You want them golden brown and smelling incredible. Once they come out, you have to let them cool down just a bit before glazing them—otherwise, the glaze melts right off! While they cool, whisk together your confectioners sugar, vanilla, and milk slowly until you get a nice, thick but pourable consistency. Then, just drizzle that sweet topping over the slightly cooled pies. They look stunning, and honestly, they taste just like a dream. For more tips on making amazing fruit desserts, check out my thoughts on handling pralines and fillings!
Make-Ahead and Storage for Easy Cherry Hand Pies
One of the best things about these being so easy to put together is that they are fantastic for a make ahead strategy! You know those mornings when you want to have dessert ready but you’re rushing around? These hand pies are your answer. They hold up really well, whether you prep them ahead of time or store leftovers (if you even have any!). Keeping that crust flaky is the main mission here, so temperature control is everything.
If you want to assemble them completely ahead of time—unbaked, ready to bake—go ahead and place the sealed pies on your baking sheet. Don’t brush them with the egg wash yet! Cover the entire sheet tightly with plastic wrap. You can keep these in the refrigerator for up to 2 days before baking. When you’re ready, pull them out, let them sit on the counter for about 15 minutes to take the chill off, brush with the egg wash, cut those vents, and bake as directed. They might need an extra minute or two in the oven since they start colder.
For baking them all at once and saving some for later, store the completely cooled, glazed pies in a single layer in an airtight container. They stay fresh on the counter for about two days because the glaze acts as a little seal, but they are best eaten the day they are baked. If you need more time, pop them in the freezer! They freeze beautifully unglazed. For reheating baked pies, skip the microwave if you want to keep that flaky texture. Instead, lay them on a small baking sheet and warm them in a 300°F (150°C) oven for about 7 to 10 minutes. That warm-up period really makes the crust wake back up. If you’re already planning your week, I have some great tips for making low-effort breakfasts ahead of time that might inspire your organization!
Variations on These Cherry Hand Pies Flaky and Juicy
Just because we nailed that perfect, juicy cherry filling doesn’t mean we have to stop there! Half the fun of a great base recipe, especially one that yields such a flaky crust, is how easily you can switch things up for holidays or just whatever fruit looks best at the market that week. These hand pies are designed to handle other fillings beautifully, making them an excellent year-round treat rather than just a summertime favorite.
If cherries aren’t quite your speed, or maybe you just want something different for your next batch of *pie recipes*, try these swaps. Remember, the key thing to watch is the moisture content of the fruit, but overall, it’s super easy to adapt!
Switching Up the Fruit Filling
You can swap out the cherries for other fruits, but I always recommend using fresh or frozen fruit rather than canned to keep that homemade texture. If you use a softer fruit, you might need to bump up the cornstarch slightly just to guarantee that filling sets up nicely and doesn’t leak everywhere.
- Apple Cinnamon: Use firm apples like Honeycrisp or Granny Smith. Dice them small instead of quartering, and maybe add a tiny pinch more cinnamon. They taste amazing with this crust!
- Blueberry Lemon: Blueberries are wonderful because those little guys burst with flavor! I would increase the lemon juice slightly when using blueberries to keep them bright. If you’re feeling adventurous with berries, you might want to check out my totally different, but equally delicious, Blackberry Pretzel Salad recipe—it’s a crowd-pleaser!
- Peach Spice: Peaches are perfect when they are slightly under-ripe. Be careful not to overcook them, or they turn mushy. A touch of cardamom pairs really well with peach!
Don’t Stop at the Vanilla Glaze
The vanilla glaze is lovely and mild, letting that cherry flavor shine, but swapping out the extract can give the whole pie a completely different character.
- Almond Glaze: Since we used almond extract in the filling, why not double down? Swap the vanilla extract in the glaze for a tiny splash more almond extract. It makes the whole pie taste gourmet.
- Citrus Zest Drizzle: My *favorite* grown-up trick! Before the glaze sets, grate a little bit of fresh orange or lemon zest right over the top. The bright citrus oils smell incredible and cut through the sweetness perfectly.
- Make It Chocolate! For a fun surprise, skip the glaze entirely and just brush the tops with egg wash, then sprinkle heavily with turbinado sugar before baking. This gives you a wonderful crunch instead of a soft glaze. This works especially well if you make up a chocolate custard filling instead of fruit!
See? It’s so easy to customize these little pockets for any time of year!
Frequently Asked Questions About Making Cherry Hand Pies
When you’re diving into a new recipe, especially one that promises that perfect balance of flaky and juicy, it’s normal to have a few questions pop up! I get asked all the time about how to make this recipe especially easy or how to troubleshoot common pastry issues. Don’t worry, these little pockets are super forgiving once you know the secrets!
Can I use store-bought dough to make this recipe easy?
Oh, absolutely! If you are short on time or just want to make the process lightning fast, using a high-quality store-bought pastry dough makes this recipe incredibly easy. You can definitely skip making the crust from scratch. You’ll still get a good result, and that cherry filling is just as delicious no matter what dough you use!
However—and you know I have to say this—if you *do* have the time to make the crust yourself, the texture you achieve is just worlds apart. Homemade dough, chilled properly, gives you those distinct, shatteringly flaky layers that you just can’t replicate quite the same way with pre-packaged stuff. It’s the difference between great and *amazing*, but either way, you win!
How do I prevent the filling from leaking out of my hand pies?
This is probably the number one issue people have when they are first making hand pies, and it almost always comes down to two things. First, and this is non-negotiable: your filling must be completely cool. I mean room temperature, or even slightly chilled! Warm filling melts the butter in your dough as soon as it touches it, and that steamy filling will push its way right through the seals when it bakes.
Second, you *have* to seal those edges well. Remember when I talked about using that fork? Press hard! You should be able to see clear indentations all the way around. If your dough circles are dry on the edge, brush a little extra egg wash on before folding. A super tight seal locks in the juicy cherry flavor and keeps everything contained so your oven stays clean!
If you want to make sure your foundation is solid, I have a great recipe for an amazing apple cake base that uses similar pastry principles if you want to practice your sealing technique!
Nutritional Estimates for Your Cherry Hand Pies
Now, I know what some of you are thinking! Because these are made from scratch and wrapped in that gorgeous, buttery, flaky crust, you might think the nutrition facts are terrifying. Well, they aren’t exactly ‘diet food,’ but being homemade means you control the quality, right?
Because the exact nutrition greatly depends on the butter, sugar, and type of flour you use in your personal Hand Pie Dough recipe—remember that’s what determines most of the fat and calories—these numbers are just an estimate based on typical pastry ingredients for 16 servings. Think of this as a general guide for your holiday treats!
Based on making 16 hand pies, here is what you might expect per serving:
- Calories: Approximately 280 – 330 kcal
- Total Fat: Around 15g – 18g (A lot of that is that delicious butter making the crust flaky!)
- Saturated Fat: About 8g – 10g
- Carbohydrates: Roughly 35g – 40g
- Sugar: Varies widely, but expect about 18g – 22g (from the fruit and the glaze)
- Protein: About 3g – 4g (Mostly from the flour and egg wash)
I always say that enjoying a treat like this, especially when it’s homemade with lovely fruit filling, is totally worth it! If you want to explore desserts where you can really load up on the fruit flavor without all the pastry, you should check out my thoughts on that amazing high-protein berry bake. It’s a different vibe entirely, but equally delicious!
Cherry Hand Pies
Ingredients
Equipment
Method
- Prepare the cherry filling. Combine the pitted and quartered cherries, granulated sugar, cornstarch, lemon juice, almond extract, cinnamon, and water in a saucepan.
- Cook the filling over medium heat, stirring often, until the mixture thickens. This usually takes about 5 to 8 minutes. Remove from heat and let the filling cool completely.
- Roll out your hand pie dough according to your recipe. Cut the dough into circles or squares for the hand pies.
- Place a spoonful of the cooled cherry filling onto one half of each dough piece. Brush the edges with the egg wash.
- Fold the dough over the filling to create a half-moon shape or seal the edges of the square. Crimp the edges with a fork to seal them securely.
- Brush the tops of the hand pies with the remaining egg wash. Cut a few small slits in the top of each pie to allow steam to escape.
- Bake the hand pies in a preheated oven at 400°F (200°C) for 20 to 25 minutes, or until the crust is golden brown.
- While the pies cool, prepare the vanilla glaze. Whisk together the confectioners sugar, milk, and vanilla extract until smooth. Add milk slowly to reach your desired consistency.
- Drizzle the vanilla glaze over the cooled hand pies before serving.