

If you’ve ever hit that point in the week where you desperately need a bright, zesty dessert but simply cannot face turning on the oven for an hour, then trust me, I totally get it. Life gets busy fast! I still vividly remember trying to coordinate content updates while juggling backend issues for Keto Violet—a sweet treat felt like a pipe dream until I perfected this recipe. That’s why I championed the Key Lime Pie Bars No Bake. Seriously, these turn out so creamy and tangy, they’re truly the best no-bake version you will ever try. As someone who focuses on quick, clean eating, I promise you that these simple bars deliver all the flavor payoff with zero fuss. They are the definition of a stress-free sweet ending!
Why You Will Love These Key Lime Pie Bars No Bake
There is really nothing to beat the convenience of a super simple dessert that tastes like you spent hours on it. These bars tick every single box for me. I know you are going to adore them!

Effortless Preparation for Easy Pie Recipes
Because these are no-bake, your prep time is shockingly short—we’re talking minutes! It is so unbelievably easy to whip up the crust and the filling while your coffee is still hot. You barely break a sweat, I promise.
Perfect Make Ahead Dessert for Any Holiday
Forget scrambling before a big event. Since these need a good chill, they become my go-to holiday treat because I make them days ahead. They travel beautifully, too, making them incredibly family friendly.
Essential Equipment for Perfect Key Lime Pie Bars No Bake
We’re keeping this operation streamlined, so you need just a few basics on hand. Since this recipe is so foolproof, having the right pan makes all the difference for getting those clean, perfect cutting lines. Trust me on this one!
You will absolutely need:
- An 8 inch square baking pan—this creates those great thick bars everyone loves.
- A trusty mixing bowl.
- Your electric beaters; hand mixing the cream cheese just doesn’t give you that smooth, airy texture we’re aiming for.
Gathering Ingredients for Your Key Lime Pie Bars No Bake
When you’re making Key Lime Pie Bars No Bake, the quality of your ingredients really shines through since there’s no actual baking to mask anything. Keeping things clean and clearly measured is key to that perfect texture. We break everything down into two easy sections so grabbing everything from your pantry becomes super quick. For more tips on simple, quick recipes, check out my quick keto recipes!
For the Graham Cracker Crust
The crust is the foundation of these bars, so don’t skimp! You only need three things here. Make sure those graham cracker crumbs are fine, use granulated sugar, and have your butter melted and ready to go. Trust me, the smell when this crust hits the hot pan is divine!
- 1.5 cups graham cracker crumbs (that’s about 12 full sheets, crushed up!).
- 1/3 cup granulated sugar.
- 6 Tablespoons butter, melted.
For the Key Lime Filling
This is where the magic happens! The combination of the rich condensed milk and that sharp lime juice is unbeatable. Remember, your cream cheese absolutely needs to be softened, or you’ll end up with little lumps, and we don’t want that!
- 2 (14 ounce cans) sweetened condensed milk.
- 4 ounces cream cheese, softened to room temperature.
- 3/4 cup key lime juice (get the good stuff!).
- 2 regular lime zests (or zest from about 4 key limes if you’re going authentic).
- Optional: Fresh whipped cream for topping later on.
Step-by-Step Instructions to Make Key Lime Pie Bars No Bake
Okay, let’s get this show on the road! I love these instructions because they are so straightforward. You don’t need to worry about complicated techniques here. When I first made these after a crazy week, I was so relieved at how simple the process actually was. Head over to my weight loss recipes page later if you want more easy ones, but for now, let’s get baking—or rather, *not* baking!
Preparing and Baking the Crust
First up, the crust! Mix those graham cracker crumbs, sugar, and melted butter together until it resembles wet sand. Press that mixture down firmly into your 8-inch square pan. Don’t be shy; pack it in tight! Pop it into a preheated 350°F oven for exactly 10 minutes. Once it’s done, pull it out and let it cool down completely. Seriously, make sure it’s cool!

Mixing the Creamy Lime Filling
Time for the dreamy filling texture. Get your softened cream cheese into your mixing bowl first and beat it until it’s purely smooth—no lumps allowed! Next, slowly beat in both cans of sweetened condensed milk until everything is incorporated. Finally, drizzle in your lime juice and that precious zest, mixing it one last time until you have one gloriously smooth filling.
Final Bake and Chilling Time for Key Lime Pie Bars No Bake
Gently pour that beautiful lime filling right over your cooled crust. Back into the oven it goes for another quick 10 minutes. After that short stint, you must let them cool on the counter for about 30 minutes. But here’s the real secret for the best Key Lime Pie Bars No Bake: they need AT LEAST 3 hours of chilling time in the fridge! Top with whipped cream right before serving!

Expert Tips for Success with Key Lime Pie Bars No Bake
Even though these are super easy, I have a few tricks up my sleeve that guarantee your Key Lime Pie Bars No Bake turn out picture perfect every single time. We want maximum tang and that perfectly set filling, right? Check out these little secrets from my own experimentation. You can find some other quick fixes over on my quick low-carb lunches page too!
Ingredient Notes and Substitutions
Regarding that key lime juice—if you can’t find fresh tiny key limes, bottled juice (like Nellie and Joe’s) works perfectly, but you’ll use quite a bit, around 20 limes worth! And please, don’t rush softening your cream cheese. It needs to be truly soft, or the filling will never become that homogenous, creamy dream we want.
Make-Ahead and Freezing Instructions
This is where these bars shine as a make ahead staple! You can actually whip up the graham cracker crust a few days early and keep it covered on the counter. The finished bars keep wonderfully chilled in the fridge for up to three whole days.
If you need to freeze them for later, wrap the whole pan tightly first in plastic wrap, and then add a layer of aluminum foil over that. They keep great for up to three months this way!
Serving Suggestions for These Pie Recipes
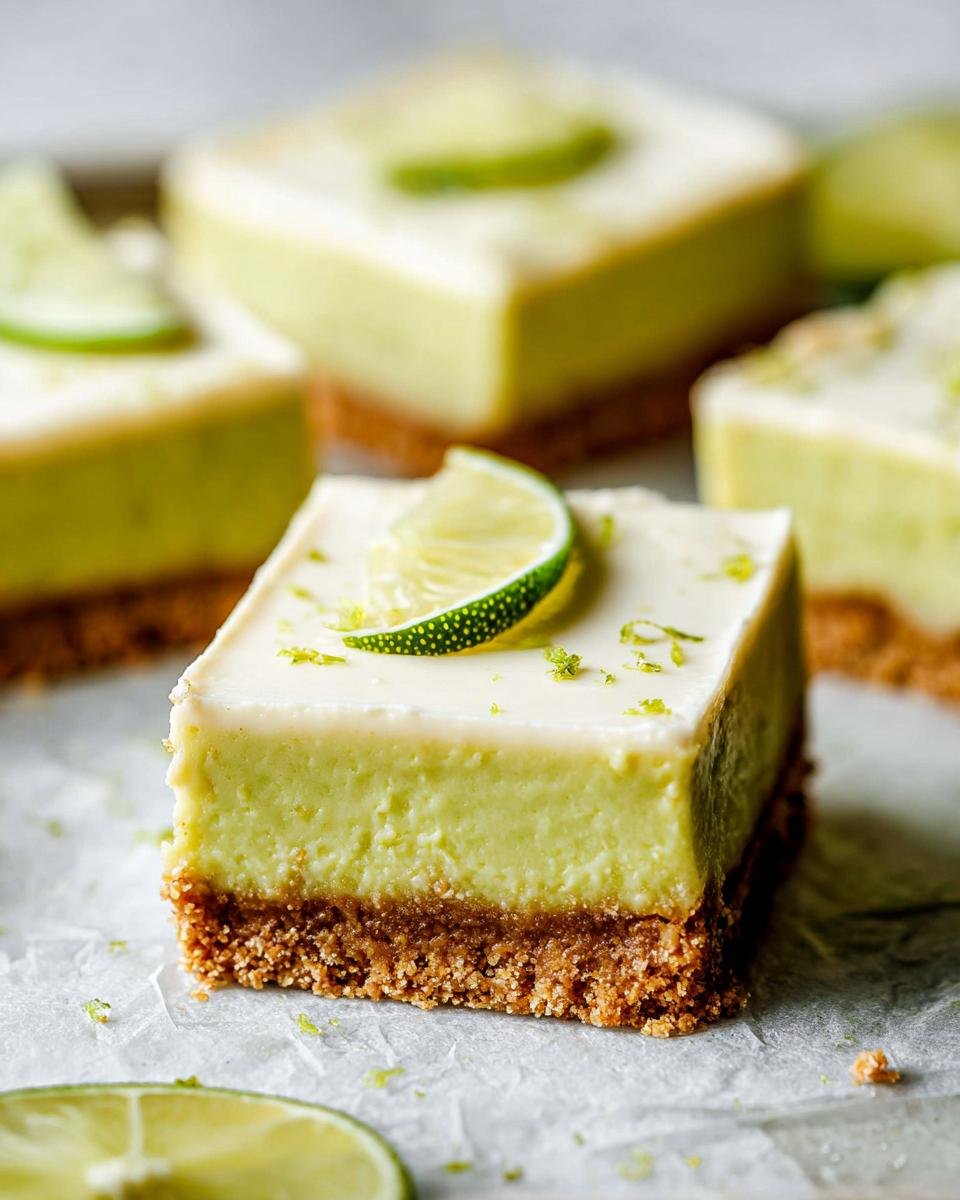
Presentation is everything, even for a quick dessert! Since these Key Lime Pie Bars No Bake are so bright green, they look incredible simply topped with a generous, fluffy dollop of fresh whipped cream right before serving. They steal the show on any dessert platter!
These tangy bars are wonderful after a big family meal or alongside coffee in the afternoon. If you are looking for other amazing pie recipes that impress everyone, stick around my blog!
Frequently Asked Questions About Key Lime Pie Bars No Bake
I know when you try a new recipe, especially one that boasts being easy, you have questions! It’s completely normal. I want to make sure you feel confident making these bars from scratch. Here are the things folks ask me most often after looking over my Key Lime Pie Bars No Bake instructions. For more tips on staying on track with your plan, take a peek at the goals section over on my blog!
Can I use regular lime juice instead of key lime juice?
Oh, that’s a common sticking point! You absolutely can use regular Persian lime juice if that’s what you have. Just know that the flavor profile changes quite a bit. Key limes are more floral and tart, while standard limes are sharper and a little less complex. If you swap them, you might want to add a tiny bit of extra zest to boost that familiar key lime brightness!
How long do I need to chill the Key Lime Pie Bars No Bake?
You have to be patient here, even though the prep is fast! The minimum chilling time for the Key Lime Pie Bars No Bake is three hours because that’s how long it takes for the filling to really set up properly against that crust. If you rush it, the bars will be runny when you cut them, and that’s a real shame after all your hard work!
Is this recipe truly family friendly?
It definitely is! That’s why I love them so much. The crust is sweet, the filling is creamy, and the tartness mellows out during the chill time. It’s sweet enough for the kids, but tangy enough for the adults. These bars are one of my go-to family friendly treats for potlucks because everyone loves them!
Nutritional Estimates for Your Key Lime Pie Bars No Bake
If you’re tracking things, you’ll want a general idea of the macros in these glorious bars. Remember, these figures are just estimates based on the ingredients I listed and are calculated for 16 servings, so your final count might vary slightly depending on brands used. For more calorie-smart ideas, check out my calorie smart recipes section!
Per bar, you’re looking at roughly:
- Calories: 153
- Total Fat: 10g
- Carbohydrates: 15g
- Protein: 1g
Share Your Key Lime Pie Bars No Bake Creations
Now that you’ve mastered these fantastic Key Lime Pie Bars No Bake, I absolutely need to know how they turned out for you! Please leave a rating right below this and tell me what you thought of how easy they were to make!
I love seeing your pictures! If you made these, tag me on social media so I can swoon over your tangy treats. Want to learn more about me and my journey creating these quick recipes? Pop over to my About Me page!

Key Lime Pie Bars No Bake
Ingredients
Equipment
Method
- For the crust, combine the graham cracker crumbs, sugar, and melted butter. Press the mixture into an 8 inch square baking pan.
- Bake the crust at 350 degrees F for 10 minutes. Allow the crust to cool before adding the filling.
- Add the softened cream cheese to a mixing bowl. Beat well with electric beaters until smooth.
- Add both cans of sweetened condensed milk, lime juice, and lime zest to the cream cheese mixture. Mix again until the filling is smooth.
- Pour the filling over the prepared graham cracker crust. Bake in the preheated oven for 10 minutes.
- Allow the bars to cool for about 30 minutes, then refrigerate for at least 3 hours before serving.
- Top with a dollop of fresh whipped cream, if you want.